Does your WooCommerce store still wave that same tired ‘SALE!’ flag like it’s 2003? 🙄
To be honest, that basic badge screams ‘generic discount bin’, not ‘urgent deal!’ Let’s swap that lazy label for something that actually sells—like ‘Steal This Deal!’ or ‘Going, Gone!’. Your products deserve better than bargain-bin energy.
Why Customize?
Custom sale badges boost your brand voice, create urgency (“Ends Tonight!”), and add clarity (showcasing 25% OFF > a vague “Sale!”). They turn window shoppers into buyers by making discounts feel personal and urgent, not like an afterthought.
So the question of the hour is, how to change sale badge text in WooCommerce?
You can customize your sale badge text either by adding code snippets to your theme files or using plugins. Several user-friendly plugins like Product Labels For Woocommerce let you edit text visually without coding. Most methods take under 10 minutes to implement.
In this guide, you’ll get two simple ways to rebrand those badges – from quick plugin setups to custom code tweaks. I’ll also share pro styling tricks as well.
Let’s make your discounts impossible to scroll past.
Table of Contents
How To Change Sale Badge Text in WooCommerce?
We all pretty much know how to add sale tag in WooCommerce. Simply, set a Sale price in your product pages, WooCommerce displays a Sale badge on the product page and the Shop listing.

Discount plugins like Disco also automatically display the Sale badge when you create dynamic and storewide discounts.
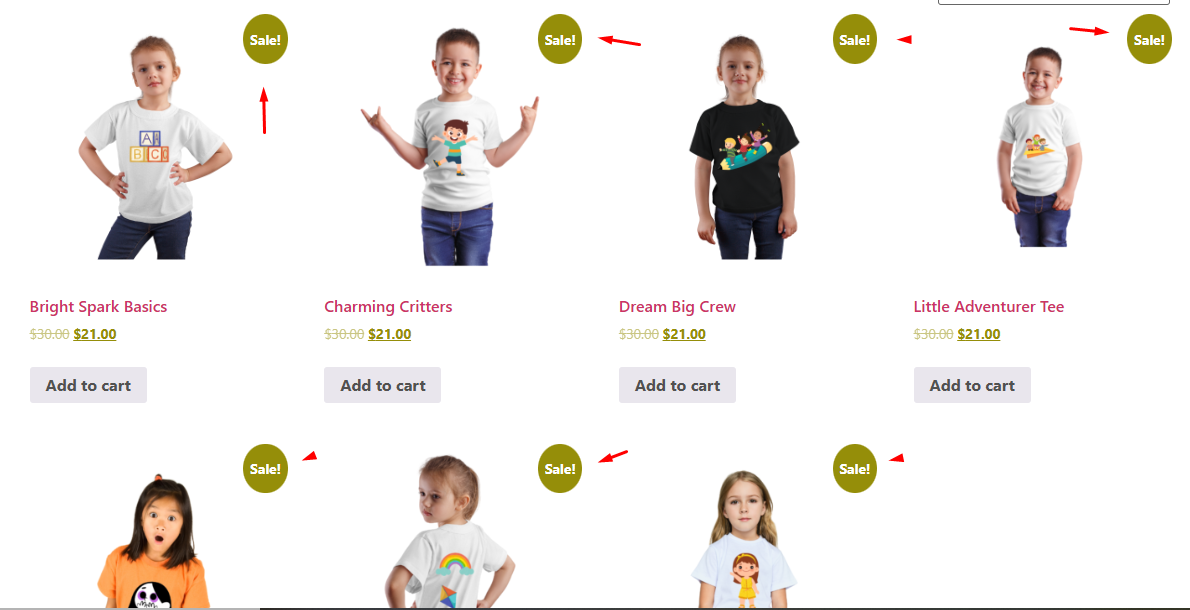
Our goal is to replace the generic WooCommerce sale badge text with a custom one. There are two ways to do this –
- Injecting Custom Codes in Your Theme File
- Using a Dedicated Custom Product Badges Plugin
Let us walk you through how to edit WooCommerce sale badge text using code. For instance, let’s say you want to change sale badge text WooCommerce to “Save 30%” for a storewide 30% discount you are offering.
Step 1: Back Up Your Store Files
Inserting custom codes can break your online store if not done right. Therefore, it’s essential that you back up your files.
Alternatively, you can create and use a child theme if you are familiar with it.
Step 2: Insert Custom Code into Theme File
We assume you have already created the storewide discount campaign using a free plugin like Disco.
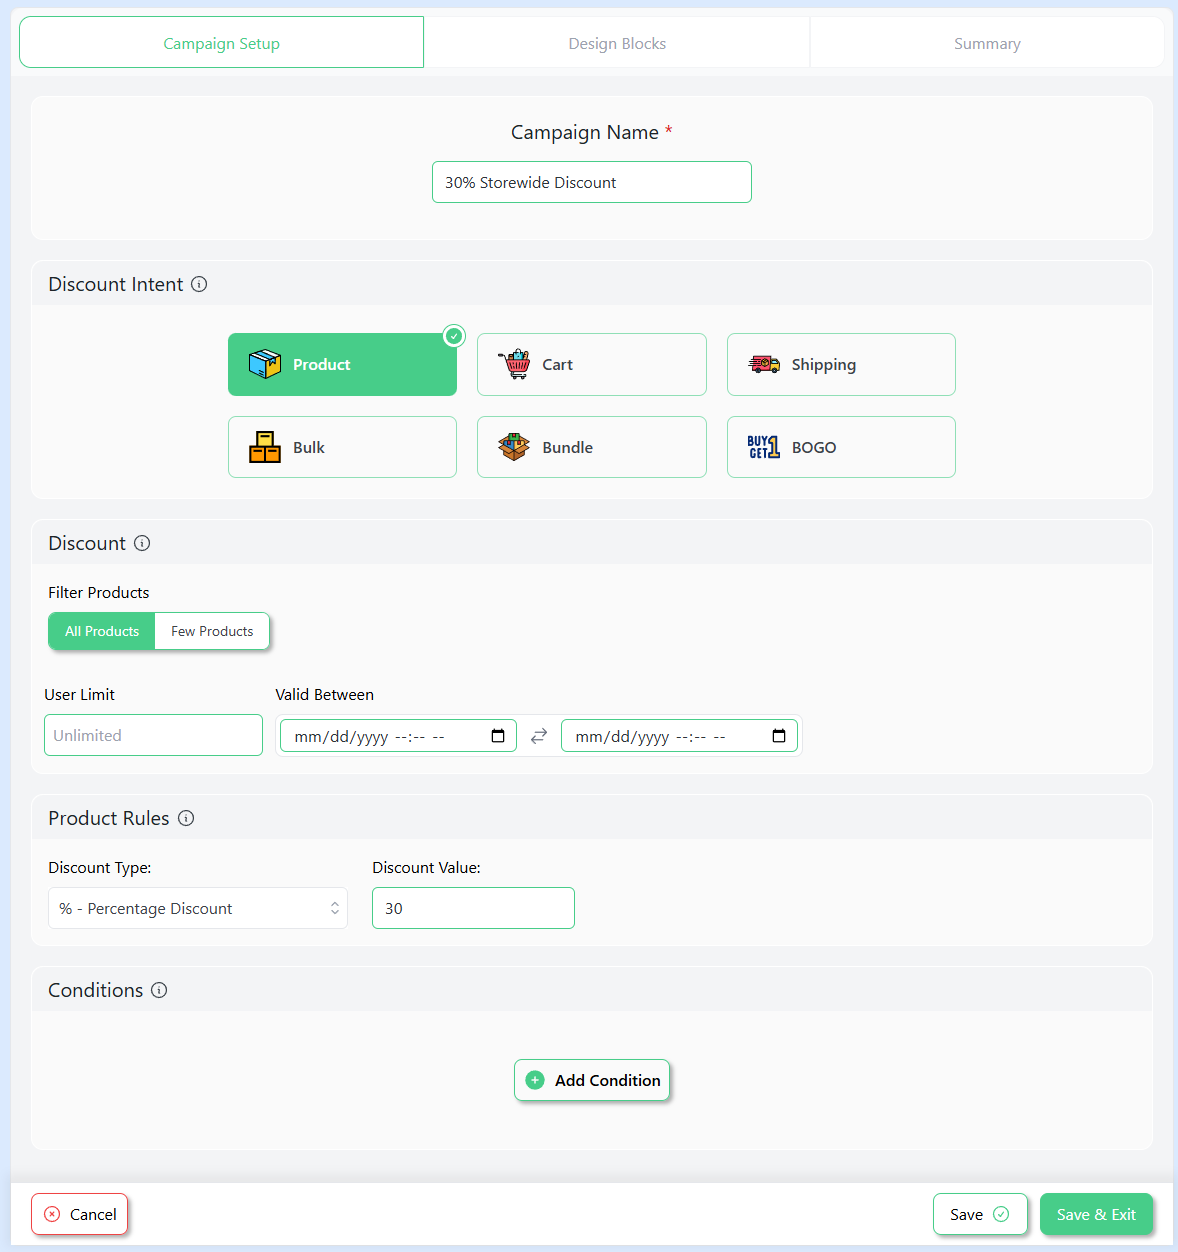
Now, it’s time to add code to change sale badge WooCommerce texts.
We are changing the default text to – “Save 30%”
- In your WordPress admin panel, go to Appearance > Theme File Editor.
- Click the functions.php.

- Insert the following code at the bottom of the page.
// Change WooCommerce "Sale" badge text to "Save 30%"

add_filter( 'woocommerce_sale_flash', 'sk_custom_sale_badge_text', 10, 3 );

function sk_custom_sale_badge_text( $badge_html, $post, $product ) {

// You can also make this dynamic by calculating $percentage from prices

$custom_text = __( 'Save 30%', 'your-text-domain' );

return '<span class="onsale">' . esc_html( $custom_text ) . '</span>';

}
What it does: Hooks into the woocommerce_sale_flash filter and returns your custom <span class=”onsale”>…</span> badge.
Tip: Replace ‘your-text-domain’ with your theme or plugin text domain if you want it translatable.
Step 3: Save and Test
- Update the functions.php file.
- Visit your storefront to check the WooCommerce sale badge percentage text.
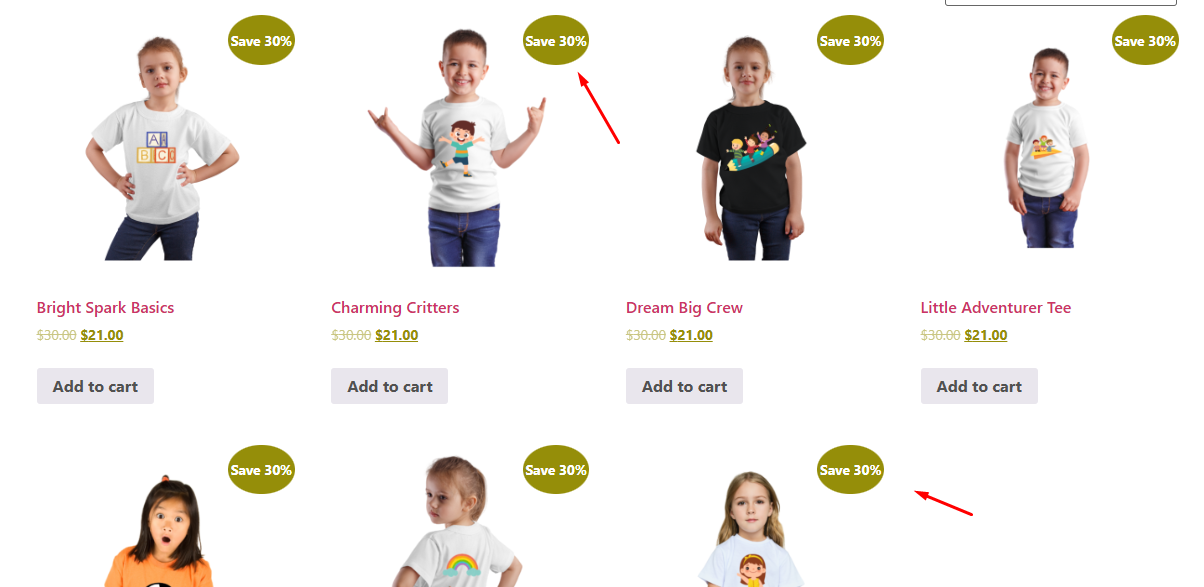
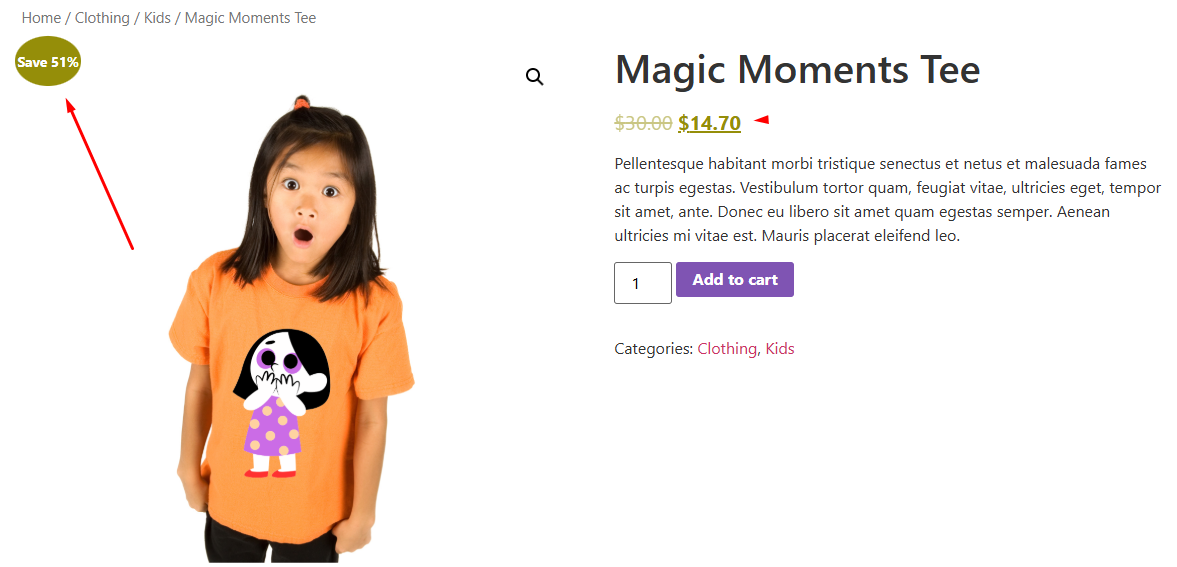
- Here’s how it displays in individual pages.
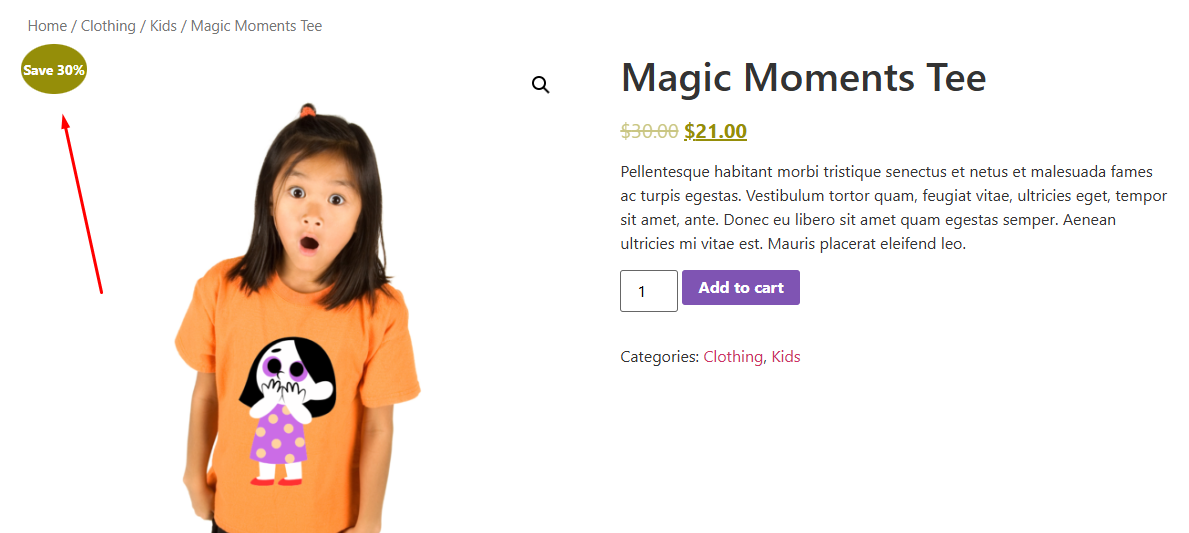
This is how to change sale badge text in WooCommerce using change sale badge text WooCommerce code.
(Optional) Dynamic Percentage
If you’d rather automatically calculate the percentage off, swap out the fixed text with something like:
// Dynamic sale percentage badge

add_filter( 'woocommerce_sale_flash', 'sk_dynamic_sale_badge', 10, 3 );

function sk_dynamic_sale_badge( $badge_html, $post, $product ) {

if ( $product->is_on_sale() ) {

     $regular = (float) $product->get_regular_price();

     $sale = (float) $product->get_sale_price();

     if ( $regular > 0 ) {

         $percent = round( ( ( $regular - $sale ) / $regular ) * 100 );

         return '<span
         class="onsale">' . sprintf( __( 'Save %d%%',
         'your-text-domain' ), $percent ) .

        '</span>';

     }

}

return $badge_html;

}
This calculates the discount percentage on each product and displays it dynamically.
How To Change Sale Badge Text in WooCommerce Using a Plugin?
There are a large number of WooCommerce sale badge edit plugins available in the market. For this demonstration, we will use the free plugin called Product Labels For WooCommerce (Sale Badges) by Acowebs.
Let’s find out how to change sale badge in WooCommerce using this plugin.
Step 1: Install the WooCommerce Product Badges Plugin
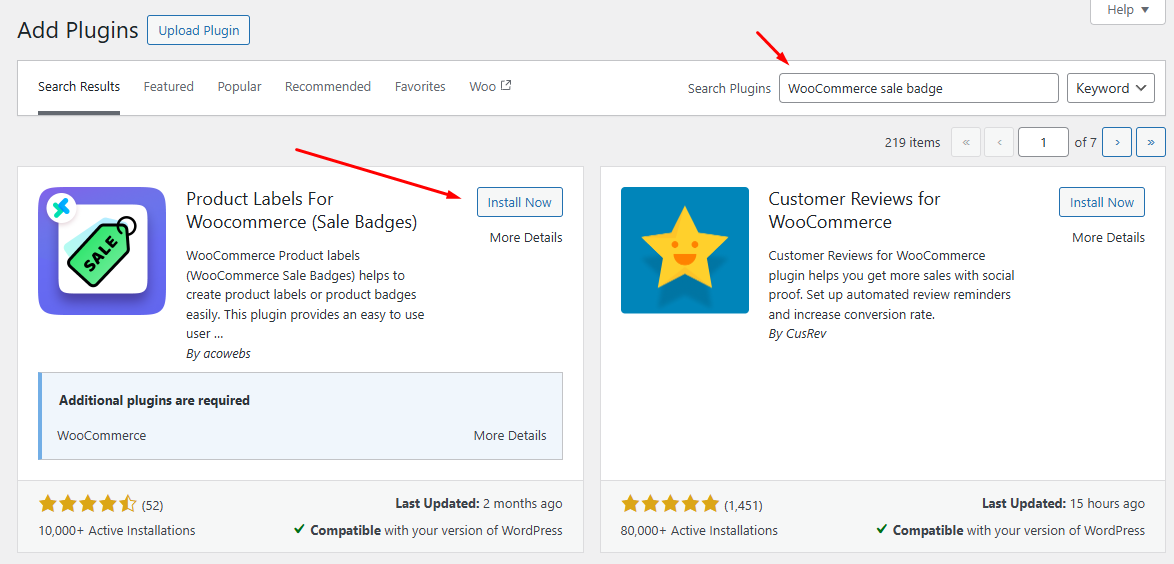
- In your WP admin panel, go to Plugins > Add Plugin.
- Search, install, and activate the plugin.
Step 2: Hide WooCommerce Default Sale Badge
In order to display custom sale badges using this plugin, you first need to disable the default one.
- Go to Badges > Settings.
- Enable the following toggle – “Hide Default Woocommerce / Theme Sale Badges”

This is how to remove sale badge WooCommerce using the plugin.
Step 3: Changing Sale Badge Text
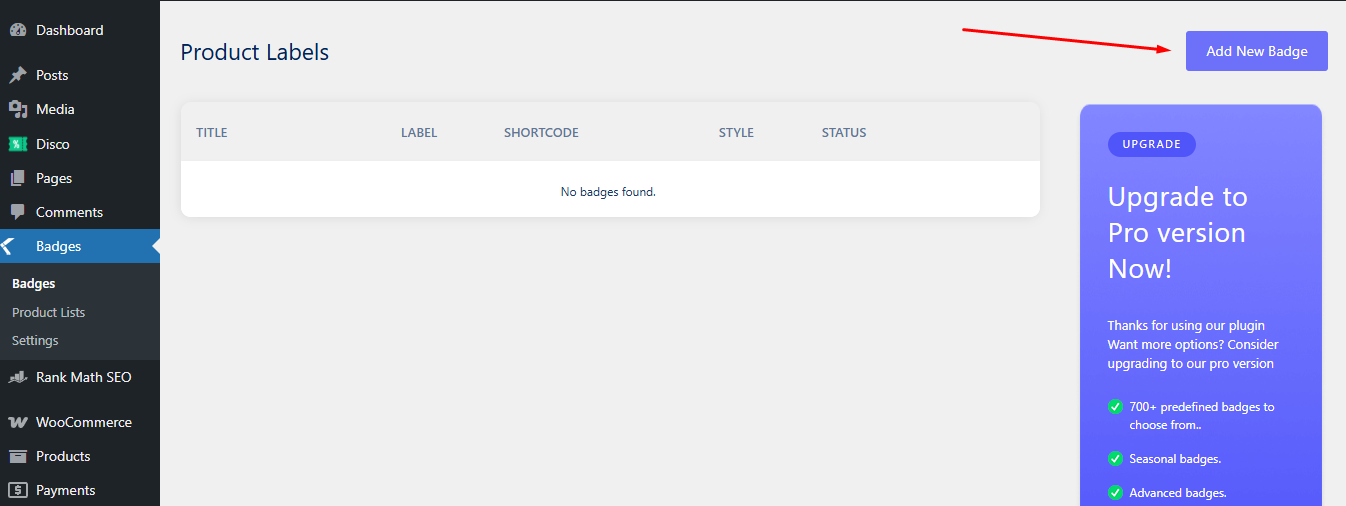
- Go to Badges and click the Add New Badges button.
- Give this project a title.
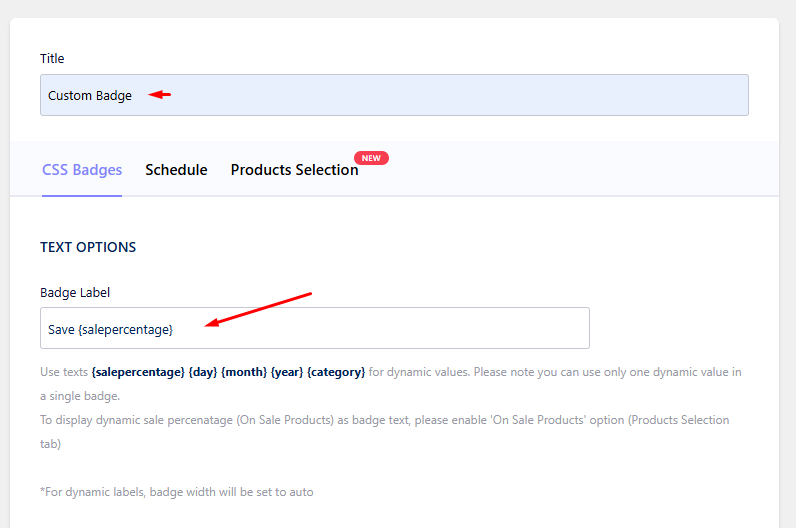
- To set a percentage-based badge on sale products, input {salepercentage} in the Badge Label field.
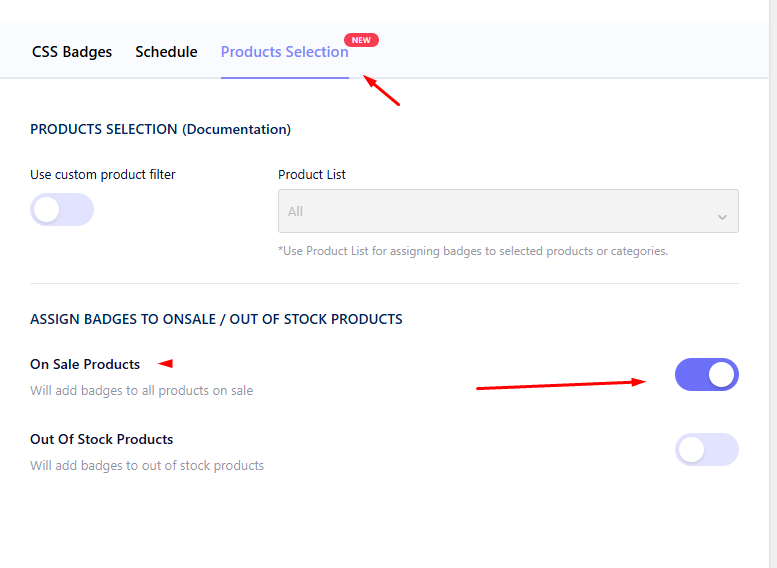
- Click the Products Selections tab and enable the On Sale Products toggle.
Step 4: Save and Test
- Hit Publish to enable the custom WooCommerce badges.
- Check out a product on sale to see if the badge is functioning correctly.
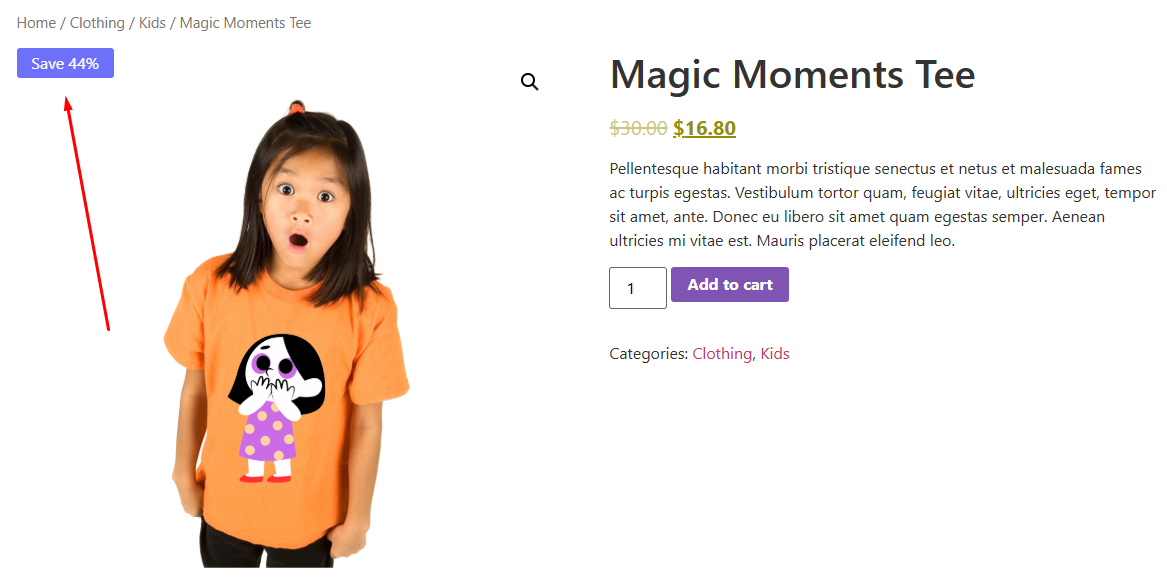
This is how to modify sale tag text WooCommerce using a dedicated plugin.
Advanced Customization Techniques
Now that we have demonstrated how to change sale badge text in WooCommerce using both code and plugin methods, let’s explore some more customization techniques. We will walk through both plugin code methods for them.
How To Change Sale Badge Color in WooCommerce?
To change sale badge color WooCommerce using the plugin, follow these steps.
- Create a new badge or edit an existing one from the Badges menu.
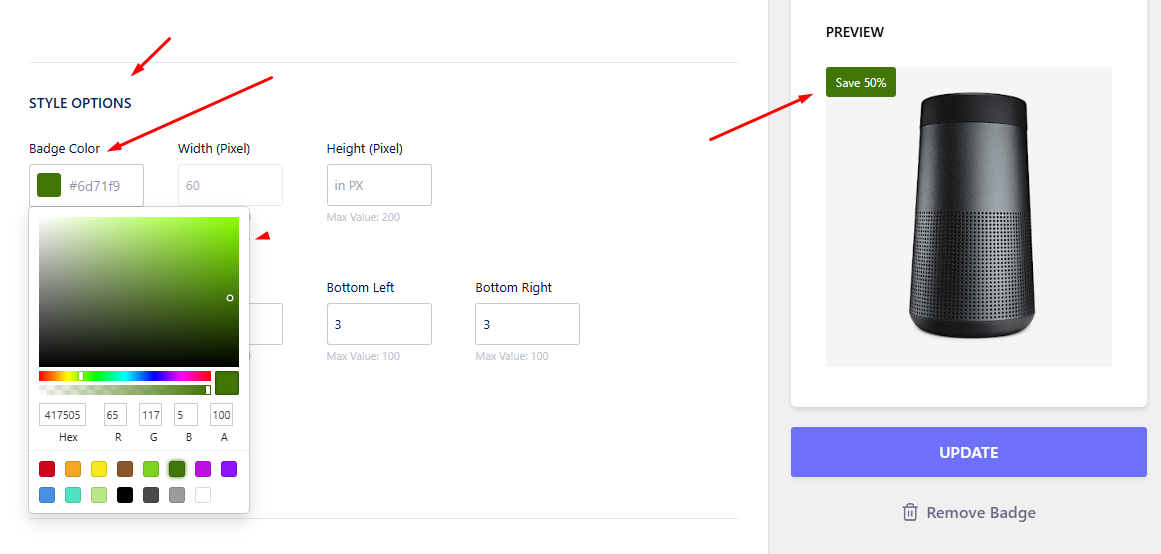
- Scroll down to the STYLE OPTIONS.
- Select and set the new color from the Badge Color picker.
- Update the badge to display in the front.
How to Change the Sale Badge Color Using Code?
WooCommerce uses the .onsale CSS class for its default Sale badge. So to change its background and text color, all we need to do is target that class in your site’s CSS.
Step 1: Open the Customizer or Theme CSS File
You have two main ways to add custom CSS:
Option A – Via WordPress Customizer (Recommended):
- Go to Appearance > Customize
- Click on Additional CSS
Option B – Via Your Child Theme CSS:
- Edit style.css inside your child theme folder
Step 2: Add the CSS Code
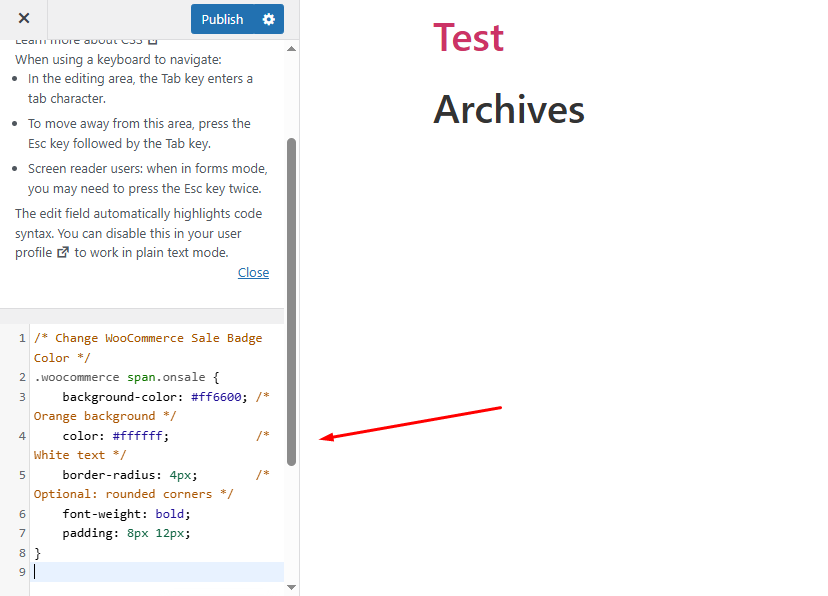
Here’s an example of custom CSS that changes the background and text color of the sale badge:
Step 3: Save and Preview
/* Change WooCommerce Sale Badge Color */

.woocommerce span.onsale {
background-color: #ff6600; /* Orange background */
color: #ffffff;        /* White text */
border-radius: 4px;    /* Optional: rounded corners */
font-weight: bold;
padding: 8px 12px;

}
Click Publish (if you’re using the Customizer), then view your Shop or Product page. You’ll see the new badge style live.
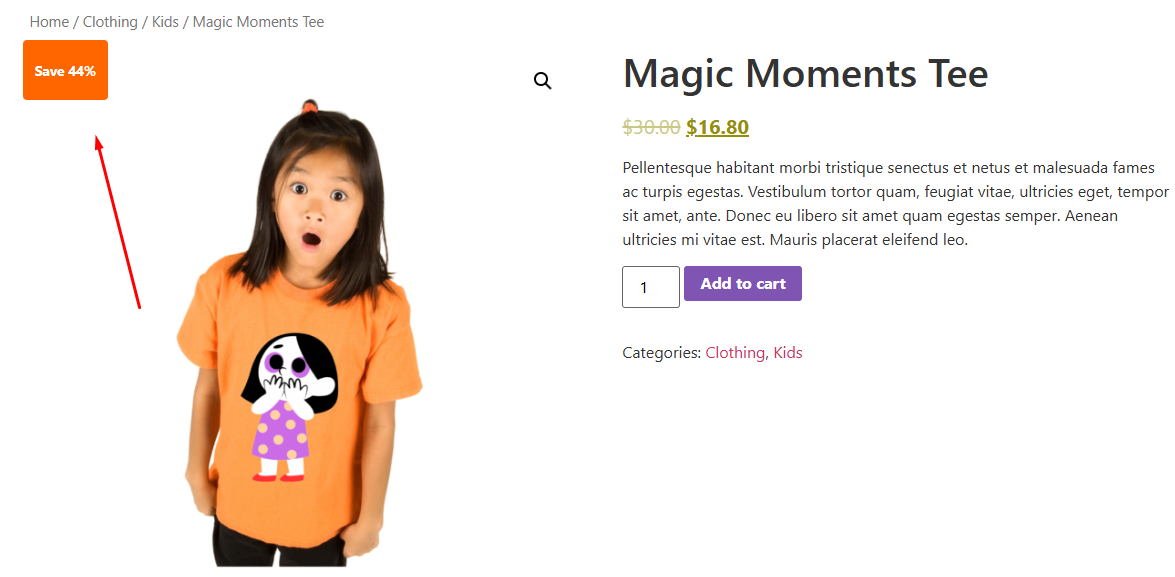
How to Change Badge Shape or Style
Let’s apply custom sale badge design WooCommerce.
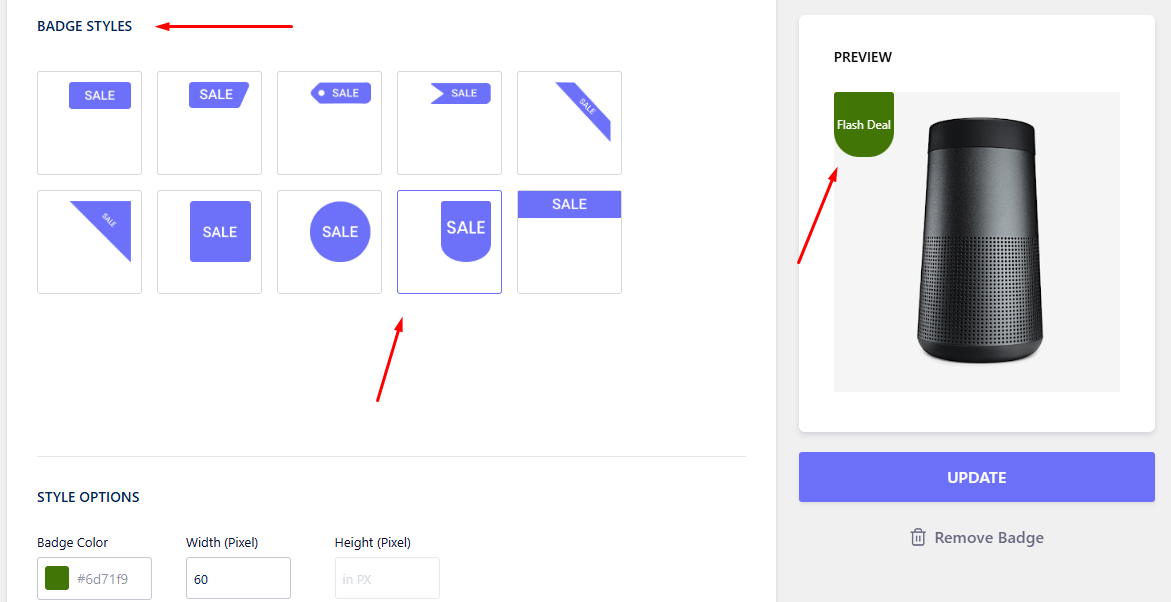
- Edit your existing badge and scroll down to the BADGE STYLES section.
- Pick your custom shape and update the badge.
- This will apply the custom shape to your badges.
How to Change Sale Badge Shape or Style Using Code?
Step 1: Go to Appearance → Customize → Additional CSS
Or use your child theme’s style.css if preferred.
Step 2: Add Ribbon-Style CSS
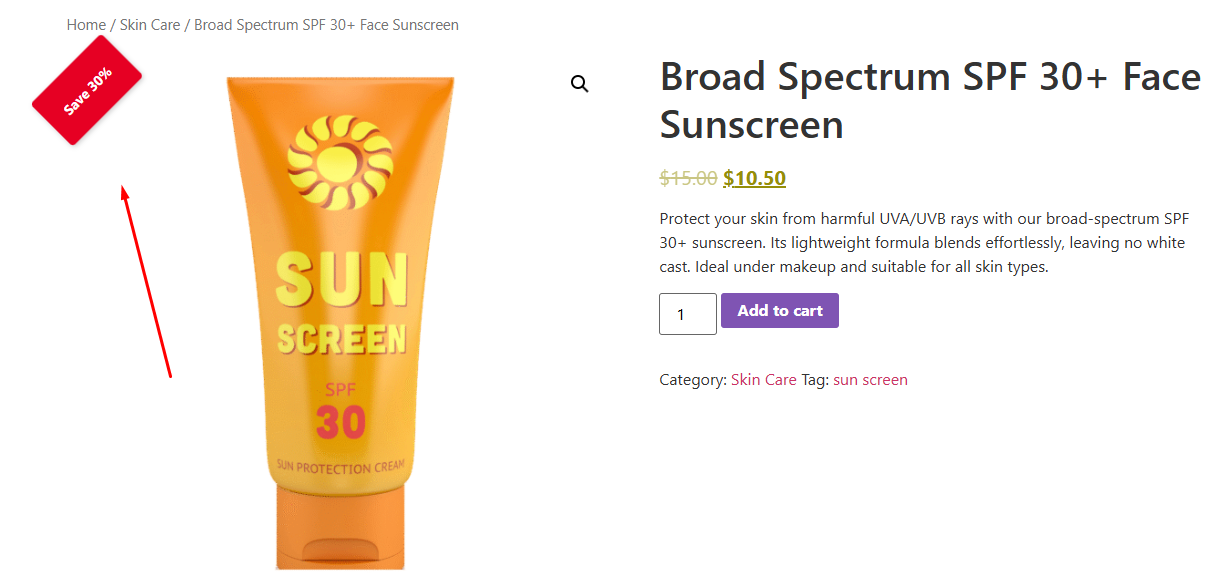
Here’s the sale badge ribbon effect WooCommerce CSS code for the top-left corner:
.woocommerce span.onsale {

background: #e60023;  /* Bright red */
color: #fff;
position: absolute;
top: 10px;
left: -30px;
transform: rotate(-45deg);
width: 100px;
text-align: center;
font-weight: bold;
z-index: 99;
box-shadow: 0 2px 5px rgba(0,0,0,0.2);

}
Step 3: Save and Refresh
Click Update, then refresh your shop/product pages to see the new style.
How to Schedule Badge Visibility in WooCommerce?
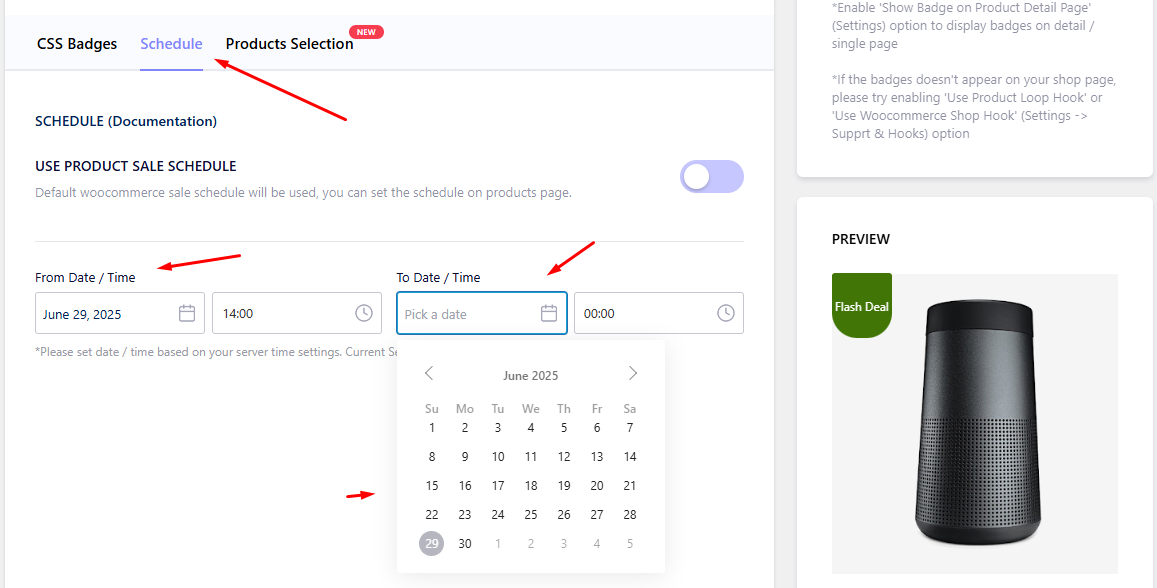
You need to make your custom sale badge stop displaying as soon as your sale ends. Here’s the sale badge scheduling WooCommerce process using the plugin.
- Edit your badge and jump to the Schedule tab.
- Set the starting and end time and date for the badge to be displayed.
How to Schedule Sale Badge Visibility in WooCommerce with Code?
Here are the steps.
Step 1: Open Your Child Theme’s functions.php File
- Go to Appearance > Theme File Editor > functions.php.
Step 2: Add This Custom Code
// Show custom sale badge only between specific dates

add_filter( 'woocommerce_sale_flash', 'custom_scheduled_sale_badge', 10, 3 );

function custom_scheduled_sale_badge( $badge_html, $post, $product ) {

// Set your schedule window (adjust to your timezone!)

$start_date = strtotime('2025-07-01 00:00:00');

$end_date   = strtotime('2025-07-05 23:59:59');

$now    = current_time('timestamp');

// Only show badge if current time is within schedule

if ( $product->is_on_sale() && $now >= $start_date && $now <= $end_date ) {

     return '<span class="onsale">Save 30%</span>'; // Customize your text here

}

// Hide badge outside scheduled time

return '';

}
What It Does:
- Checks if the product is on sale
- Compares the current time to your start and end times
- Only displays the badge if the sale is active within that window
Step 3: Save and Test
- Update the functions.php file, and the code will ensure your badges automatically stop displaying.
Best Plugins to Change Sale Badge Text in WooCommerce
We know that plugins are your best friend when it comes to modifying sale badges without hassle and with minimal effort. They turn complex design tasks into drag-and-drop simplicity.
Let’s explore some powerful options available for you.
Product Labels For WooCommerce (Sale Badges) By acowebs
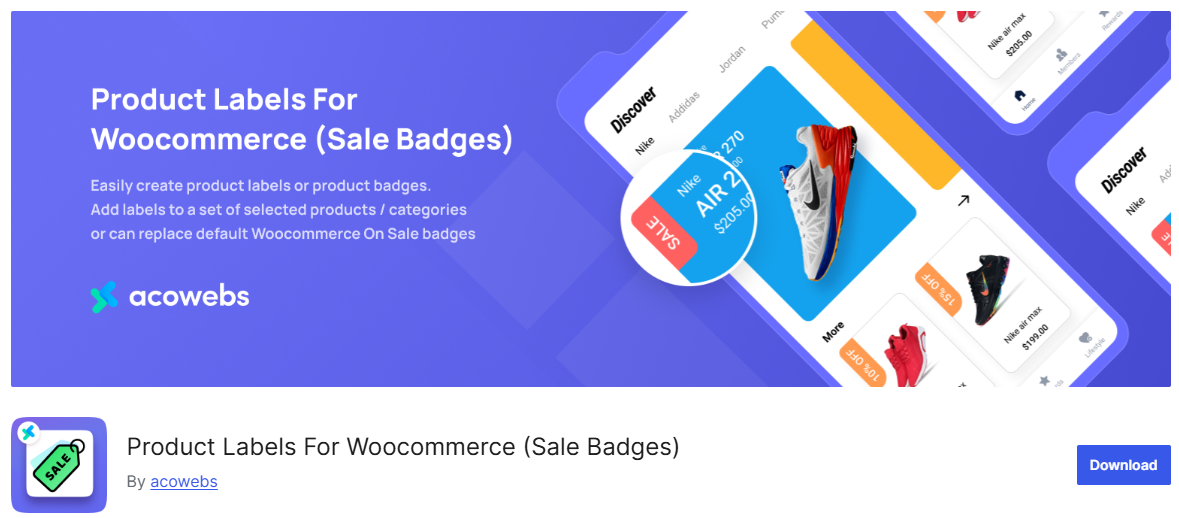
This plugin makes badge creation for WooCommerce stores easy. Instead of coding, you design beautiful labels through a visual dashboard. It handles everything from basic “Sale” tags to condition-based badges for clearance items or seasonal promotions.
It replaces WooCommerce’s default sale markers and adds precision. You decide exactly where badges appear – on specific categories, out-of-stock items, or discounted products. Timing controls let badges auto-expire after flash sales.
Key Free Features
- 🎨 Visual Customization
Change colors, fonts, sizes and positioning with live previews. - 🎯 Precise Targeting
Show badges only for:- Specific products/categories
- “On Sale” or “Out of Stock” items
- ⏱️ Scheduling
Set start/end dates for time-sensitive promotions. - 💡 Smart Replacements
Hide default WooCommerce sale badges or show discount percentages. - 👁️ Live Previews
Test designs before publishing.
Pro Version Notes
The pro version has 700+ pre-made badges (holiday/event themes) and image-based badges. However, the free version covers most of the basic needs.
Why It Stands Out
The plugin focuses on practicality over flashy extras. The interface is clean and not overwhelming for beginners, and the live preview prevents design mistakes. For stores that need basic but polished badges without coding, it’s a good choice.
YITH WooCommerce Badge Management
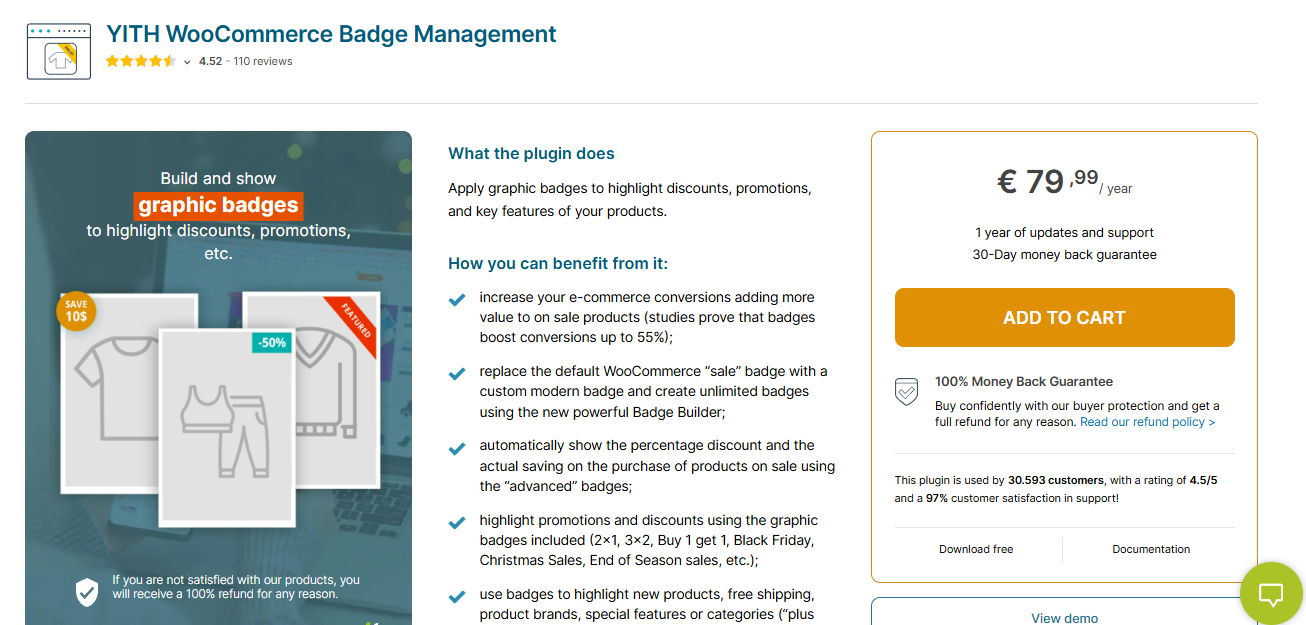
YITH’s solution transforms how you highlight promotions. Instead of basic “Sale” tags, it crafts visually compelling badges that make discounts impossible to ignore. The plugin uses a drag-and-drop builder – think Canva for WooCommerce badges – letting you design without technical skills.
Its standout feature? Smart dynamic badges. When prices drop, it auto-generates “Save $12” or “30% OFF” labels. For seasonal campaigns like Black Friday, pre-made templates enable the launch of promotions in seconds.
Key Features
- 🎨 Visual Badge Builder
Customize every detail: text, colors, rotation, padding, and positioning with real-time previews. - 🔢 Dynamic Discount Displays
Auto-calculates savings (“Save $15” or “45% OFF”) based on product pricing. - 🗓️ Scheduled Campaigns
Set badges to appear only during specific dates (e.g., Christmas sales). - 🎯 Granular Targeting
Show badges for:- Specific user roles/memberships
- Low-stock/variation-specific items
- Shipping classes (e.g., “Free Delivery”)
- Product categories (e.g., “Vegan” or “Eco-Friendly”)
- 🌐 Multilingual Support
Translate badges using WPML for global stores. - 📱 Mobile-Responsive
Auto-adjusts size/visibility on smaller screens. - 🎁 60+ Pre-Designed Templates
Includes Black Friday, BOGO, and seasonal badges.
Why It Stands Out
YITH excels in contextual badge strategies. A coffee brand could show “Summer Cold Brew” badges only during heatwaves, while a fashion store highlights “Last Size!” on specific variants. For stores running frequent targeted promotions, this precision drives higher conversions.
Improved Sale Badges for WooCommerce by XforWooCommerce
This CodeCanyon plugin transforms WooCommerce’s basic sale tags into conversion-focused badges. Unlike default badges, it adapts to seasons, holidays, or collections with 17+ preset designs. Setup happens directly in WooCommerce settings – no coding needed.
The tool shines for stores running time-sensitive deals. You can display countdown timers (“Ends in 3h!”) alongside discounts, creating urgency that static badges can’t match. Per-product customization lets you tailor badges for specific items or categories.
Key Features
- ⏱️ Urgency Tools
Show countdown timers + discount values (percentage or “$ saved”). - 🎭 17+ Design Presets
Seasonal/holiday templates (Christmas, Black Friday, etc.). - 🎯 Per-Product Control
Assign unique badges to individual products or categories. - 💬 Special Badge Types
3 customizable badges for spotlight products (e.g., “Staff Pick!”). - 🌍 Multilingual Support
WPML-compatible with included .PO/.MO translation files. - 🛡️ Theme Resilience
Works with any theme (manual insertion option for non-standard setups).
Why It Stands Out
For stores needing urgency-driven badges, the countdown timer is a game-changer. Pair it with per-product customization – like showing “Last Chance!” on clearance items while displaying “30% OFF” on new arrivals – and you create hyper-relevant prompts that boost conversions.
Wrap Up
So, that’s all about how to change sale badge text in WooCommerce.
Changing your WooCommerce sale badge text isn’t just cosmetic—it’s conversion science. Whether you tweak code, use plugins, or overhaul designs, here’s your cheat sheet:
- For Quick Text Swaps → Edit functions.php (5 lines of PHP).
- For No-Code Flexibility → Plugins like YITH Badge Management (visual editor) or Product Labels For Woocommerce (Free plugin).
- For Urgency & Clarity → Replace “Sale!” with dynamic discounts (“Save $15”) or urgency triggers (“Ending Tonight!”).
Remember: Badges should work, not just decorate. A/B test texts like “50% OFF” vs. “Limited Deal” – small changes can lift sales by 20% or more—best of luck.
