Still typing UPS rates manually? Ouch. You’re likely overpaying on shipping and frustrating customers with checkout surprises.
Here’s the fix: Connecting UPS to WooCommerce automates real-time rates, slashes costs, and turns delivery into a customer magnet.
So, how to add UPS shipping to WooCommerce?
Install a UPS plugin (like UPS Shipping Method), connect your UPS account, and configure shipping rules. Your store will then automatically show live UPS rates at checkout, print shipping labels, and add tracking. Simple—no more guesswork.
In this article, we’ll unpack every step—from choosing the right plugin to troubleshooting rates—even if you’ve never touched shipping settings before.
Table of Contents
Pre-Setup Essentials: Get These 3 Things Ready
Think of connecting UPS to WooCommerce like building a bridge. Without strong foundations, it collapses.
Before touching plugins or settings, gather these three essentials:
1. Your UPS Account: Business or Personal?
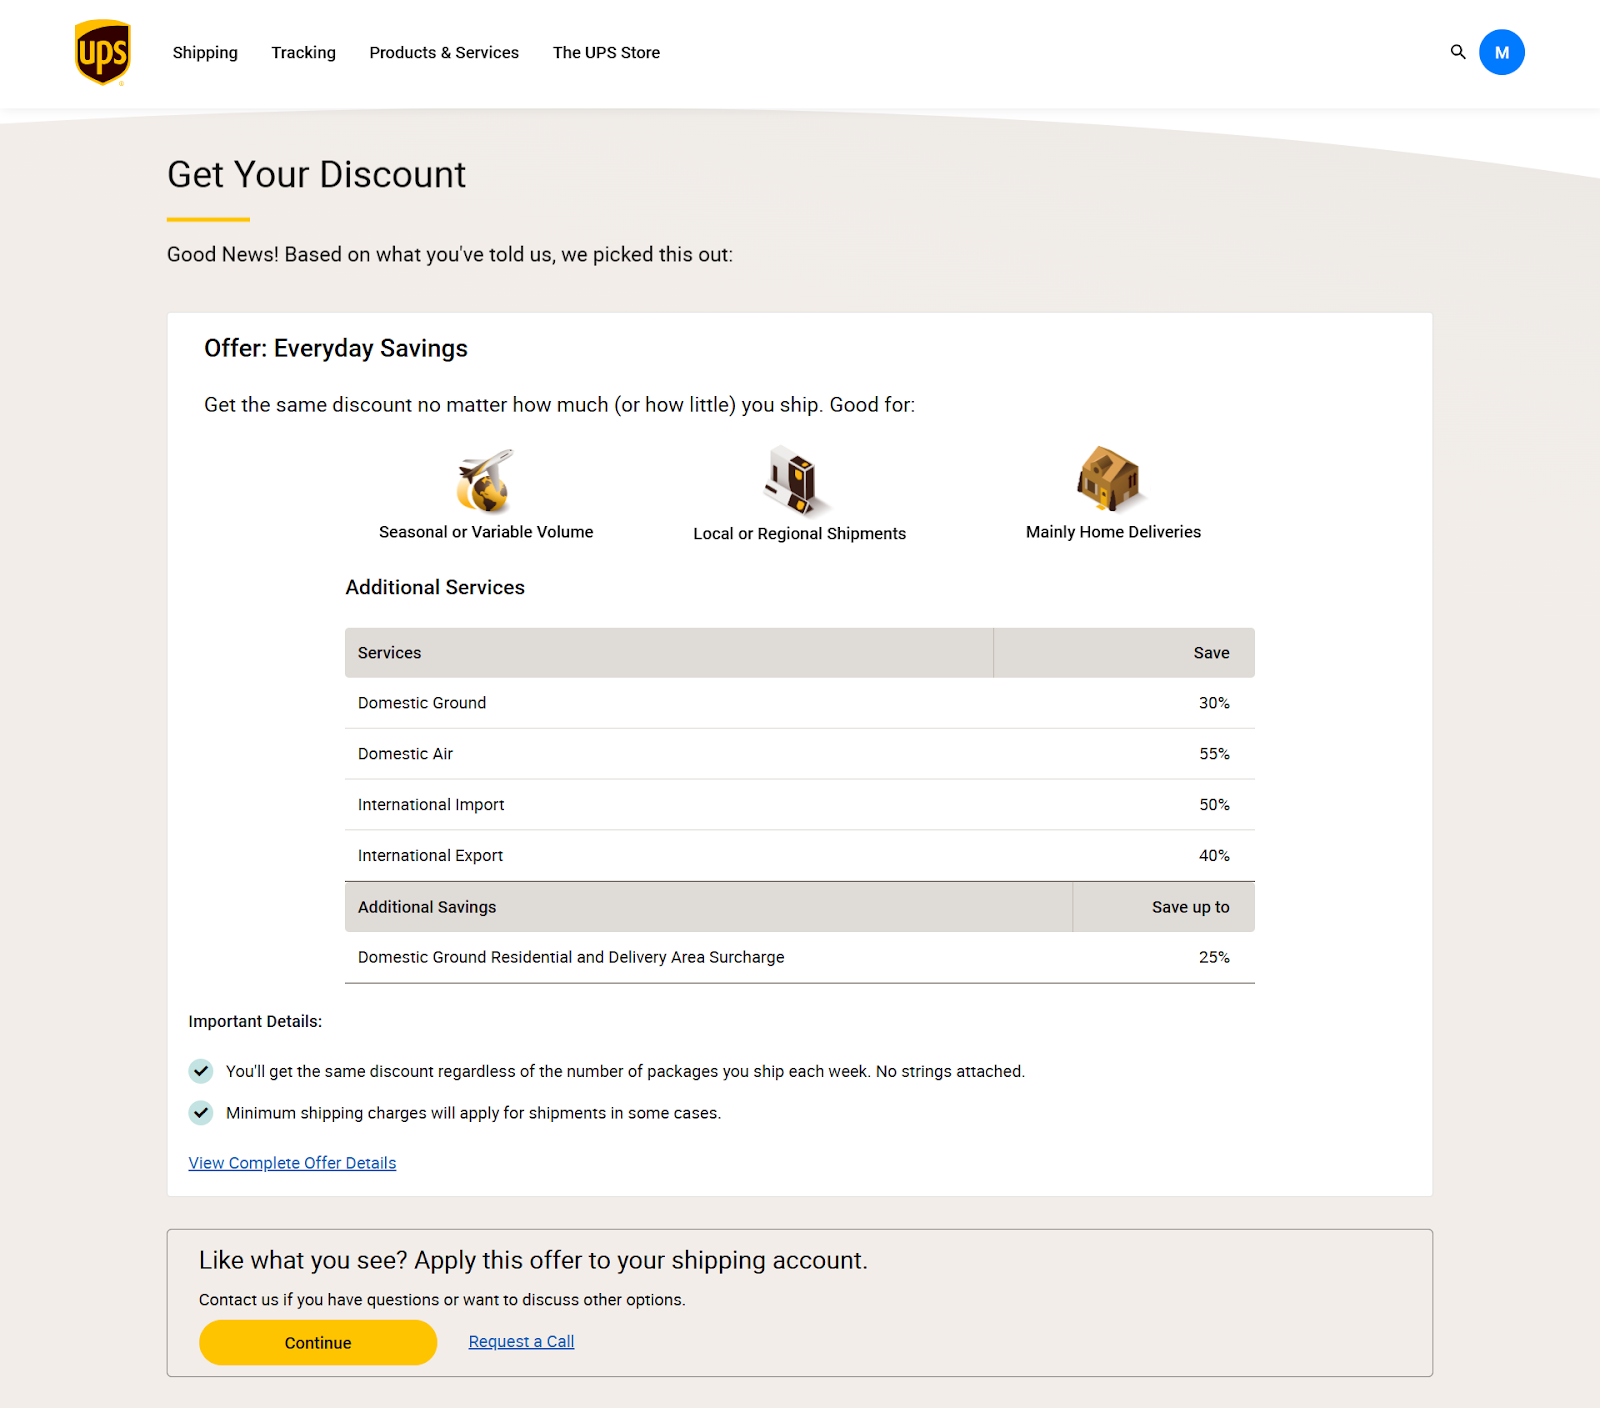
If you sell more than 10 orders monthly, choose a UPS business account.
Why? It unlocks hidden discounts called negotiated rates (often 15-30% cheaper than standard prices). Personal accounts work for tiny stores but miss these savings.
→ Activating negotiated rates takes 5 minutes:
- Call UPS at 1-800-PICK-UPS (1-800-742-5877) (say “enable negotiated rates for my business account”)
- OR request online: UPS.com > Account > Shipping > Discounted Shipping Rates
Don’t skip this! Without negotiated rates, your customers overpay – and you lose sales.
2. WooCommerce Groundwork: Shipping Zones & Product Details
First, define where you ship from:
- Go to WooCommerce > Settings > General.
- Input your store or warehouse location details from where you will ship the items.
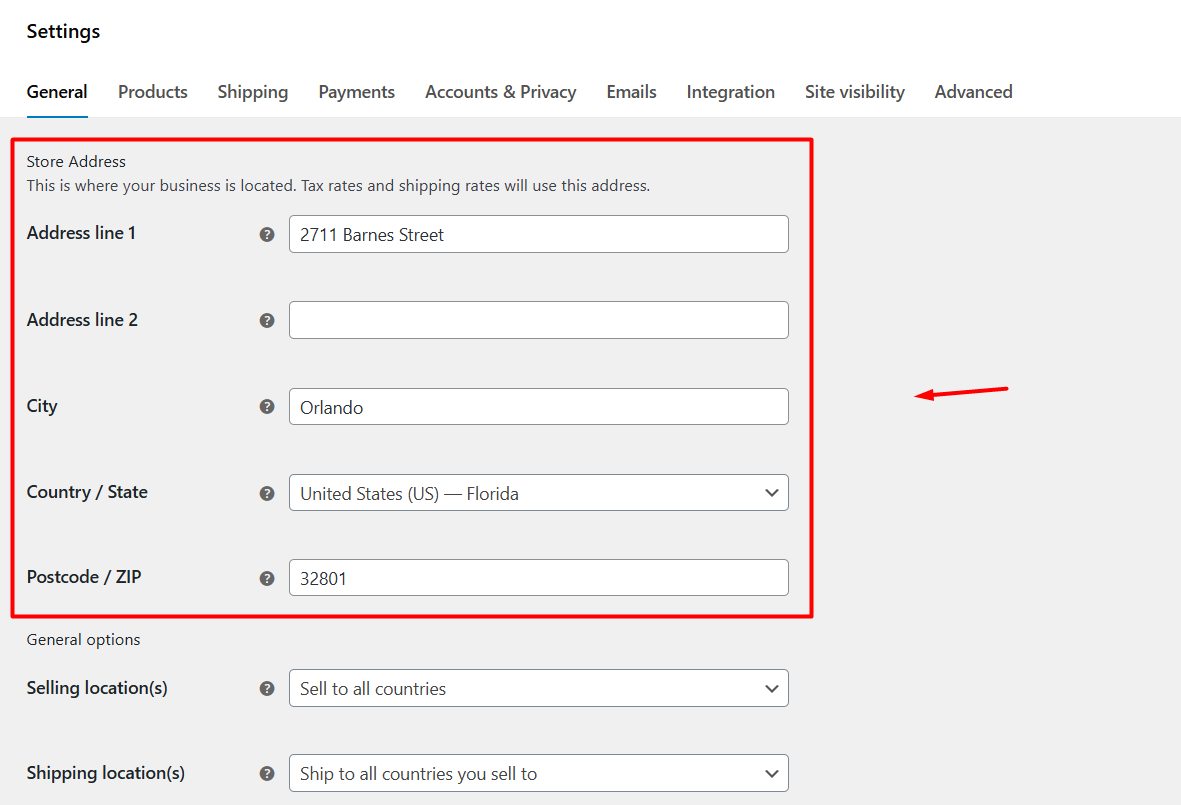
Next, define where you ship to:
- Go to WooCommerce > Settings > Shipping > Shipping Zones
- Click “Add Zone” (e.g., “United States,” “European Union”)
- Why? UPS won’t show rates if zones aren’t mapped.
Next, product weights and dimensions – non-negotiable!
- Edit every product: Products > Select Product > Shipping tab.
- Add exact weight (lbs/kg) and dimensions (LxWxH in inches/cm)
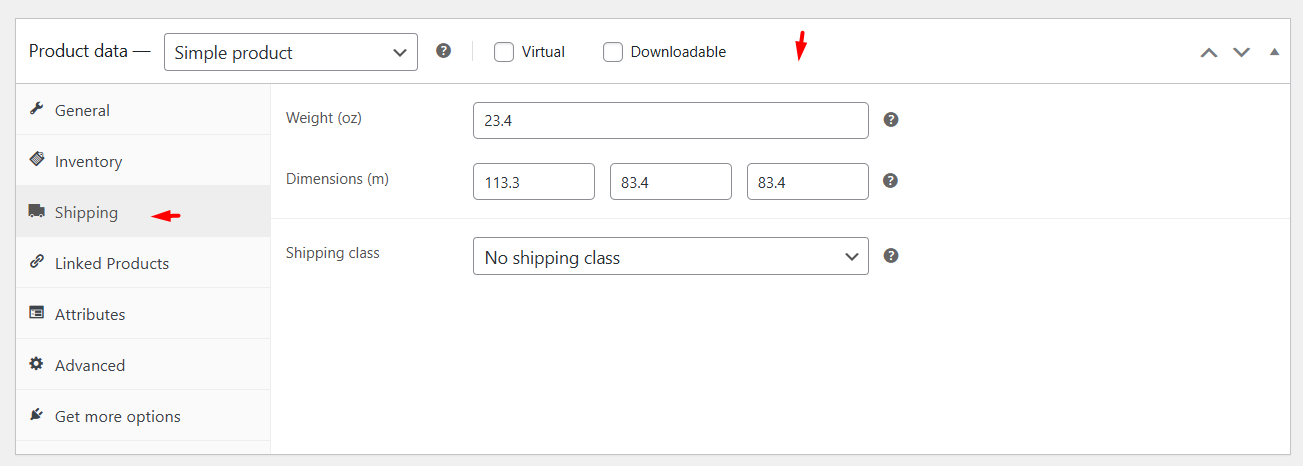
- Real-world example: A ceramic mug might be 1 lb | 6x4x4 in
→ UPS calculates costs based on this. Guesses = wrong quotes at checkout → angry customers.
3. Your UPS API Keys: The “Golden Ticket”
This is how WooCommerce “talks” to UPS. Follow these steps carefully:
- Go to the UPS Developer Kit and sign in.
- Click “Get API Keys” → Choose “Production” (for live stores) or “Developer” (for testing).
- You’ll get three codes:
- Access License Number (your main key)
- User ID
- Password
→ Save these like passwords! Paste into Notepad temporarily.
⛔ Critical: Business accounts get priority API access. If you chose “Personal,” switch now, or rates may fail during busy hours.
How to Add UPS Shipping to WooCommerce?
For this article, we will use a free WooCommerce UPS shipping plugin called Shipping Live Rates and Access Points for UPS for WooCommerce by Octolize.
This nifty tool saves you from collecting and entering the UPS API key or user details manually, and fetches them automatically through OAuth login, and starts displaying WooCommerce real-time shipping rates almost automatically. Let us walk you through how to add UPS shipping to WooCommerce using the WooCommerce UPS plugin free.
Step 1: Install a WooCommerce UPS Shipping Method Plugin
Log in to your WordPress admin panel and,
- Navigate to Plugins > Add Plugin.
- Search for UPS shipping plugin.

- Install and activate the plugin.
Step 2: Connecting to UPS
After you install the plugin,
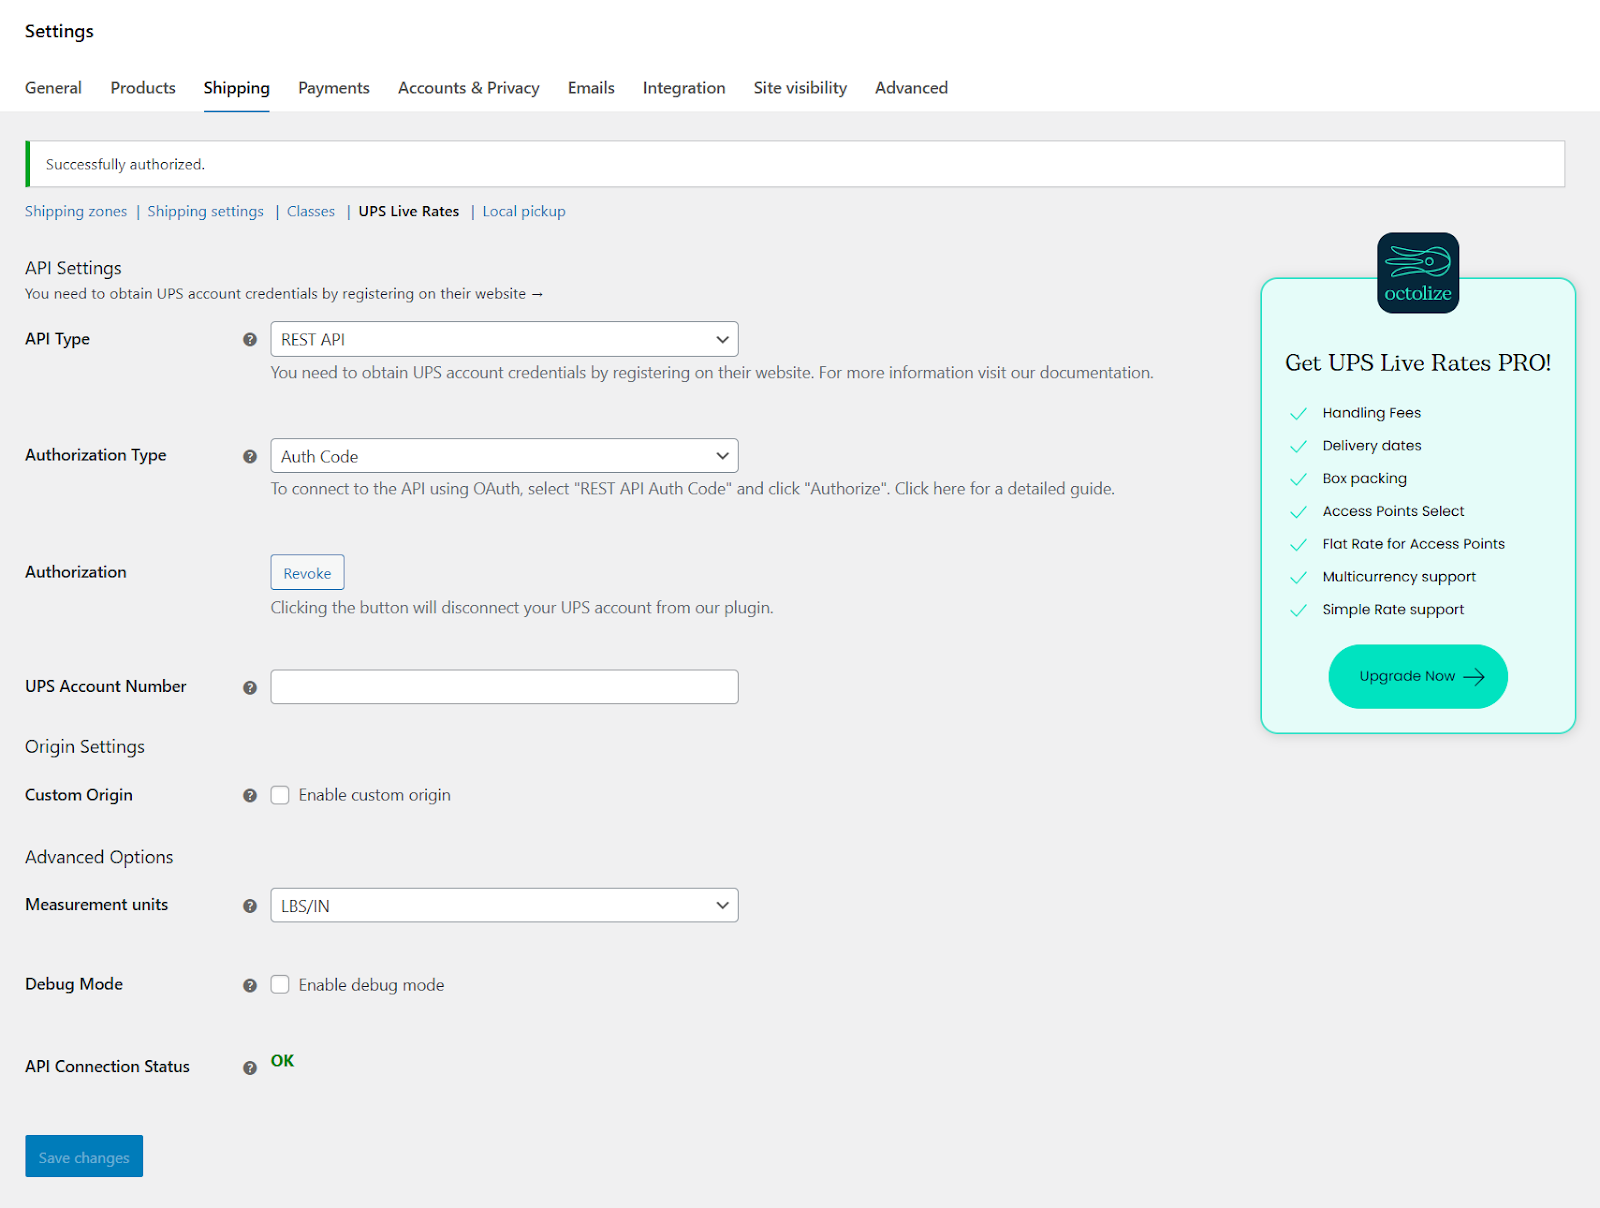
- Go to WooCommerce > Settings > Shipping > UPS Live Rates.
- Select the API type – REST API.
- Select Authorization Type – Auth Code.
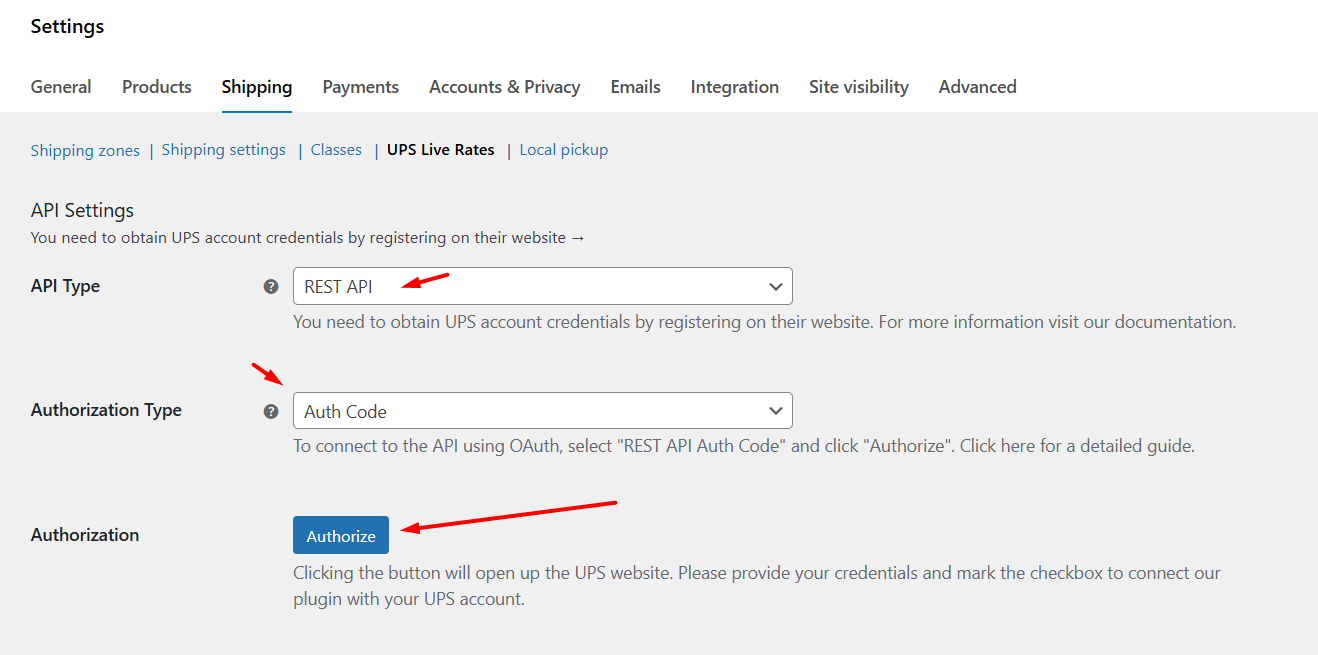
- Click the Authorize button. It will redirect you to the UPS.com login page.
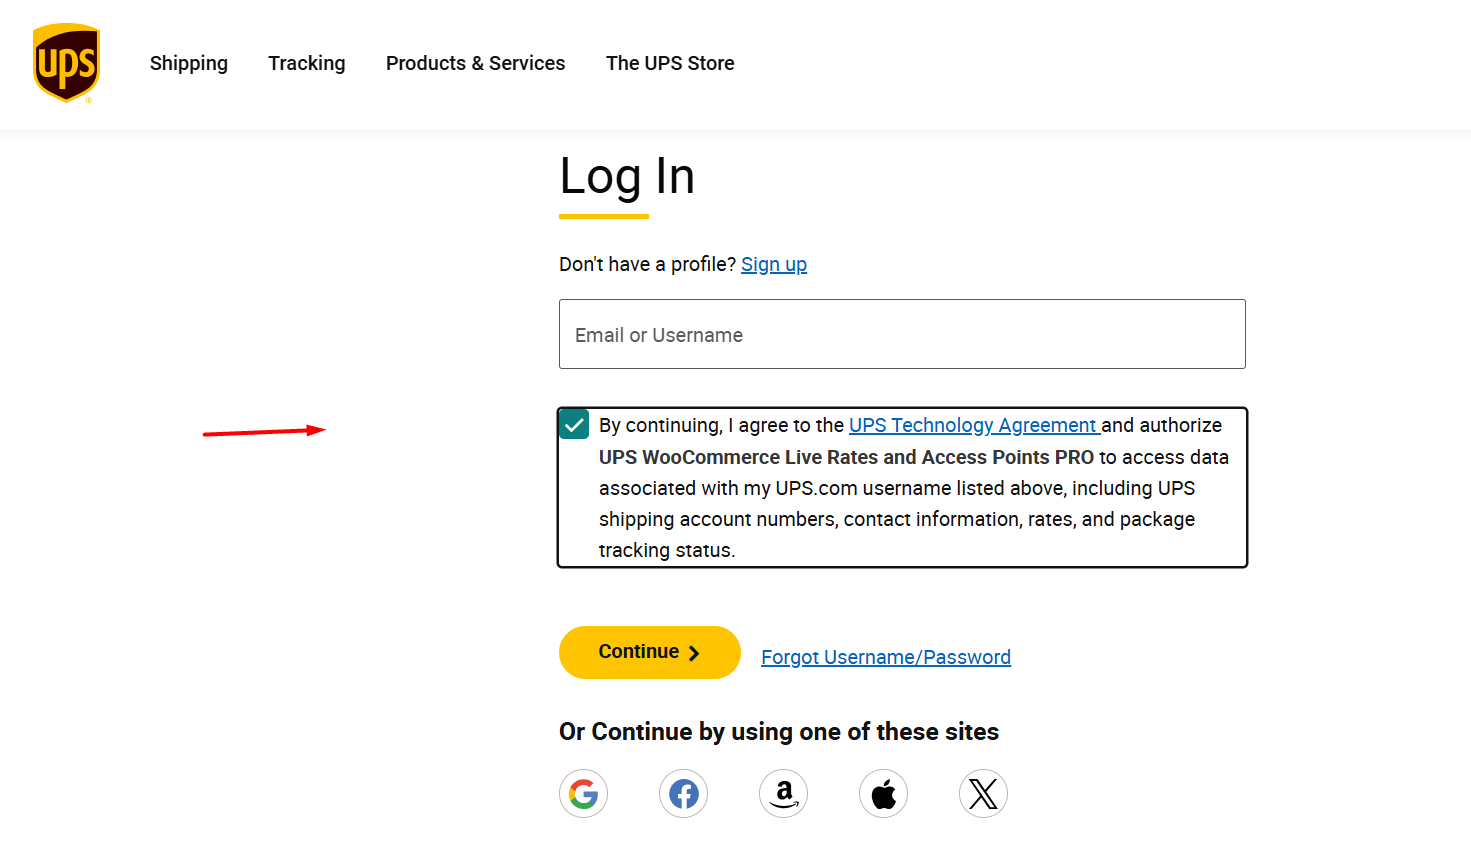
- After successful login, it will automatically fetch API details and display an OK status in the eCommerce shipping dashboard by UPS for WooCommerce.
Step 3: Create and Assign Shipping Zone and Method
Let’s say you want to ship across the United States and provide UPS tracking.
- Click Add Zone under WooCommerce > Shipping > Shipping Zones.
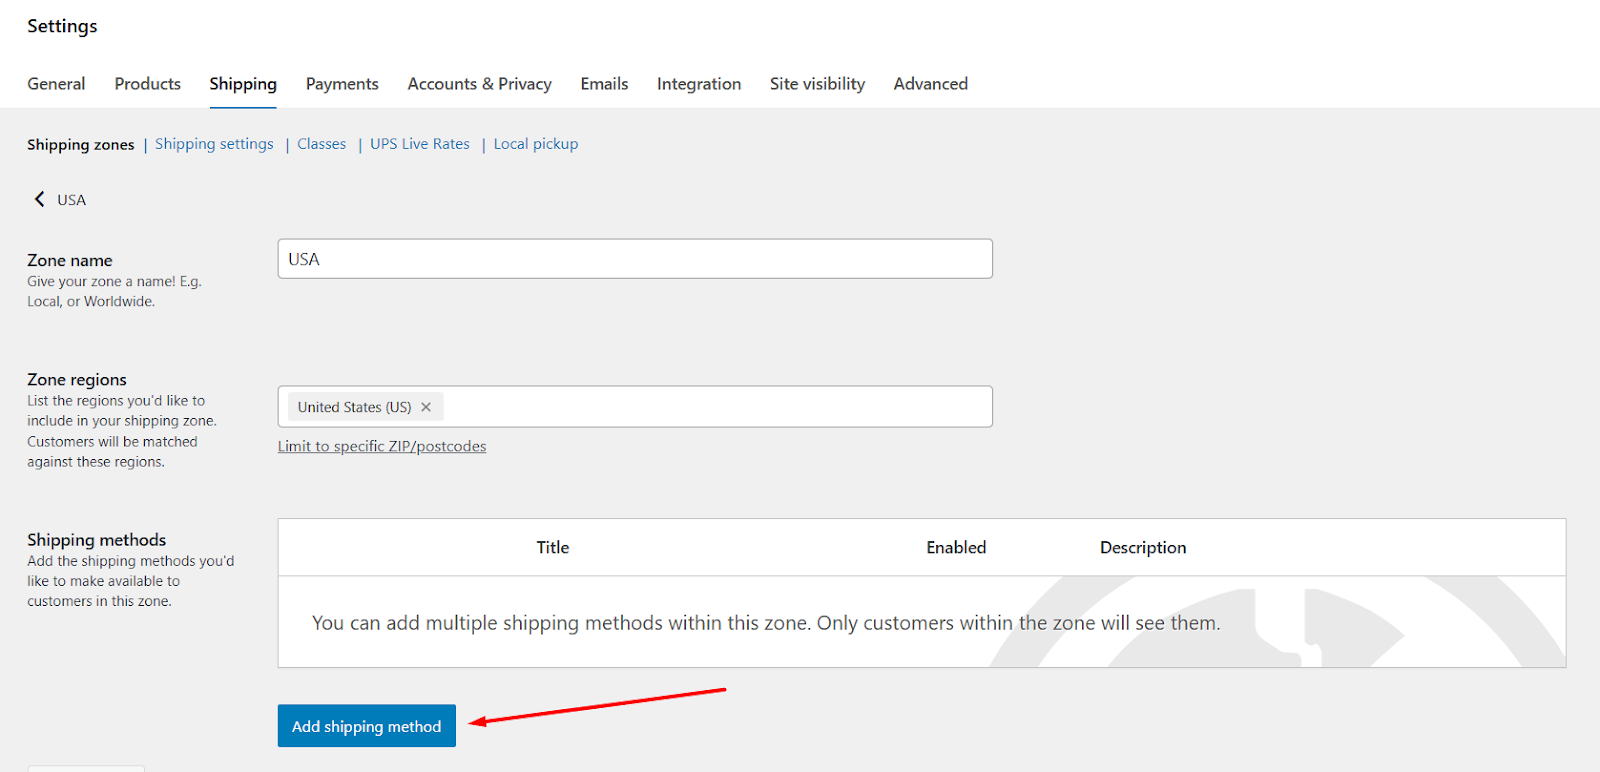
- Select and set your zone region and click Add Shipping Method.
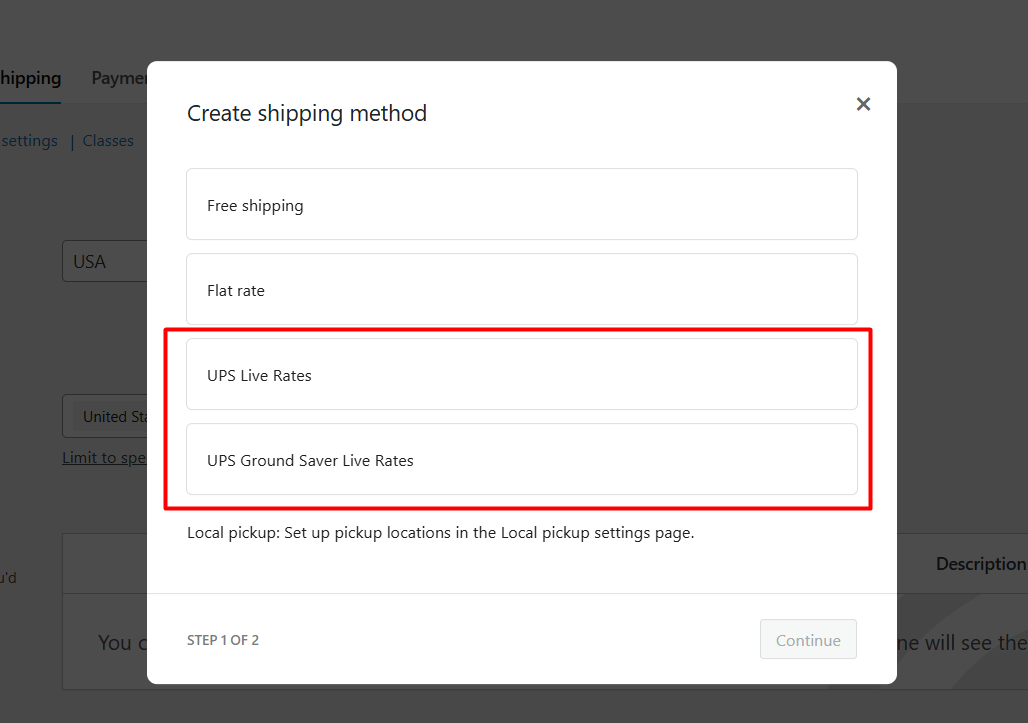
- Select the appropriate UPS shipping method from the list.
- Save your changes.
Step 4: Test UPS Shipping Connection
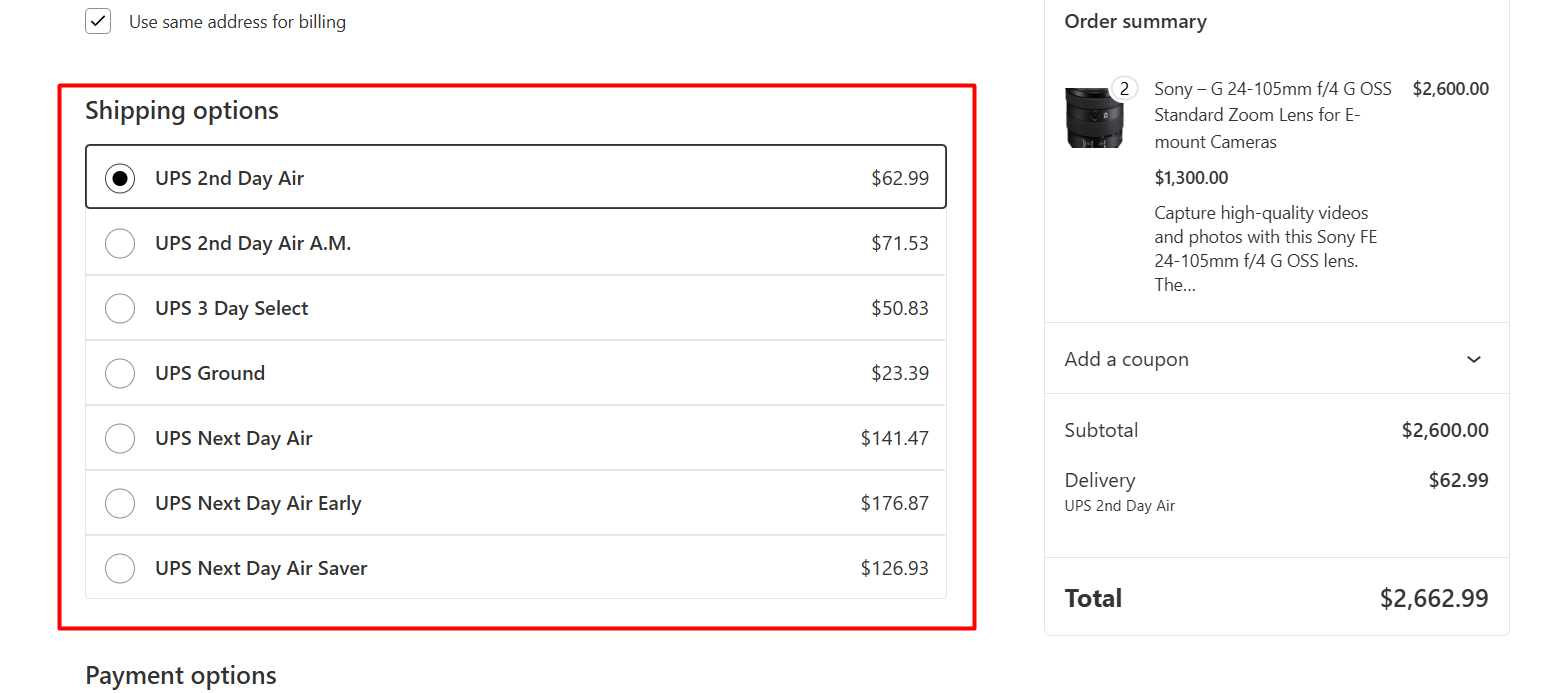
- Go to your storefront and add a product to the cart.
- Jump to the checkout page to see UPS shipping charges WooCommerce is displayed automatically.
This is how to add UPS shipping to WooCommerce. Additionally, if you want to offer discounts based on UPS shipping or shipping classes in WooCommerce, you can use the free plugin called Disco. This free tool packs monstrous powers to offer all sorts of dynamic discounts, including shipping discounts.
How to Pick the Best UPS Plugin for WooCommerce?
Choosing a UPS plugin feels overwhelming—I get it. You’ll see dozens of options. But only 5 features truly matter for a smooth, money-saving setup.
1. Real-Time Shipping Rates: Non-Negotiable
A good plugin pulls live UPS rates instantly during checkout. No flat fees or guessing. It should calculate costs based on:
- Product weight/dimensions (that mug you shipped to Ohio?)
- Warehouse location
- Exact customer address
Avoid plugins that only offer “fixed UPS rates.” They’ll overcharge customers.
2. One-Click Label Printing (Save 3+ Hours Weekly)
Look for:
- “Print Label” buttons inside WooCommerce orders (no copying/pasting addresses)
- Options for 4×6 thermal labels or standard paper
- Batch printing (e.g., process 20 orders at once)
3. Automatic Tracking: Stop “Where’s My Order?” Emails
The plugin should:
- Auto-add UPS tracking numbers to orders
- Email customers with links like *”Track Your Package (UPS.com/1ZXXXXX)”*
- Show delivery status in WooCommerce (e.g., “In Transit – Louisville Hub”)
4. Let Customers Choose Services (Cheap vs. Fast)
Must support:
- UPS Ground (budget)
- UPS 2nd Day Air (balanced)
- UPS Next Day Air (urgent)
- International (Worldwide Saver)
Pro tip: Hide services you don’t offer (e.g., disable Next Day Air for heavy items).
5. Packaging Rules: Avoid Box-Size Disasters
Your plugin should handle:
- UPS-branded packaging (e.g., Express Envelopes, Tube Boxes)
- Custom boxes (if you reuse Amazon boxes)
- Multi-box shipments (e.g., splits 5 heavy books into 2 boxes)
Red Flags to Avoid
🚩 “Requires separate tracking plugin” → Tracking should be built-in.
🚩 “Manual rate tables” → Means no real-time calculations.
🚩 No free trial → Always test before paying.
My Plugin Recommendations
| Feature | Free Option | Premium Pick |
| Real-Time Rates | Basic (UPS only) | Advanced (multi-carrier) |
| Label Printing | ❌ | ✅ 1-click, bulk print |
| Tracking | Manual updates only | ✅ Auto-sync + emails |
| Negotiated Rates | ❌ | ✅ Apply UPS discounts |
| Best For | Testing, <50 orders/month | Growing stores (>100 orders) |
💡 Start free if you’re new. Upgrade when label printing becomes a time-suck.
Best UPS Integration Plugin for WooCommerce
There are a number of plugins available to integrate UPS shipping method charges in your WooCommerce store. Here’s our top picks:
PluginHive: WooCommerce UPS Shipping Plugin with Print Label
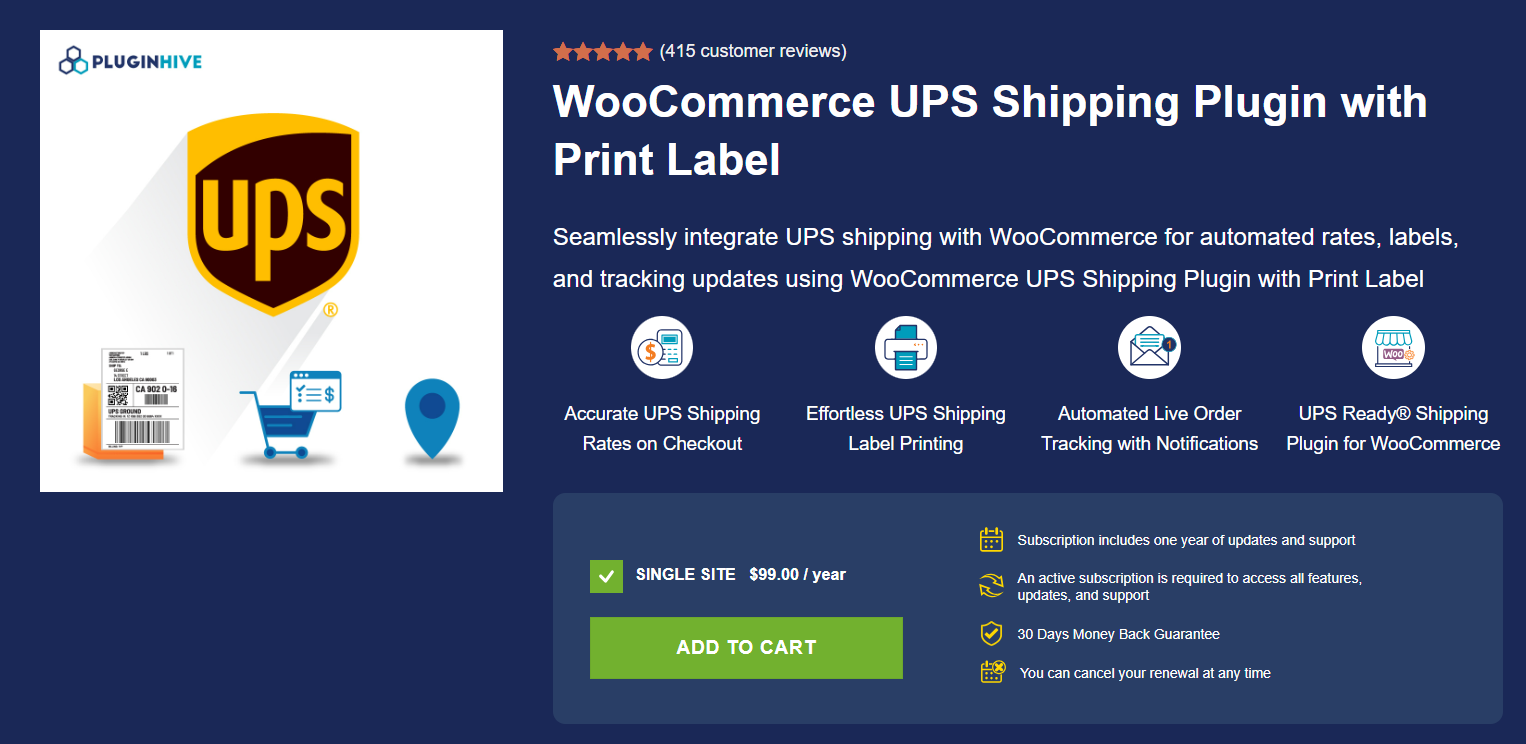
This UPS Ready plugin integrates UPS shipping directly into WooCommerce. It automates real-time rate calculations, label printing, and tracking updates.
Designed for stores needing full shipping automation, it supports domestic/international services, bulk processing, and compliance features like commercial invoices and hazardous materials handling.
The plugin requires an active UPS account with API credentials. It includes multilingual support (Spanish, French, German, Italian + WPML compatibility) and works with WooCommerce extensions like Bookings and multi-vendor platforms (via add-ons).
Key Features
- Real-time UPS rates:
Calculates shipping costs dynamically during checkout based on product weight, dimensions, destination, and UPS service type. - Automated label printing:
Generates and prints UPS shipping labels individually or in bulk directly from WooCommerce orders. Supports PDF/image formats and automatic label creation upon order placement. - Tracking automation:
Attaches UPS tracking numbers to orders and sends email notifications to customers with shipment status and tracking links. - UPS SurePost integration:
Combines UPS pickup with USPS final delivery for U.S. shipments under 10 lbs. - Access Point locations:
Allows customers to select nearby UPS pickup points for order delivery. - Flat-rate box options:
Offers fixed-price shipping using UPS-branded boxes (Extra Small to Extra Large) with rates between $10 and $30. - Customs documentation:
Auto-generates commercial invoices, EEI data, and NAFTA/USMCA forms for international shipments. - Specialized shipping:
Supports hazardous materials, alcohol, dry ice, and COD (cash/check/money order) shipments. - Pickup scheduling:
Requests UPS pickups directly from the WooCommerce dashboard. - Multi-vendor compatibility:
Works with Dokan Multi-Vendor (requires a separate add-on) for marketplace shipping management.
Technical & Support Details
- Pricing: $99/year for a single site (renewable subscription).
- Requirements: UPS User ID, Password, Access Key, Shipper Number, and origin postcode/country.
- Support: 1 year of updates included. Documentation, live demo, and support contact provided.
- Guarantee: 30-day money-back policy.
Octolize: Shipping Live Rates and Access Points for UPS
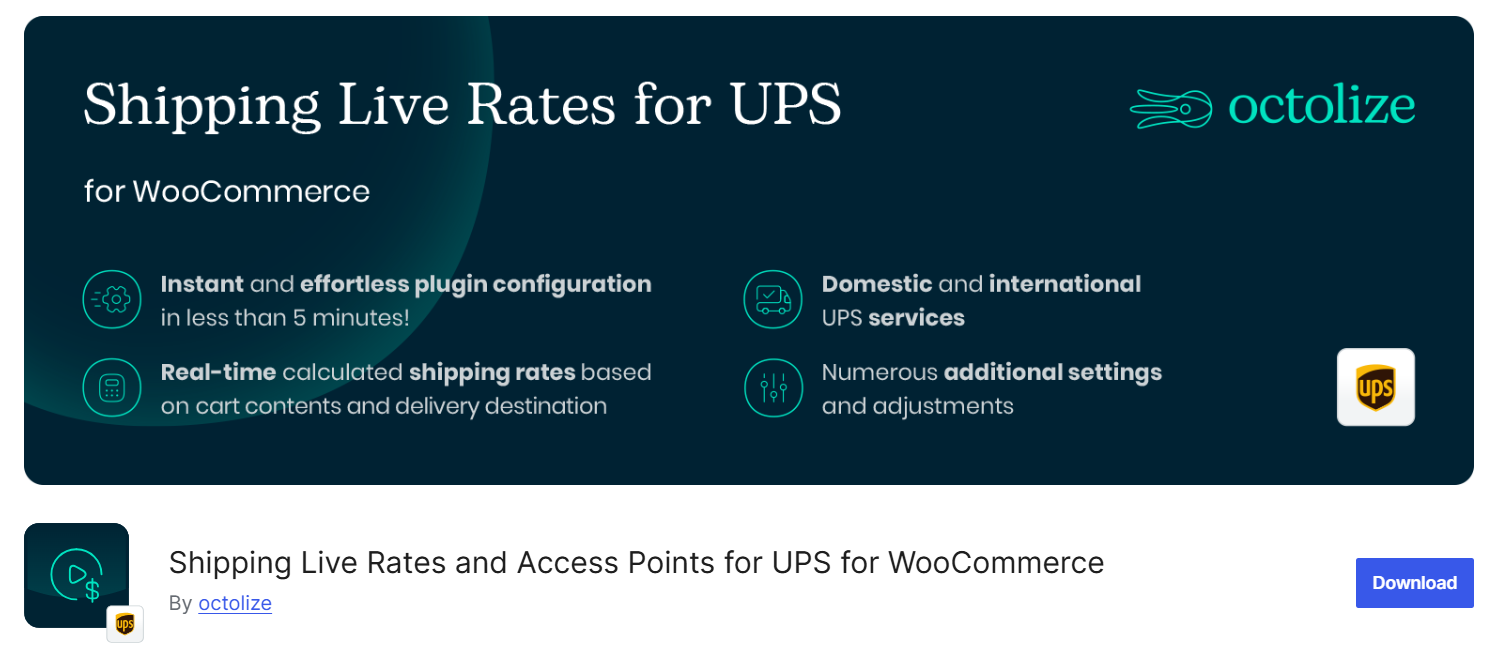
This WooCommerce plugin by Octolize enables automatic UPS shipping rate calculations and Access Point selection. It connects to UPS via REST API (OAuth) for one-click authorization or XML API for manual setups.
The tool displays real-time shipping costs during checkout and allows customers to choose from 27,000+ UPS Access Points across Europe and North America.
Setup can be done in under 5 minutes. The free version supports core UPS services, negotiated rates, and basic Access Point functionality.
PRO upgrades add advanced features like box packing and delivery date estimates. Compatibility includes WooCommerce Shipping Zones and currency switchers.
Key Features
- One-click UPS OAuth connection:
Links your UPS account via REST API without requiring manual application setup on UPS.com. XML API remains available for alternative configurations. - Real-time rate calculations:
Dynamically displays UPS shipping costs during checkout based on cart weight, destination, and selected service. Supports all UPS currencies. - Access Point integration:
Shows customers nearby UPS pickup locations (over 27,000 points). Saves chosen Access Points to orders automatically. - Service customization:
Limits available UPS services by destination address or manual selection. Includes SurePost options for U.S. shipments. - Fallback handling:
Provides backup shipping rates if UPS API connections fail. - Insurance & negotiated rates:
Supports declared value insurance and discounted negotiated UPS rates. - Debug mode:
Troubleshoots rate calculation or connection issues. - Free shipping thresholds:
Configures free shipping based on order value.
PRO Version Additions
(Requires paid upgrade)
- Advanced box packing:
Auto-packs items by weight/volume using custom boxes with padding options. - Access Point enhancements:
Flat-rate pricing and detailed search/selection for pickup points. - Delivery date estimates:
Displays transit times with lead time/cutoff adjustments and weekday exclusions. - Handling fees:
Applies fixed or percentage-based surcharges/discounts to rates. - Multi-currency support:
Works with currency switcher plugins. - Delivery confirmation:
Requires recipient signatures for select shipments.
Technical Notes
- Supported UPS services: Includes Ground, Next Day Air, Worldwide Express, SurePost, and 15+ other options.
- Compatibility: Integrates with Flexible Shipping (table rates) and Conditional Shipping Methods plugins.
- Support: Free version receives limited forum support; PRO includes priority email assistance.
- Translations: Actively seeks community contributions for localization.
ELEX EasyPost: Multi-Carrier Shipping with UPS Integration
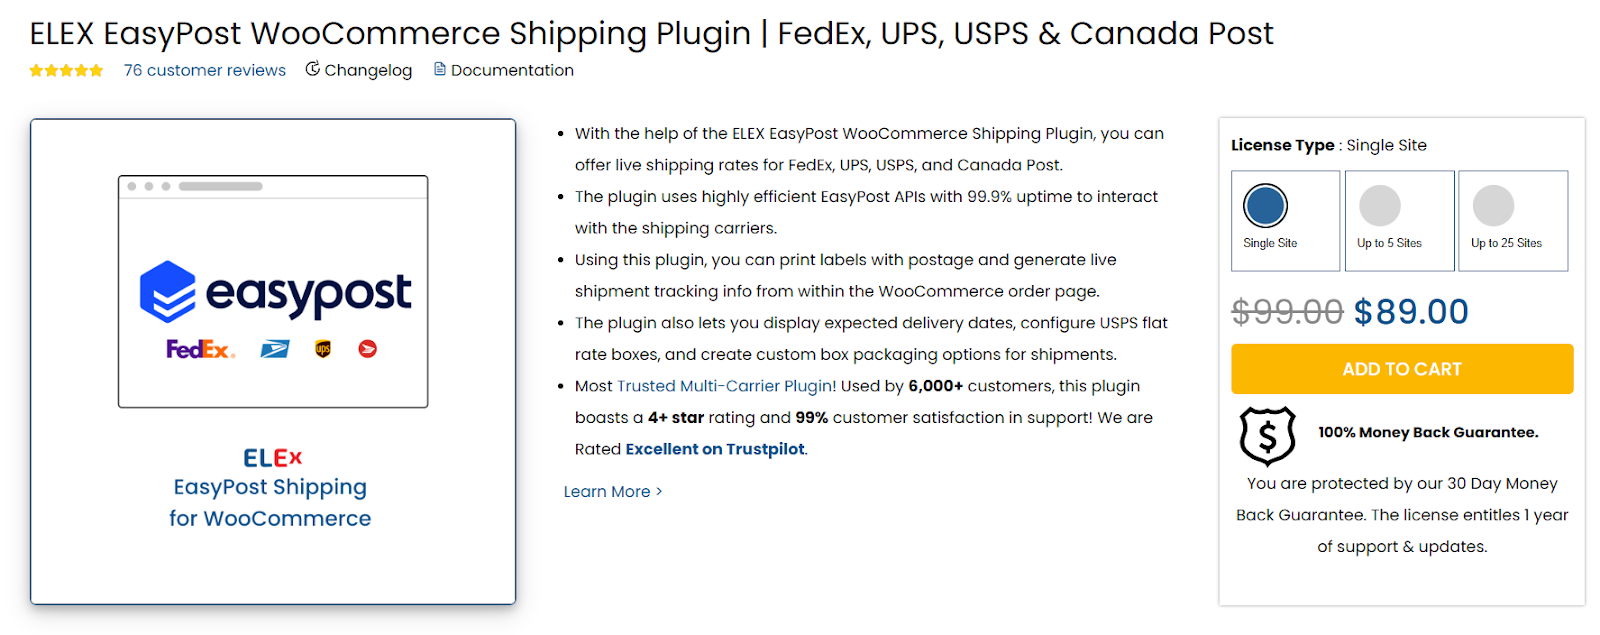
This plugin enables UPS shipping alongside FedEx, USPS, and Canada Post through EasyPost’s API infrastructure. It centralizes label printing, rate calculations, and tracking for multiple carriers within WooCommerce.
UPS-specific functionality includes third-party billing, SurePost support, and negotiated rate applications without requiring direct UPS API setup.
The solution suits stores needing multi-carrier flexibility. Setup involves connecting an EasyPost account (free tier available), configuring packaging rules, and enabling UPS services.
Note: All carrier interactions route through EasyPost’s API gateway.
Key UPS Features
- Real-time UPS rates:
Calculates shipping costs during checkout using product weight/dimensions, destination, and selected UPS services (Ground, Next Day Air, SurePost, etc.). - UPS label generation:
Prints shipping labels directly from WooCommerce orders. Supports postage payment via a linked EasyPost account. - Third-party billing:
Allows shipping charges to be billed to third-party UPS accounts (requires valid account numbers). - UPS SurePost integration:
Combines UPS pickup with USPS final delivery for eligible shipments. - Package customization:
Configures UPS-specific packaging using volume-based or stack-first packing logic. - Insurance options:
Offers package insurance (default: 1% of product value) during checkout. - Multi-package support:
Assigns different UPS services to individual packages within the same order.
Advanced UPS Tools
(Requires paid add-ons)
- Bulk label printing:
Generates UPS labels for multiple orders in one action (PDF output). - Return label system:
Creates UPS return labels with custom sender addresses. - Pickup scheduling:
Requests UPS pickups via EasyPost API.
Technical Notes
- Dependency: Requires EasyPost account (free tier available; carrier fees apply).
- UPS service coverage: Includes Ground, Air, SurePost, and international options.
- No direct UPS API: All UPS interactions processed through EasyPost’s gateway.
- Compatibility: Works with WooCommerce Multi-Vendor and Mix/Match Products extensions.
- Support: 1-year included with license ($89-$99/site). 30-day money-back guarantee.
UPS: eCommerce Shipping Dashboard for WooCommerce
This official UPS plugin connects WooCommerce stores to UPS services through a centralized Shipping Dashboard. It enables order synchronization, bulk label creation, and workflow automation without API development.
The solution focuses on streamlining shipping operations by syncing orders across sales channels and warehouses while providing tools like split-order functionality and package matching.
All data processing occurs through UPS’s secure dashboard (ups.dashboardlink.com) with periodic WooCommerce API syncs. UPS maintains Data Processing Agreements with involved vendors for compliance.
Note: This plugin does not support UPS Live Rates or Access Points functionality.
Key Features
- Centralized shipping management:
Processes orders, shipments, and labels through UPS’s unified dashboard. - Bulk processing tools:
Generates shipping labels and return labels in bulk batches. - Paperless invoicing:
Supports UPS Paperless Invoice for digital documentation. - Order synchronization:
Automatically syncs WooCommerce orders to the dashboard every few minutes. - Workflow automation:
Enables order splitting/combining and package size matching. - Default configurations:
Sets reusable shipment and sender profiles to reduce repetitive setup. - Multi-channel integration:
Syncs inventory and orders across sales channels and warehouses.
Support & Compliance
- 24/7 assistance:
Email support (ecommerce.help) and live chat available. - Data security:
Uses api.itembase.com for encrypted data transfer with UPS-vendor DPAs. - Open-source:
Publicly accessible codebase with UPS as the primary contributor.
Technical Notes
- External services:
Requires connection to UPS Dashboard (ups.dashboardlink.com). - No live rates:
Does not calculate real-time shipping costs at checkout. - No Access Points:
Excludes UPS pickup location functionality. - Data sync frequency:
Pulls order/product data from WooCommerce API at regular intervals.
Wrap-Up
Now you know how to add UPS shipping to WooCommerce—no coding or shipping expertise needed. By connecting UPS to your store, you’ll:
- Eliminate manual rate guesses with real-time calculations
- Cut carrier costs through negotiated discounts
- Turn delivery into trust with automated tracking
Whether you choose PluginHive for label automation, Octolize for Access Points, or ELEX for multi-carrier flexibility, the setup follows the same core steps:
- Gather credentials (API keys/account details)
- Install your chosen plugin
- Map shipping zones
- Test live rates
Your next move? Pick one method from this guide, activate UPS shipping before tomorrow’s orders, and start saving.
