disco logo
  • Features
  • Pricing
  • Compare
  • Resources
    • Blog
    • Documentation
    • Changelog
    • Contact/Support
    • Disco Community
Login Get Disco Pro

Getting Started

1
  • Installation Process of Disco Plugin (PRO And Free)

Product Intent Discounts

4
  • Set Up Product Intent Discounts
  • Example 1: $20 Off All ‘Men’ Category Products
  • Example 2: 5% Off Product X for a Limited Time
  • Example 3: Flat $50 Off on Products Over $500

Cart-Intent Discounts

4
  • Set up Cart Intent Discounts using Disco Plugin
  • Example 1: 20% Cart Discount on Selected Categories
  • Example 2: Offer 10% Cart Discount for 10+ Items (Cart Quantity)
  • Example 3 : Offer $10 Off Product X When Cart Has 3+ Items (In Stock)

Free Shipping Discount

4
  • Set Up Free Shipping with DIsco Plugin
  • Example 1: Free Shipping for Location ‘X’ Customers
  • Example 2: Free Shipping on Category “A” Products
  • Example 3: Free Shipping on Specific Product During Promotion

Bulk Intent Discount

4
  • Set Up Bulk Intent Discount with Disco Plugin
  • Example 1: Bulk Percentage Discounts on All Products by Quantity
  • Example 2: Offer 5% Bulk Discount on Product X for 3+ Units (October Only)
  • Example 3: Offer $10 Off on 5+ Units from Category ‘A’

Bundle Discount

1
  • Set Up Bundle Discount with Disco Plugin

Campaign Setup

6
  • Product Rules Explain with Example
  • Bundle Rules Explain with Example
  • Bulk Rules Explain with Example
  • Cart Rules Explain with Example
  • Discount Rules (Filter Products, User Limit, Valid Between, Discount Label)
  • Discount Intent

Conditions

9
  • Items Count (Entire Cart) vs Item Count 
  • Set Up Discounts According to Product Stock Quantity in WooCommerce
  • Apply Discounts on Selected Categories in WooCommerce 
  • Create a Discount on a Specific Product Attribute in WooCommerce
  • Set Up Discounts by Brand in WooCommerce with Disco Plugin
  • Tax and Shipping Based Discount Conditions
  • Price Based Discount Conditions
  • Product Attributes Based Discount Condition
  • Product/Cart Item Based Discount Conditions

Ticket Solutions

1
  • Discount Applies but No Visual Badge or Offer Displayed

BOGO

5
  • Buy X Product, Get Y Product at a Discounted Price
  • Buy X, Get Y Free (Different Product)
  • Buy X from Category A & Get Y from Category B
  • Set Up BOGO Discount (Buy 1 T-Shirt, Get 1 T-Shirt Free)
  • Buy X Get X at Discount (Buy 3 Coffee Mugs, Get 3rd One 50% Off)

Campaign Display

3
  • Display Product Badge in WooCommerce
  • Display Bundle Discount Table in WooCommerce 
  • Display Bulk Discount Table in WooCommerce

Compatible Plugins

5
  • CURCY – Multi Currency for WooCommerce
  • FOX – Currency Switcher (WOOCS)
  • WPML + WooCommerce Multilingual
  • Aelia Currency Switcher
  • ACF – Advanced Custom Fields
View Categories
  • Home
  • Documentation
  • Compatible Plugins
  • ACF – Advanced Custom Fields

ACF – Advanced Custom Fields

3 min read

Advanced Custom Fields (ACF) is one of the most popular WordPress plugins for adding custom data fields to posts, pages, and products. When ACF is active alongside Disco Pro, your ACF product fields automatically appear as selectable conditions in the Disco campaign – allowing you to target and apply discounts based on any custom field value attached to your WooCommerce products.

📌 Note: ACF field conditions are a Disco Pro feature — Requires Disco Pro.


Requirements #

  • Disco Free v1.3.0 or later
  • Disco Pro v1.1.0 or later
  • Advanced Custom Fields (ACF) — free or Pro version, any recent release
  • At least one ACF field group is assigned to WooCommerce products

Step-by-Step Setup #


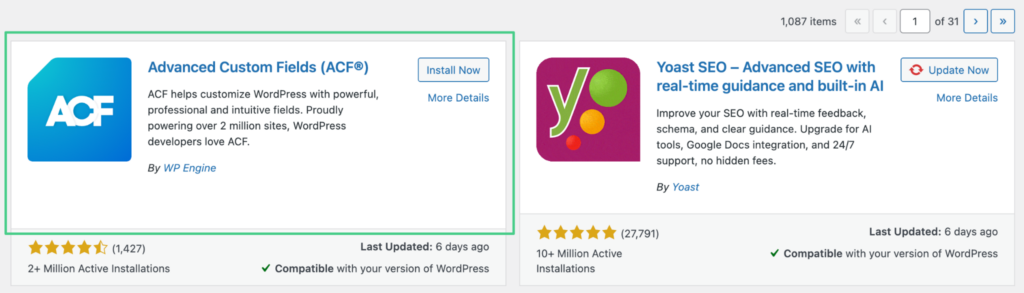
Step 1: Install and Activate ACF

  1. Go to WordPress Admin → Plugins → Add New
  2. Search for Advanced Custom Fields
  3. Click Install Now then Activate

image 11


Step 2: Create an ACF Field Group for Products

  1. Go to Custom Fields → Add New
  2. Create a new field group (e.g. “Product Extra Data”)
  3. For example a text field called product_material or a select field called product_season
  4. Under Location Rules, set the rule to Post Type → is equal to → Product
  5. Click Publish to save the field group

image 10
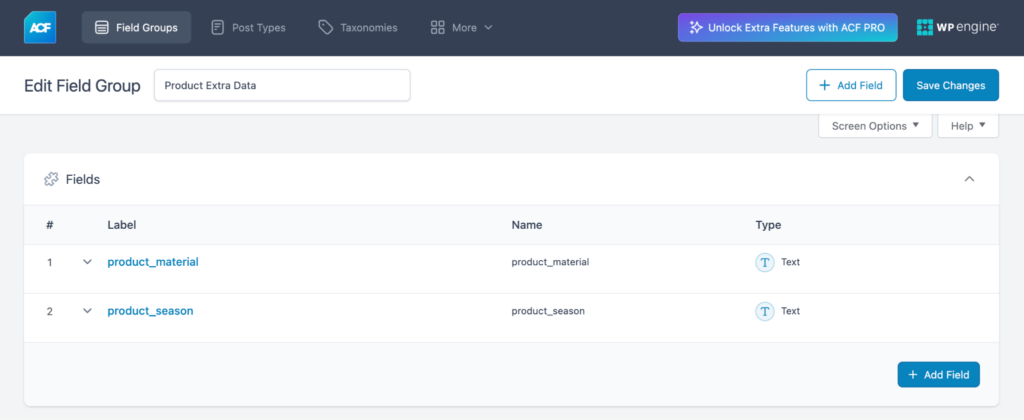
⚠️  Important: Disco reads ACF fields using the field’s name (slug), not its label. Make sure you use clear, consistent field names when creating your ACF fields — these are what appear in the Disco condition dropdown.


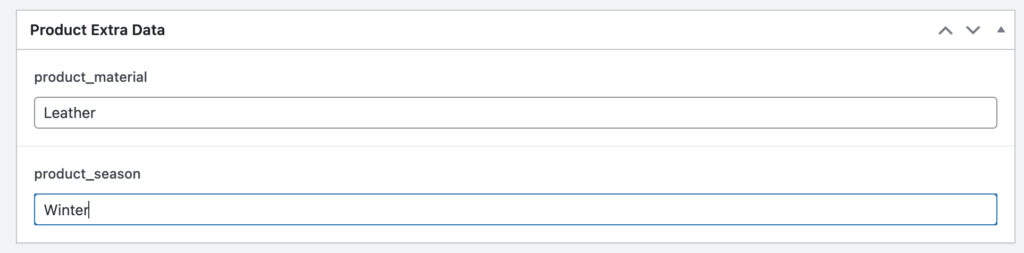
Step 3: Populate ACF Field Values on Your Products

  1. Go to Products and open any product
  2. Scroll down to the ACF field group you created
  3. Fill in the field values (e.g. Material = “Leather”, Season = “Winter”)
  4. Click Update to save the product

image 8

Step 4: Install and Activate Disco Pro

  1. Install and activate Disco Free from the WordPress plugin repository
  2. Upload and activate the Disco Pro add-on
  3. Enter your license key under Disco → License and activate it


Step 5: Use ACF Fields as Campaign Conditions

  1. Go to Disco → Create Discount
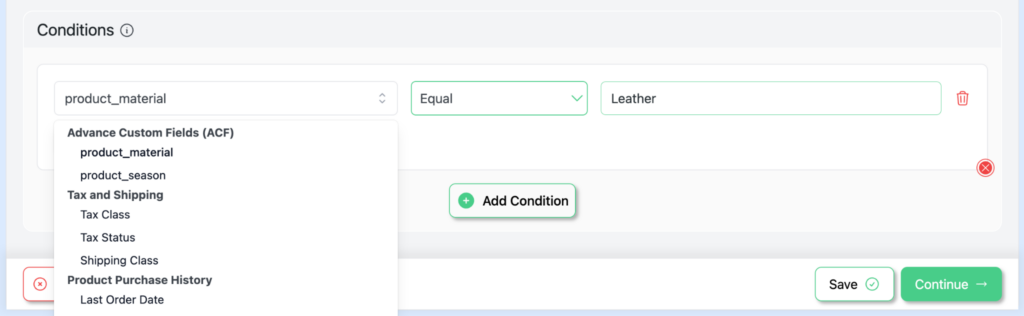
  2. In the Conditions section, click Add Condition
  3. Open the condition attribute dropdown — scroll to the Advanced Custom Fields (ACF) option group
  4. Select the ACF field you want to use (e.g. product_material)
  5. Choose an operator (e.g. equals, contains, not equals) and enter a value (e.g. “Leather”)
  6. Save and publish the campaign

image 9
📌 Note: ACF fields only appear in the condition dropdown if ACF is active and at least one field group with fields exists. If no fields appear, check that ACF is active and that your field group has been published with fields assigned to Products.

Example Use Cases #

Here are some practical examples of how ACF fields can be used as Disco campaign conditions:

ACF Field NameExample Use Case
product_materialApplies 15% off to all products where the Material field equals “Leather.”
product_seasonTriggers a campaign only when the Season ACF field equals “Winter.”
bundle_eligibleApplies a bundle discount only when a custom “bundle_eligible” checkbox field is checked (value = 1)
vendor_idRestricts a campaign to products belonging to a specific vendor ID stored in an ACF field

Result #

Once ACF is active and your field groups are configured, your custom product fields will automatically appear as condition options in every Disco campaign. This allows you to build highly targeted discount rules based on any custom data you store on your products — far beyond what standard WooCommerce product attributes alone can provide.

Example: A “40% off all Leather products” campaign — create a condition where acf_fields_product_material equals “Leather”, and Disco will automatically apply the discount only to products where that ACF field value matches.

image 12

What are your Feelings

  • Happy
  • Normal
  • Sad

Share This Article :

  • Facebook
  • X
  • LinkedIn
  • Pinterest
Aelia Currency SwitcherCURCY – Multi Currency for WooCommerce

Leave a Comment Cancel Reply

Table of Contents
  • Requirements
  • Step-by-Step Setup
  • Example Use Cases
  • Result
disco logo

The best WooCommerce discount plugin for BOGO deals, bulk discounts, tiered pricing, user role pricing, and dynamic pricing rules.

Product

  • Features
  • Pricing
  • Free vs Pro
  • Documentation

Resources

  • Blog
  • Tutorials
  • FAQ
  • Changelog

Company

  • About WebAppick
  • Support
  • Feature Request
  • Disco Community

© 2026 Disco by WebAppick. All rights reserved.