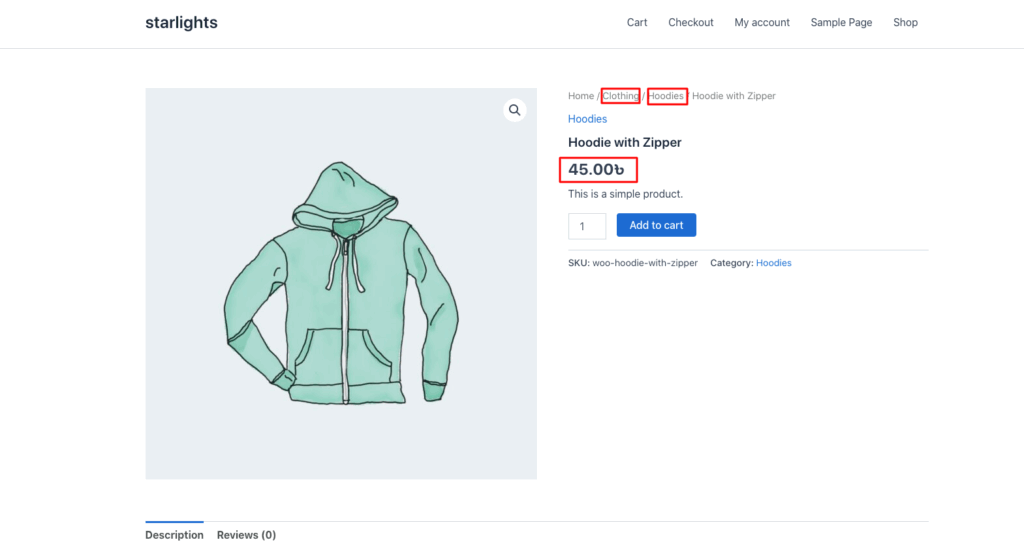
One of the key features of the Disco plugin is the ability to create discounts based on specific categories.
Examples:
- 20% off all products in the Clothing category (Parent category)
- 20% off all products in the Accessories category (Sub-category / Child category)
Let’s first walk through Example 1:
20% off all products in the “Clothing” category (Parent Category)
Step 1: Verify Product Categories #
Make sure your products are assigned to the correct categories. In WooCommerce, a parent category is the main category that includes all sub-categories.
With the Disco Plugin, applying a discount to a parent category affects all products within its child categories.
Example: Setting a discount on Clothing (parent category) will also apply to sub-categories like Accessories, Hoodies, and T-shirts.

Step 2: Open Disco and Create a Discount #
Click on Disco, then select Create a discount to start setting up your offer.
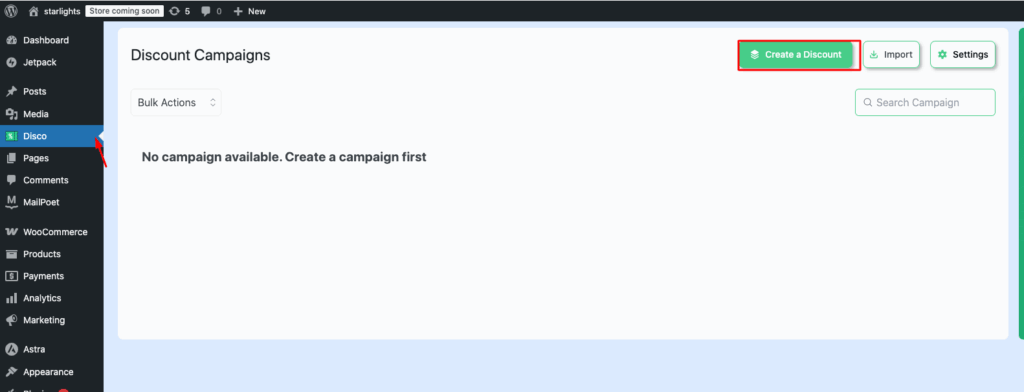
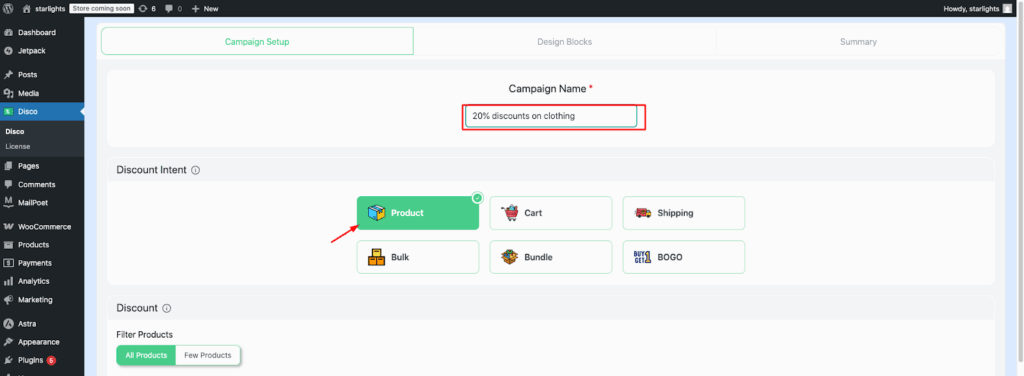
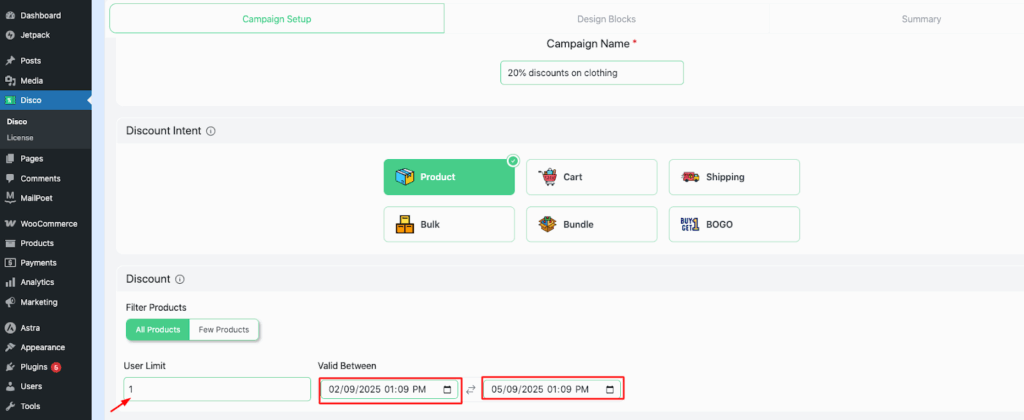
Step 3: Add Campaign Name and Select Discount Intent #
Enter a Campaign name and choose your Discount intent.
For example, you could set “20% Discount on Clothing” as the campaign name and select Product-based discounts as the discount intent.
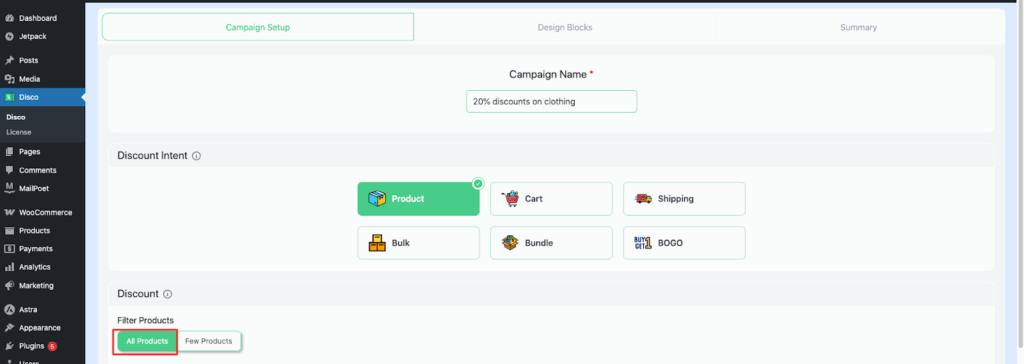
Step 4: Apply Filters and Conditions #
From the Filter section, select All products. Then, in the Condition section, choose a Specific category to narrow down the products.
Step 5: Set User Limit and Validity Date #
Enter the User limit (how many users can claim this discount) and the validity date (start and end period of the offer).
For example, set the User limit to 1 and the validity date to 2/09/2025 to 5/09/2025.
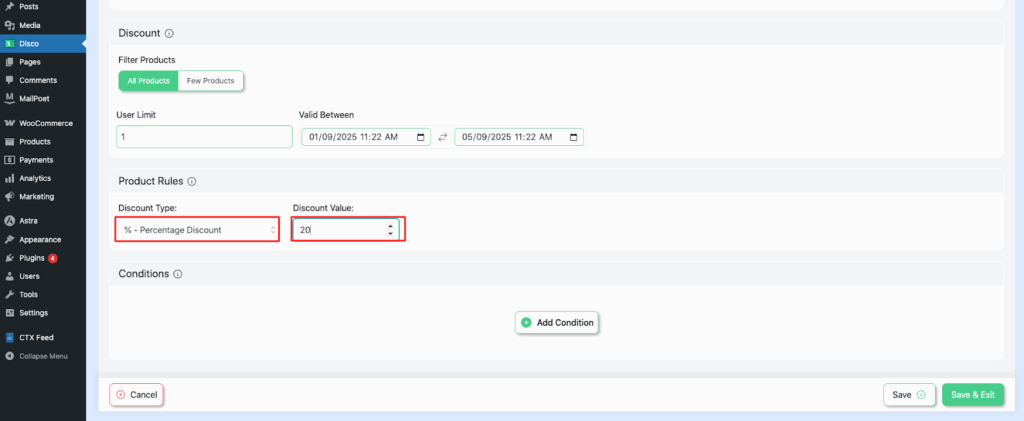
Step 6: Choose Discount Type and Value #
Set the Discount type to Percentage discount and enter the value as 20.
The Discount type determines the amount by which the product price will be reduced. Customers can select the discount type they prefer when multiple options are available.
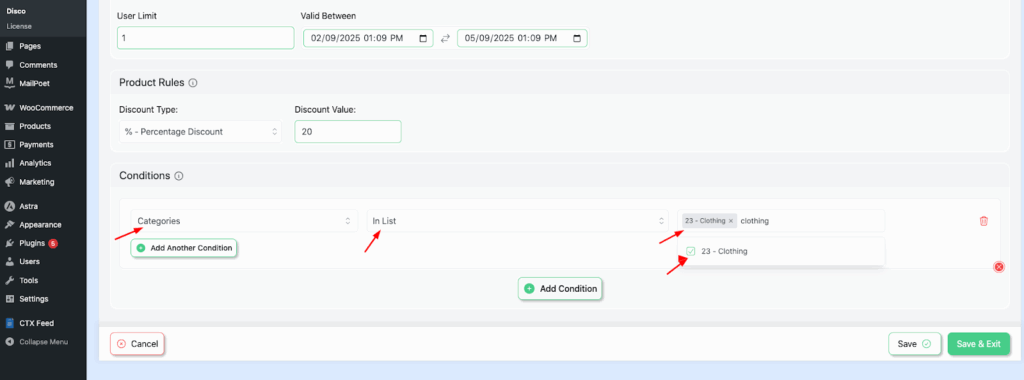
Step 7: Add Conditions for Categories #
In the Product/Cart Item section, select Categories. Choose In list (Include) and pick the specific category for the discount.
Example: Select Clothing to apply the discount only to products in that category.
Step 8: Save and Launch the Campaign #
Click Save and Exit to finalize your setup. Your campaign is now live, and the discount rules will be applied as configured.

Step 9: Verify the Discount on the Category Page #
Visit the Clothing category page in your store to confirm that all products show the 10% discount as configured.

Following the same approach, if we go through example 2 :
20% off all products in the “ Accessories” category (sub-category/child category )
Example: Select the Child category (Accessories). This ensures the discount rule applies only to products in the Accessories sub-category, not the entire parent category.

Visit the Accessories category page to confirm that all products in this sub-category now have a 20% discount applied.

Here, the discount rule is set for “ accessories ” but not for other child categories :
