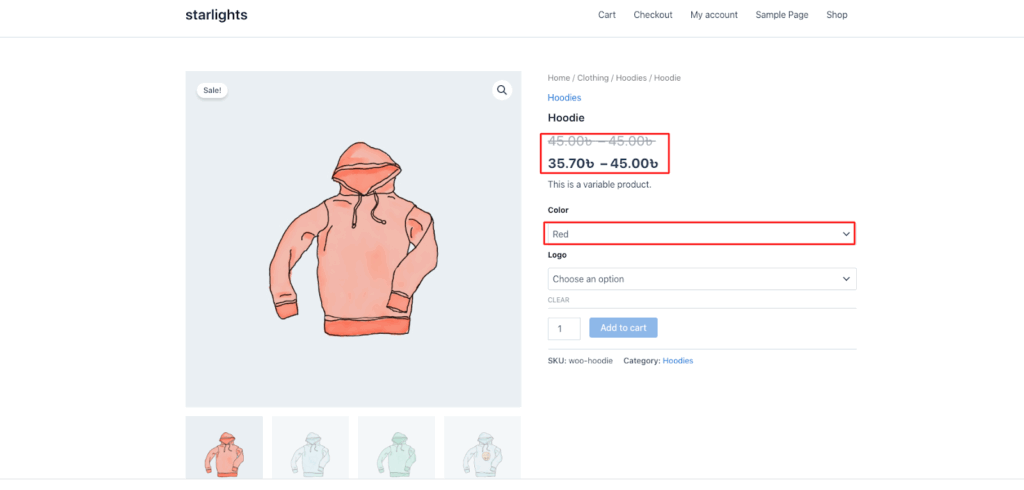
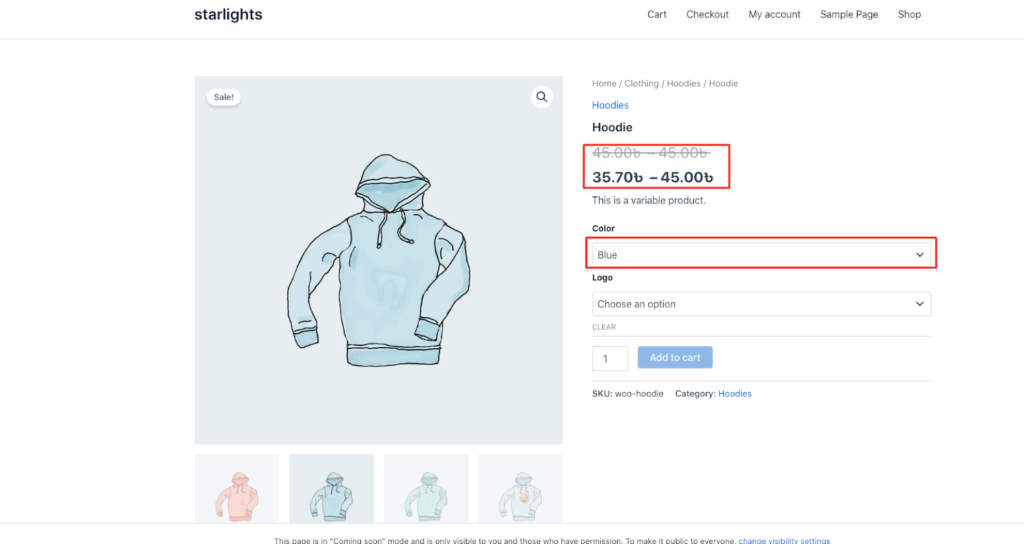
The Disco Plugin allows customers to create discounts on product attributes.
Attributes are characteristics of products,e.g, color, size, material, and design. It is most effective for flexible, targeted promotions.
In this scenario, we will offer a 15% discount on all Clothing products in Blue and Red.
Step 1: Confirm Product Attributes #
From your WordPress Dashboard, make sure each product is linked to the correct attribute and value. You can select from existing ones or create new attributes as needed.
Once set, you can use the Disco plugin to create attribute-based discounts.

Step 2: Create a Discount #
From your WordPress dashboard, go to Disco → Create a discount to begin setting up the attribute-based discount.

Step 3: Add Campaign Name and Select Discount Type #
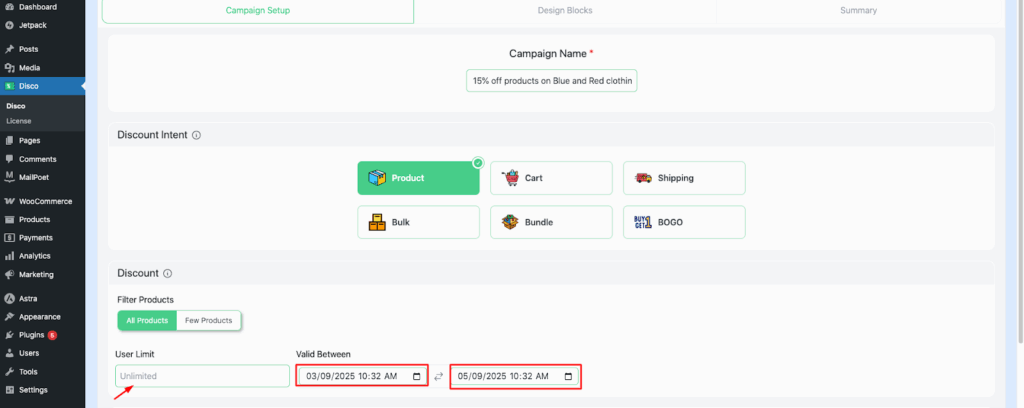
Enter a Campaign name and choose your Discount type.
Example: Name the campaign “15% Discount on all Clothing products in Blue and Red.”
Then, select Product-based as the discount type.
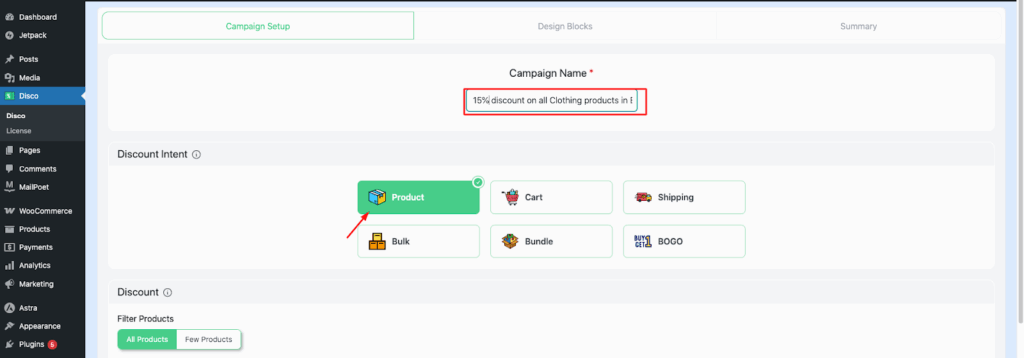
Step 4: Choose Product Scope #
Scroll down to decide whether the discount applies to All products or Specific products.
Example: Select all products so Disco will apply the rule to every product. Later, you’ll filter these products with specific attribute-based conditions.
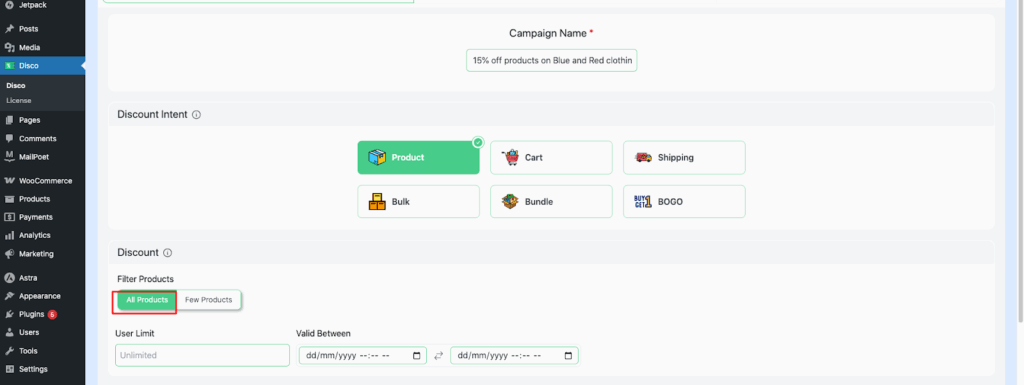
Step 5: Set User Limit and Validity Date #
Define the User limit and Validity date for the discount.
- User limit: Leave it blank to allow unlimited customers to claim the offer.
- Validity date: Set the active time period for the discount.
Example: Enter the validity date as 3/09/2025 to 5/09/2035.
Step 6: Configure Product Rules #
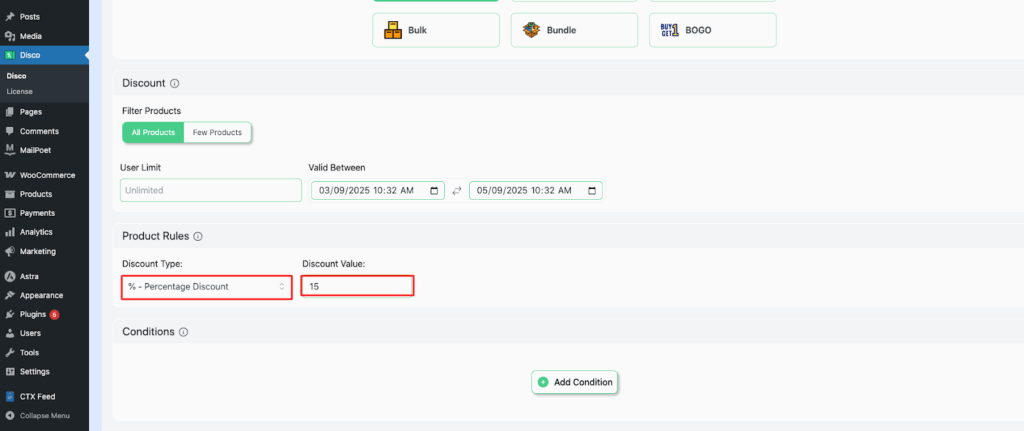
In the Product Rules section, set the Discount type to Percentage and enter the Discount value as 15.
This will apply a 15% discount to the selected products.
Step 7: Add Attribute Conditions #
In the Conditions section, select Product Attribute → In list (Include) and choose the specific attributes.
Example: Select Color → Blue, Red to apply the discount only to products with these colors.
Note:
Attributes allow general preferences, such as color, size, or design.
Product Attribute lets you define detailed options, e.g., Color → Blue, Red; Size → Small, Medium, Large.

Step 8: Save and Launch the Campaign #
Click Save and Exit to finalize your setup. This will successfully launch the campaign, and the discount rules will now be active.

Step 9: Verify the Discount in Your Store #
Visit your store to confirm that the discount rule has been applied. The selected products with the specified attributes should now show the discount.
