Cart Notice is a Pro feature that displays a promotional banner on the WooCommerce cart page. It shows your active discount offer in real time — with dynamic messages that update automatically based on each shopper’s cart.
Once you’ve created a Cart or Shipping campaign, follow these steps to enable and customize the Cart Notice banner.
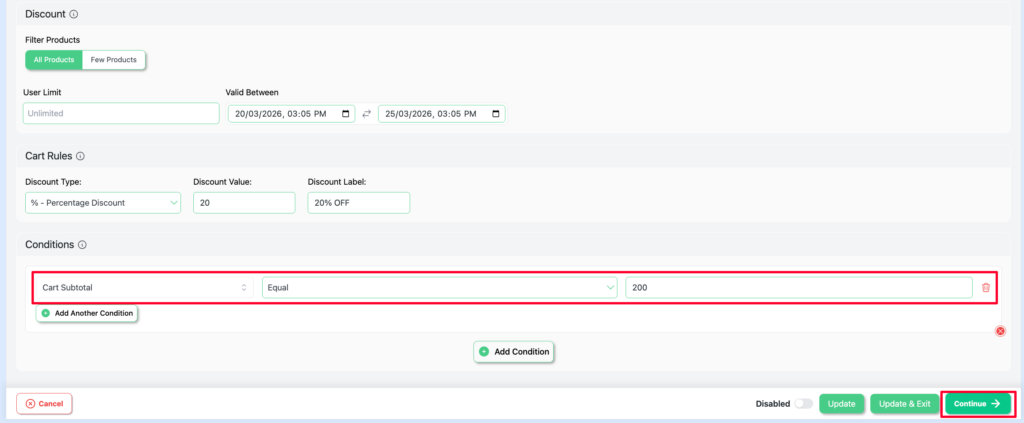
Step 1: Go to the Display Tab #
After setting up your campaign, click the Display tab at the top of the campaign editor.
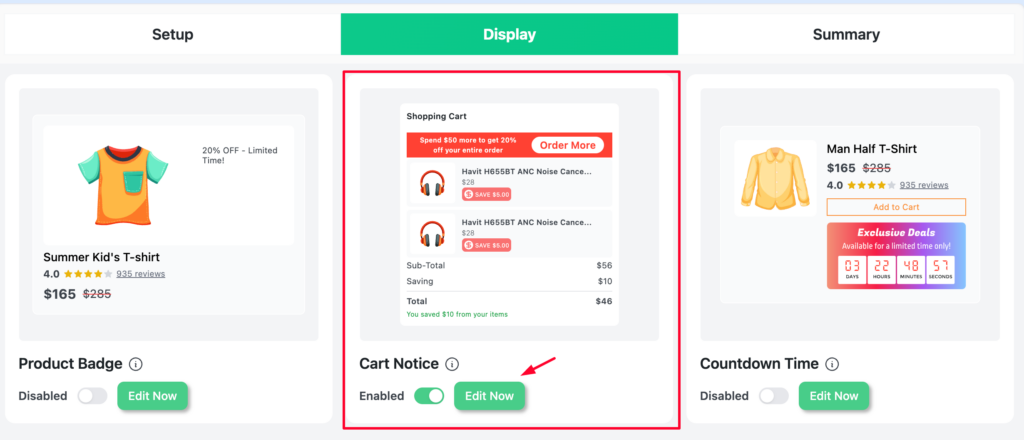
Step 2: Enable Cart Notice #
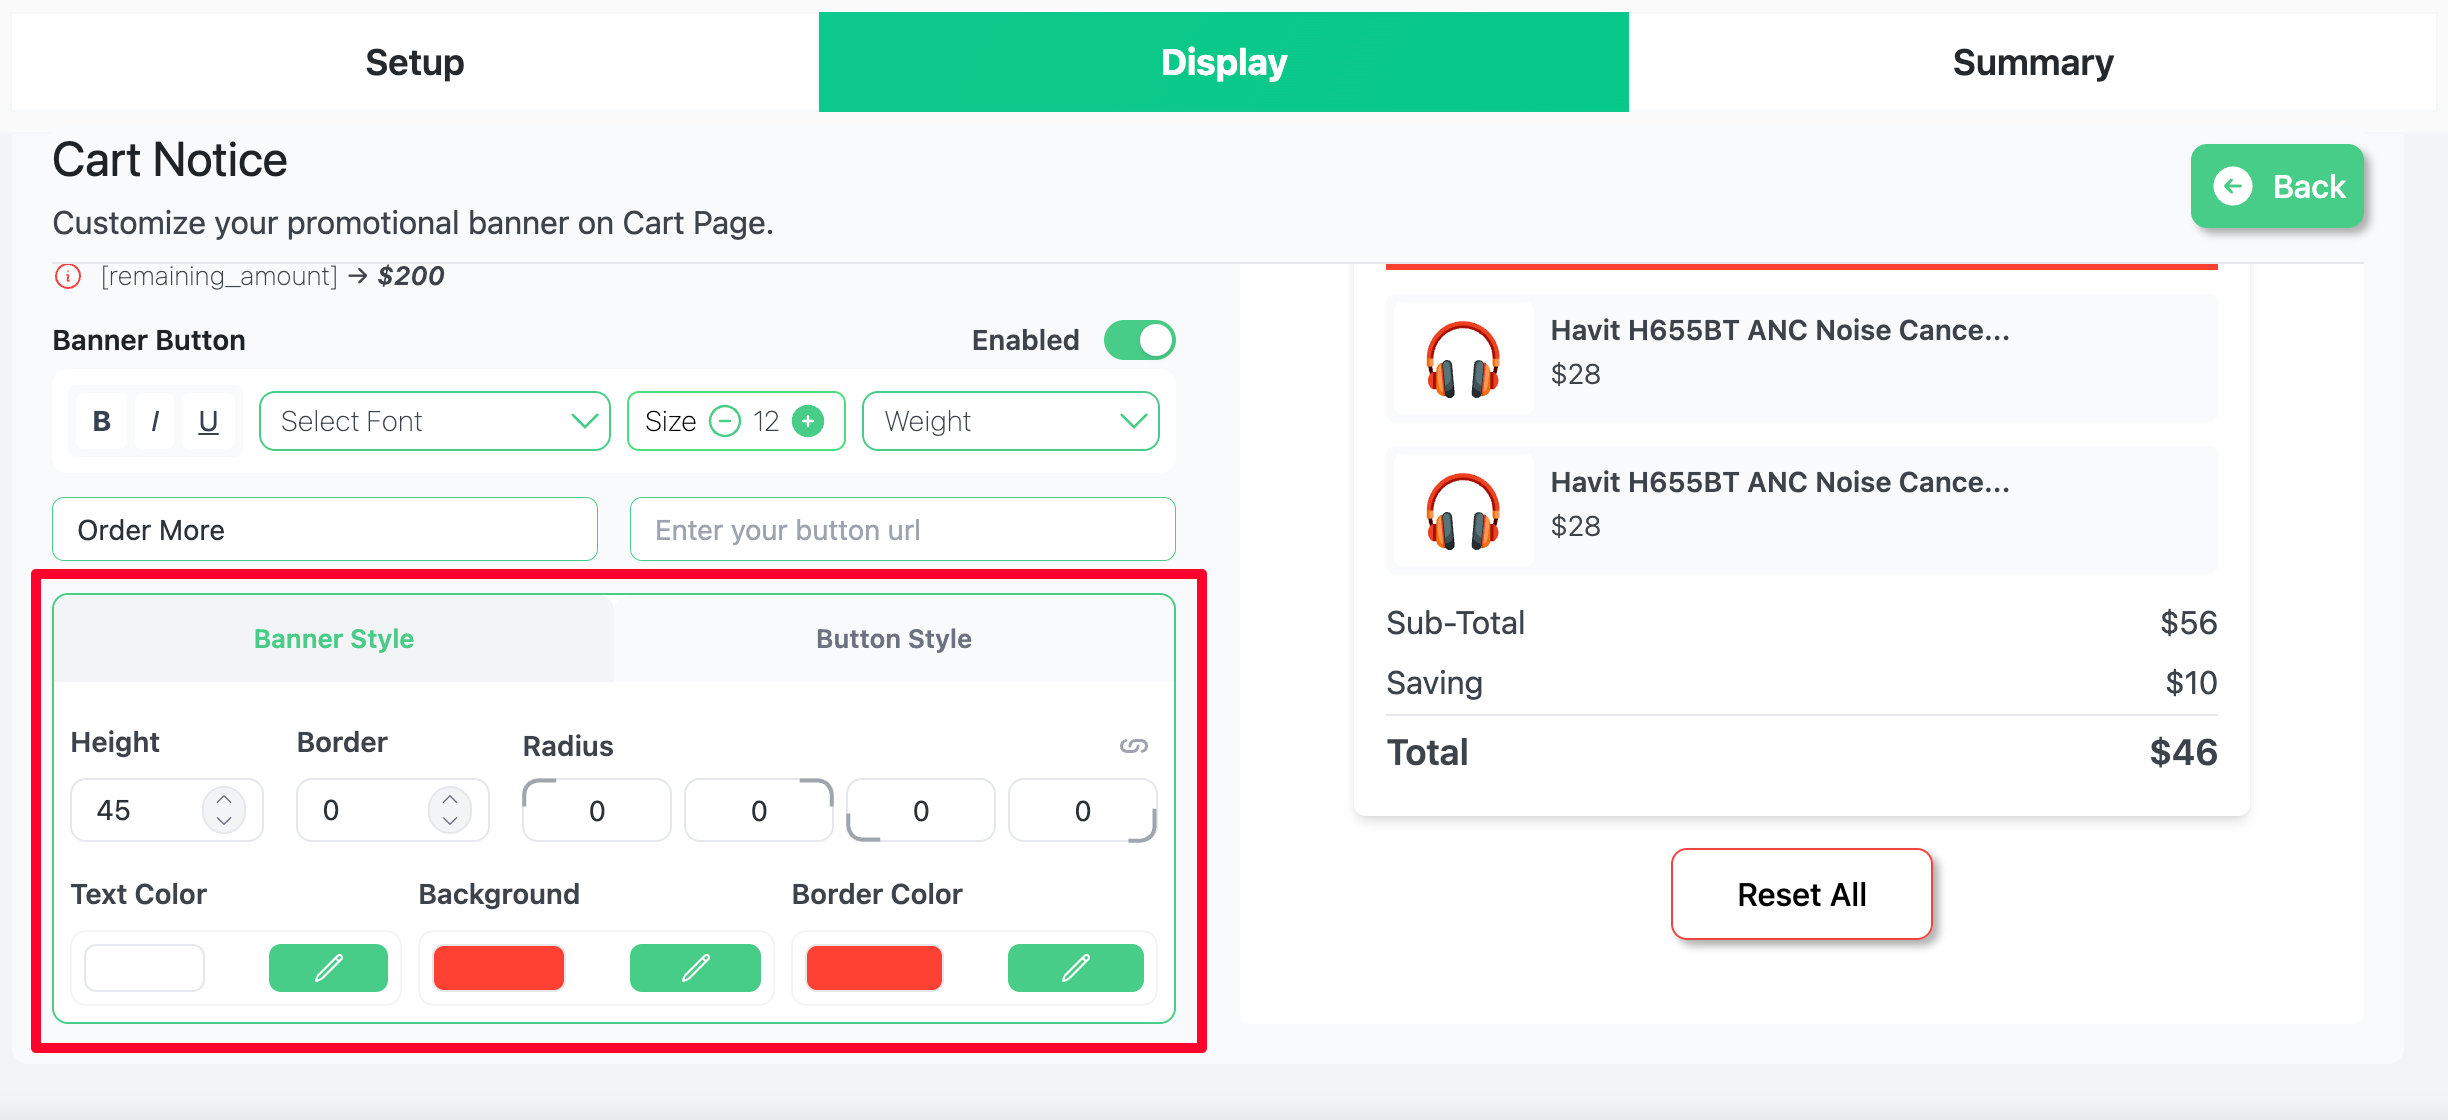
- Locate the Cart Notice block
- Toggle it to Enabled
- Click Edit Now to open the customizer
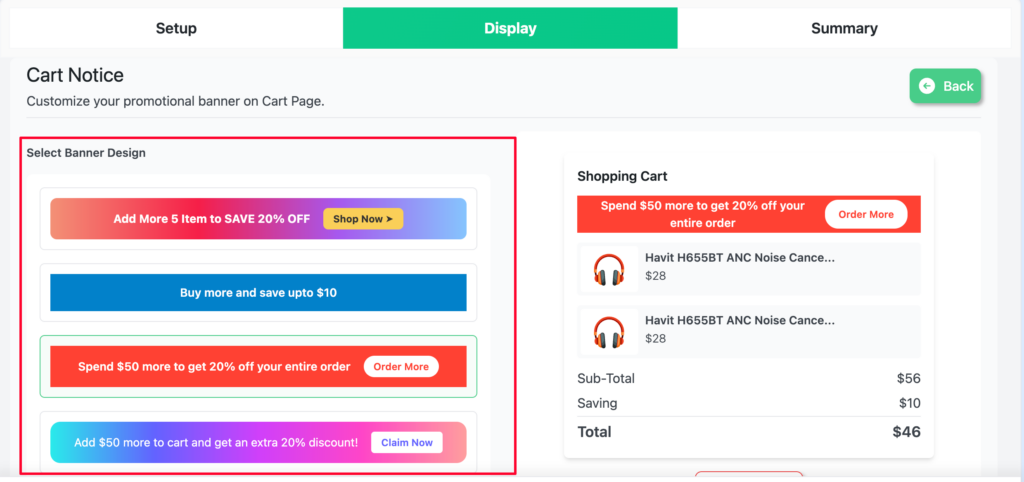
Step 3: Choose a Banner Design #
Select one of the 4 pre-built banner designs as your starting point:
- Dark green solid
- Purple gradient
- White with border
- Soft white
All designs are fully customizable after selection.
Step 4: Write the Banner Text with Placeholders #
In the Banner Text field, enter your promotional message. Use dynamic placeholders to make the message update automatically for each shopper:
| Placeholder | What It Inserts | Example |
|---|---|---|
| [discounted_percentage] | The campaign discount percentage | 20% |
| [discounted_amount] | The discount as a currency value | $50.00 |
| [remaining_amount] | How much more to spend to qualify | $20.00 |
| [remaining_quantity] | How many more items are needed (quantity condition) | 3 items |
| [remaining_cart_items] | How many more product types are needed (count condition) | 2 products |
Example: “Spend [remaining_amount] more and get [discounted_percentage] off your order!”
Output: “Spend $20.00 more and get 20% off your order!”
Below the text field, Disco shows a live preview of what each placeholder resolves to based on your campaign rules.
![Banner Text field with placeholder values shown below (e.g. [discounted_percentage] → 20%)](https://discoplugin.com/wp-content/uploads/Banner-Text-field-with-placeholder-values-shown-below-e-g-discounted-percentage-20.png)
Step 5: Configure the Banner Button (Optional) #
- Toggle Banner Button to Enabled
- Enter button text — e.g. Shop Now
- Enter a destination URL — e.g. /shop
- Adjust font, colors, border, and radius under Button Style
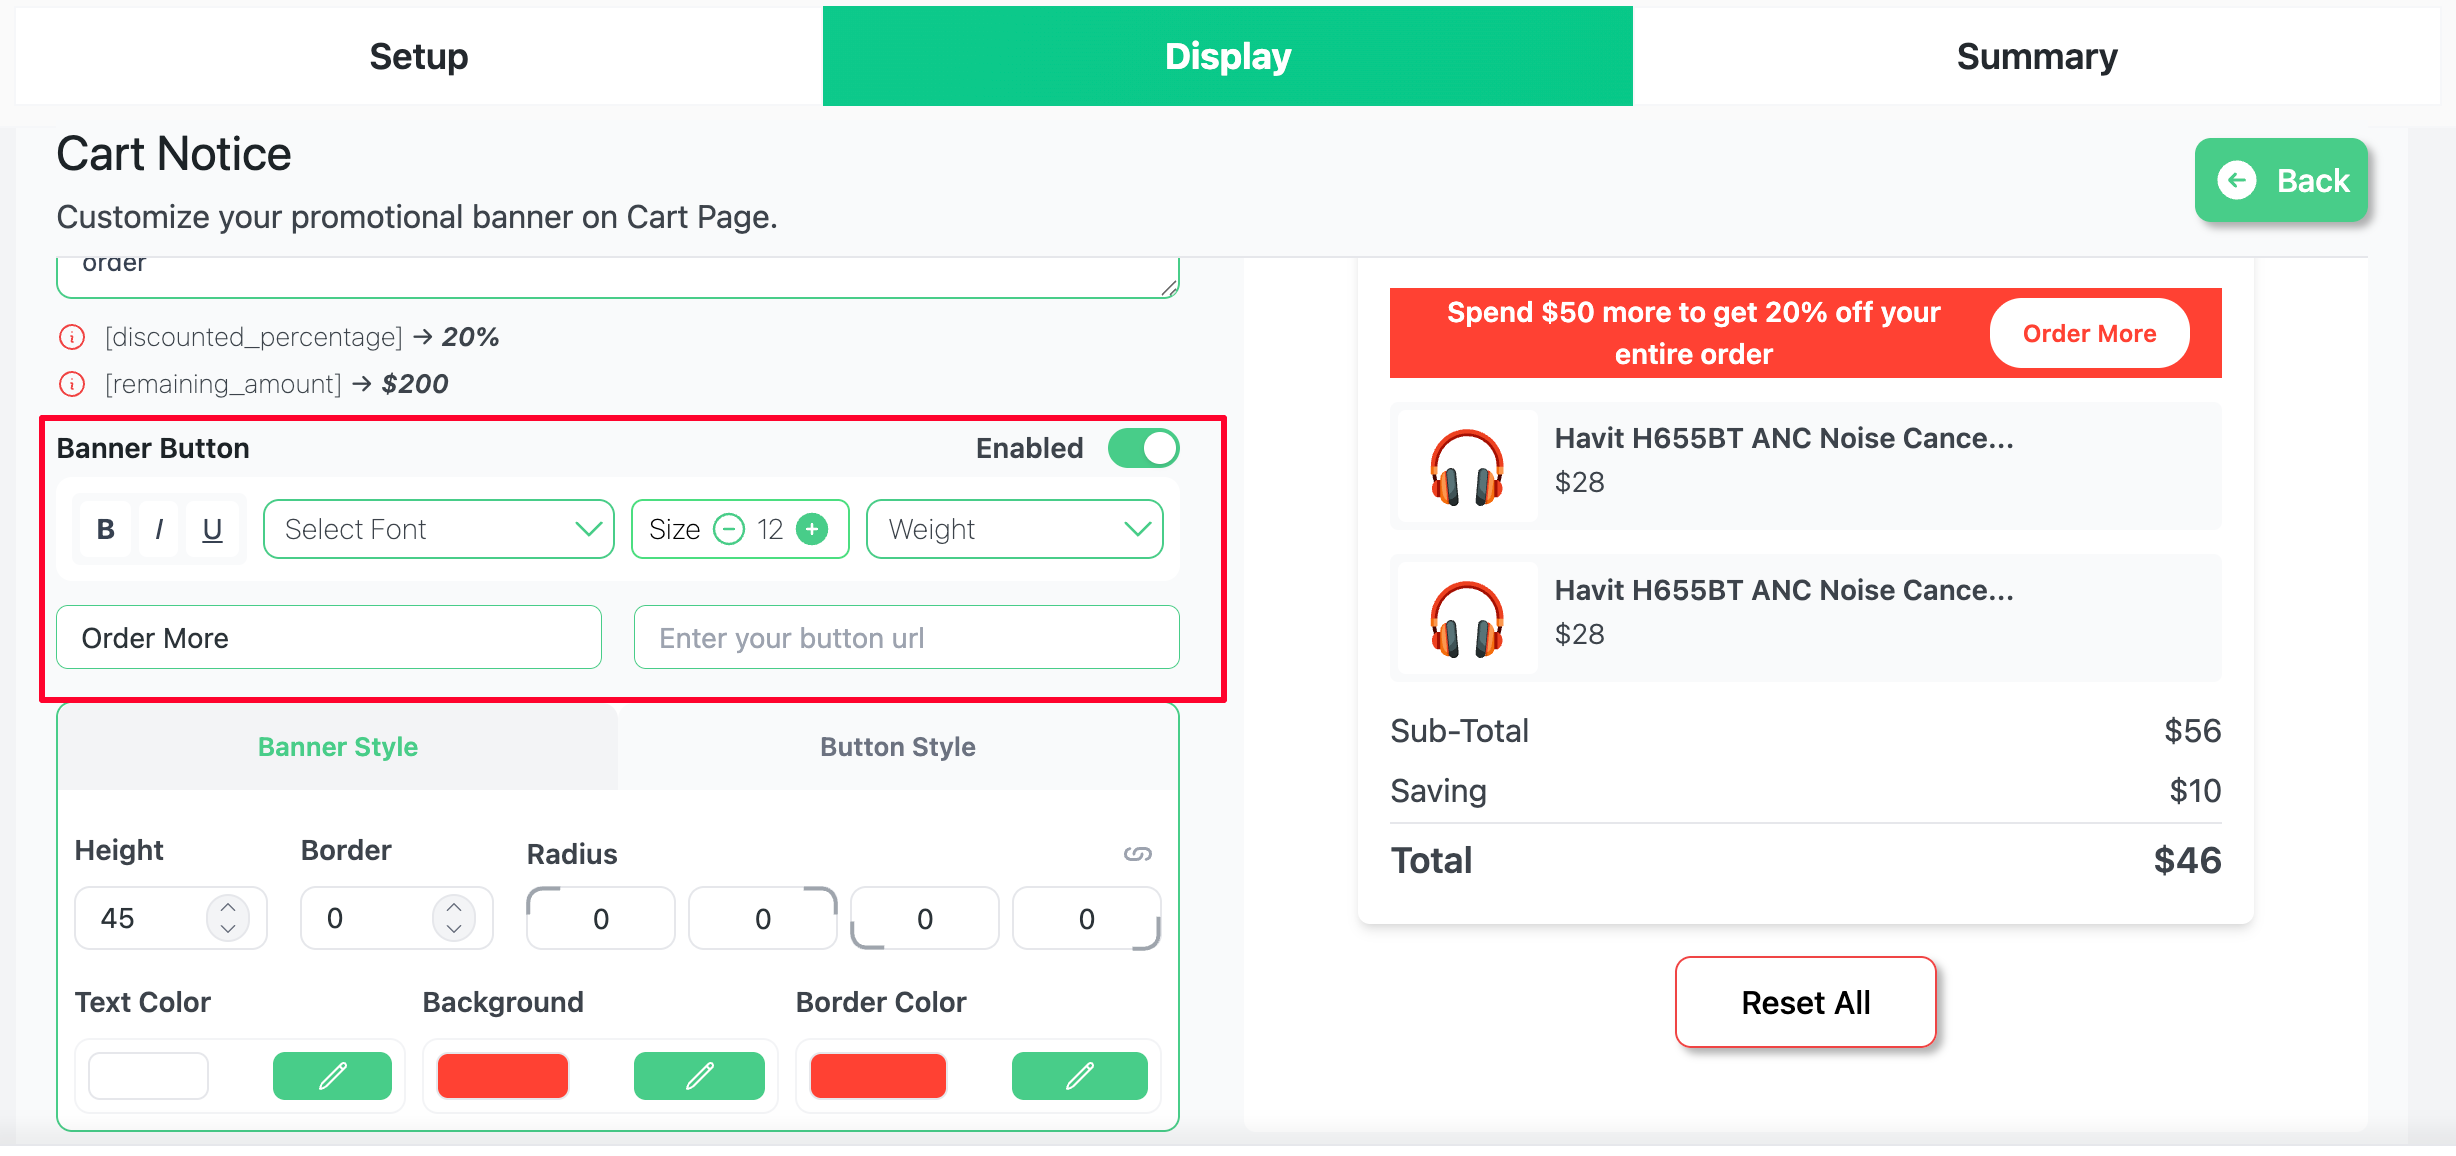
Step 6: Style the Banner #
Use the Banner Style controls to match your store’s look:
- Height — minimum banner height (default: 45px)
- Border & Radius — border width, color, and corner roundness
- Text Color — color of the message text
- Background — solid color or gradient
Step 7: Save and Publish #
- Click Update to save
- Ensure the campaign Enabled toggle is on
- Click Publish to go live
Result: Cart Notice on the Cart Page #
Open your WooCommerce cart page. The Cart Notice banner will appear at the top of the cart, updating in real time as the customer changes their cart.
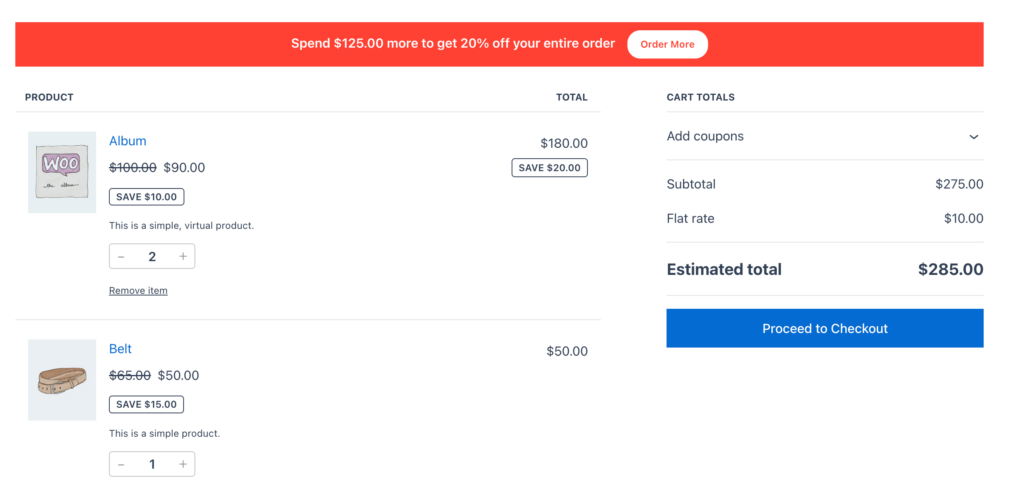
“Spend $320.00 more and get 20% off your order! Shop Now →”


