Countdown Timer is a Pro feature that displays a live ticking timer on your product pages. It creates urgency around your active discount — showing customers exactly how much time is left before the offer expires.
Once you’ve created a campaign with an end date, follow these steps to enable and customize the Countdown Timer.
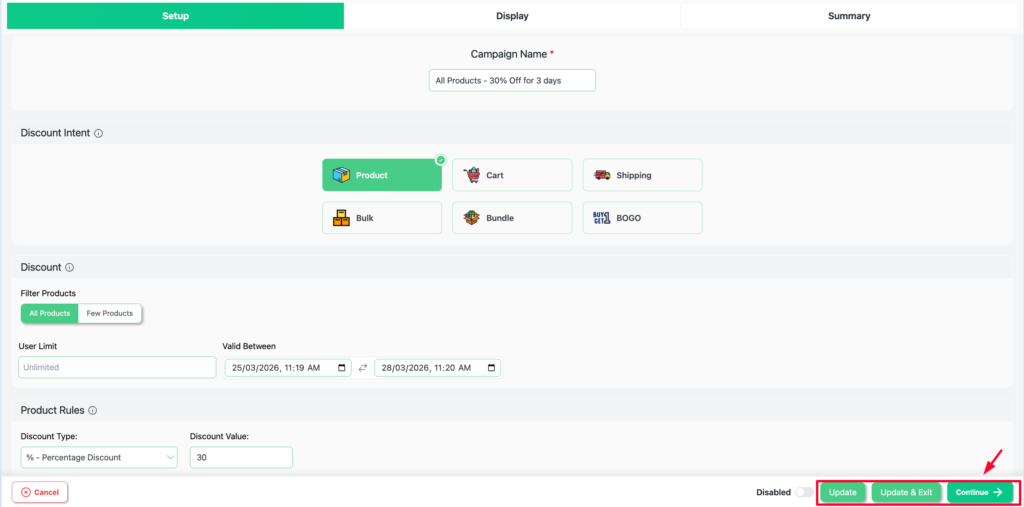
Step 1: Go to the Display Tab #
After setting up your campaign, click the continue button at the bottom of the campaign setup.
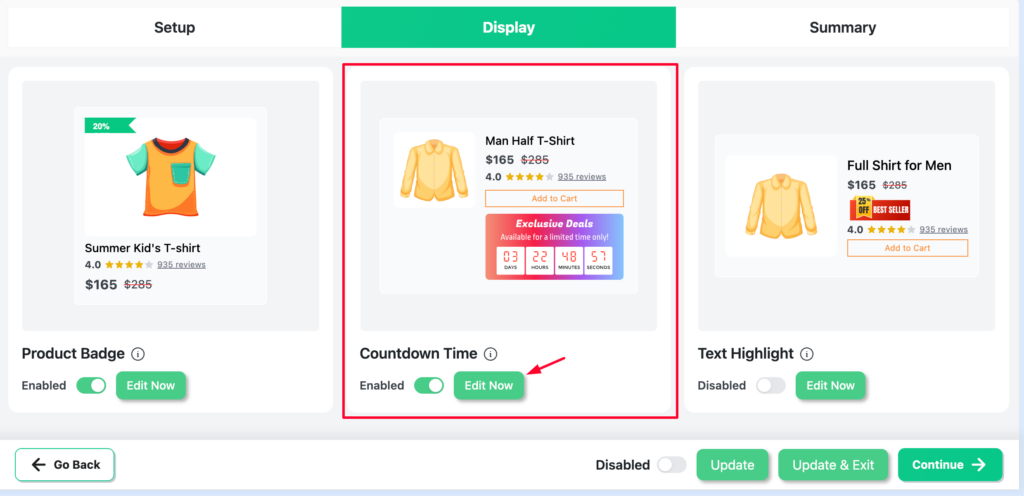
Step 2: Enable Countdown Timer #
- Locate the Countdown Time block
- Toggle it to Enabled
- Click Edit Now to open the customizer
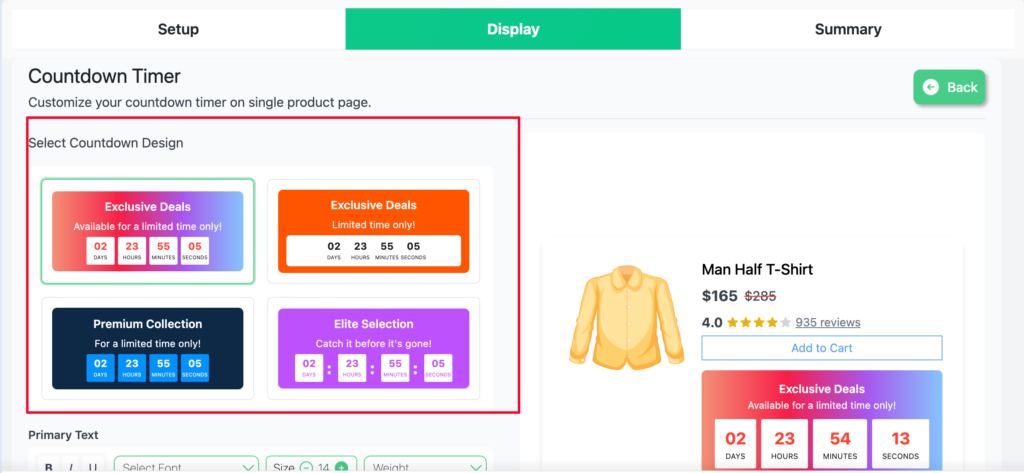
Step 3: Choose a Countdown Design #
Select one of the 4 pre-built countdown designs as your starting point:
- Pink gradient with bold digits
- Orange solid with compact layout
- Dark / navy with bright digit boxes
- Purple gradient with dot separators
All designs are fully customizable after selection.
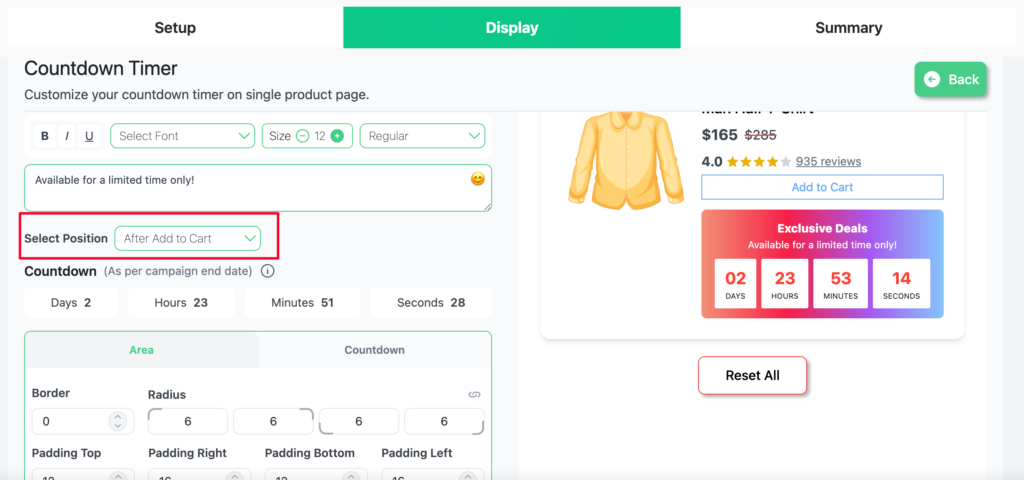
Step 4: Add Primary and Secondary Text #
You can add two lines of text above the countdown boxes to give customers context:
- Primary Text — the main heading, e.g. “Exclusive Deals”
- Secondary Text — a supporting line, e.g. “Available for a limited time only!”
Both fields support font, size, and weight controls. Leave them blank to show the timer only.
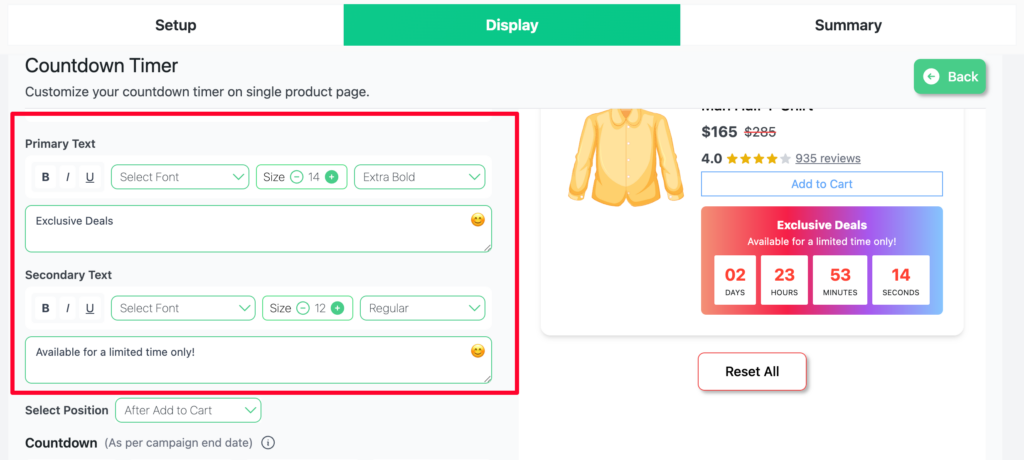
Step 5: Set the Display Position #
Use the Select Position dropdown to choose where the timer appears on the product page:
- Before Add to Cart
- After Add to Cart
- Before Product Title
- After Product Title
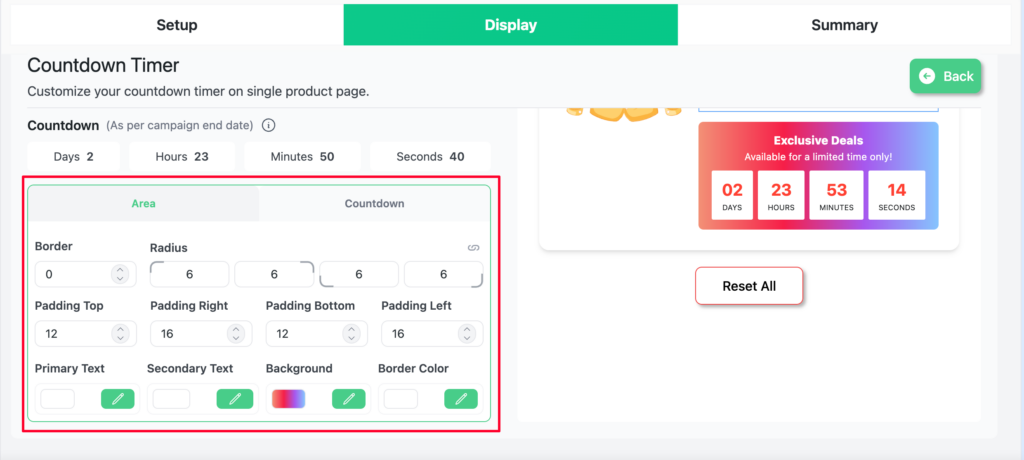
Step 6: Style the Timer #
The style controls are split into two tabs — Area and Countdown:
Area tab — controls the overall container:
- Border & Radius — border width and corner roundness
- Padding — spacing inside the container (Top, Right, Bottom, Left)
- Primary Text / Secondary Text — text colors
- Background — solid color or gradient
Countdown tab — controls the individual time boxes:
- Box background color, border, and radius
- Digit color, size, and weight
- Label color and size (Days, Hours, Minutes, Seconds)
- Separator style between boxes
Step 7: Save and Publish #
- Click Update to save
- Ensure the campaign Enabled toggle is on
- Click Publish to go live
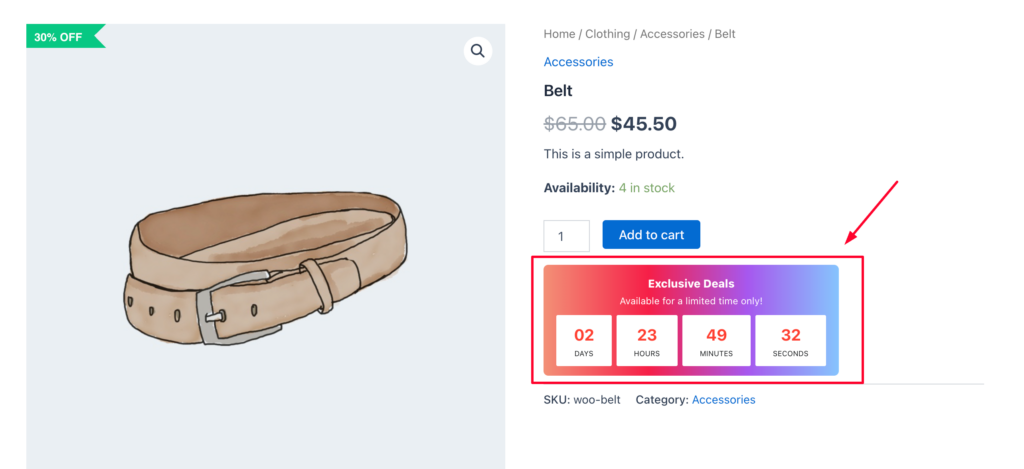
Result: Countdown Timer on the Product Page #
Open a product page covered by the campaign. The Countdown Timer will appear at the selected position, ticking down in real time toward the campaign end date.
“Exclusive Deals — Available for a limited time only! 01 : 23 : 59 : 22”
📌 Note: The Countdown Timer requires a campaign end date (Valid Between) to display. It automatically hides when the timer reaches zero — no manual intervention needed. Countdown Timer is a Pro-only feature — requires Disco Pro


