Text Highlight is a Pro feature that displays a styled promotional badge on your product pages. It draws attention to your active discount with a compact, eye-catching label — showing the discount value or a custom message directly on the product.
Once you’ve created a campaign, follow these steps to enable and customize the Text Highlight badge.
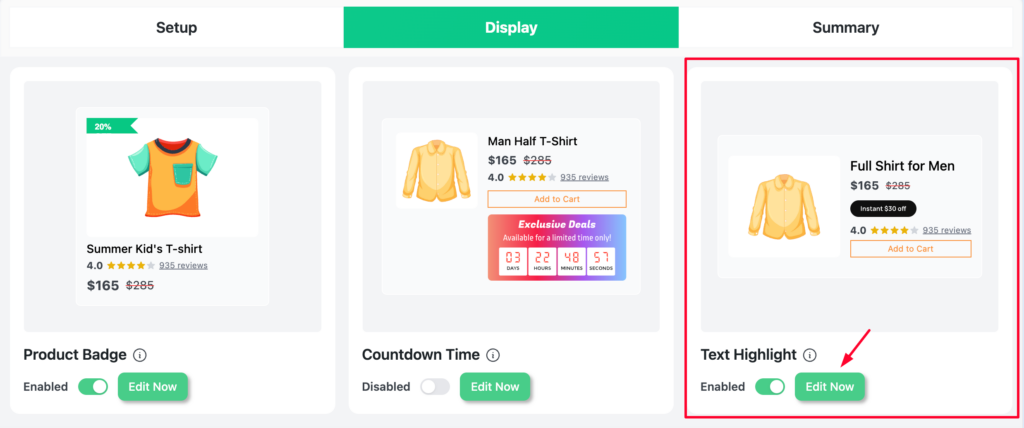
Step 1: Go to the Display Tab #
After setting up your campaign, click the Display tab at the top of the campaign editor.
Step 2: Enable Text Highlight #
- Locate the Text Highlight block
- Toggle it to Enabled
- Click Edit Now to open the customizer
Step 3: Choose a Badge Type #
First, select the badge type using the Choose Badge option at the top:
- Editable — a plain text badge. You write the full message yourself.
- Value Editable — a badge with an SVG icon shape. Best for showing discount values like “Big savings: $10”.
Step 4: Select a Badge Design #
Choose one of the 6 pre-built badge designs as your starting point:
- Purple arrow ribbon (e.g. “Big savings: $20”)
- Yellow solid (e.g. “Holiday Offer”)
- Black rounded (e.g. “Instant $30 off”)
- Red solid (e.g. “Limited Stock”)
- Purple solid (e.g. “Limited Stock”)
- Green icon with text (e.g. “Save Instantly 20%”)
All designs are fully customizable after selection.
Step 5: Write the Badge Text with Placeholders #
In the Primary Text field, enter your badge message. Use placeholders to insert dynamic discount values automatically:
| Placeholder | What It Inserts | Example |
|---|---|---|
| [discounted_percentage] | The campaign discount percentage | 30% |
| [discounted_amount] | The discount as a currency value | $10.00 |
Example: “Big savings: [discounted_amount]”
Output: “Big savings: $10”
Below the text field, Disco shows a live preview of what each placeholder resolves to based on your campaign rules.
![Primary Text field with placeholder value shown below (e.g. [discounted_percentage] → 30%)](https://discoplugin.com/wp-content/uploads/Primary-Text-field-with-placeholder-value-shown-below-e-g-discounted-percentage-30-1024x474.png)
Step 6: Set the Badge Size and Position #
- Width — badge width in pixels (default: 150)
- Height — badge height in pixels (default: 40)
- Border — border width around the badge
- Radius — corner roundness of the badge
- Select Position — where the badge appears on the product page (e.g. After Add to Cart)
Step 7: Style the Badge Colors #
Use the color pickers at the bottom to match the badge to your store’s branding:
- Font Color — color of the badge text
- Background Color — fill color of the badge
- Border Color — color of the badge border (visible if Border > 0)
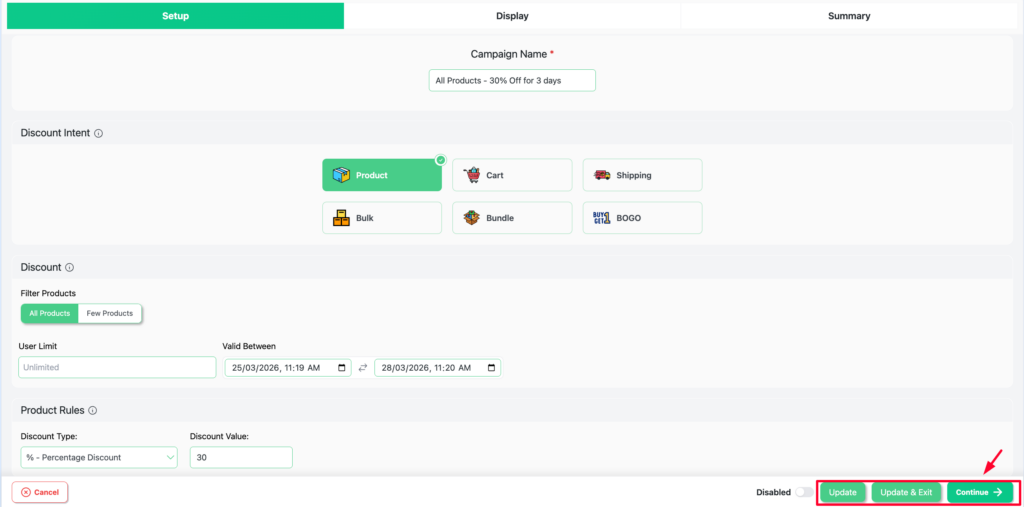
Step 8: Save and Publish #
- Click Update to save
- Ensure the campaign Enabled toggle is on
- Click Publish to go live
Result: Text Highlight on the Product Page #
Open a product page covered by the campaign. The Text Highlight badge will appear at the selected position on the product page, showing your promotional message with the discount value automatically filled in.
“Big savings: $10” — displayed as a styled badge on the product page
📌 Note: You can use Text Highlight with any campaign type. The [discounted_amount] and [discounted_percentage] placeholders pull values directly from your campaign rules. Text Highlight is a Pro-only feature — requires Disco Pro.


