Discounts are your secret weapon to recover a whopping 87% of your abandoned carts. That means you bring almost all of ‘em back and make ‘em buy from you.
Discounts are the pied piper for online stores that lure shoppers to your store and hit that Place Order button, leading to sales and AOV growth.
But how to add a discount on WooCommerce products?
To apply discounts to WooCommerce product prices, utilize the built-in coupon tool for basic offers or install a plugin like Disco for advanced rules. Within Disco, create discount rules by specifying types (percentage or fixed), target products, and conditions (e.g., cart total). Save the rule to enable automatic adjustments.
In this guide, we’ll break down step-by-step methods, including Disco’s advanced discounts, plus pro tips to maximize sales.
How to Add a Discount on WooCommerce Products?
Suppose you want to set up automated, personalized, and advanced discount strategies to cater to different audience segments and drive sales and revenue. In that case, WooCommerce discount plugins are your best choice.
Our pick of the best WooCommerce discount plugin is called Disco.

Do you want to enjoy all the premium features of a paid discount plugin without paying a dime? Then Disco is your BFF (Best Friend Forever!).
This free plugin offers a plethora of features to create all sorts of discount strategies without needing any coding or skills. You only need to click a few times, and Voila, your powerful discount campaign will be up and running automatically.
Whether it is basic percentage and fixed product discounts or advanced cart-based rules or even discounts based on customer behavior, this free plugin has your back. Most importantly, it’s incredibly easy to set up any rule.
Let us walk you through setting up WooCommerce automatic discounts using Disco.
- Example Scenario: “10% Off on All Products over the Weekend”
Step 1: Install the Free WooCommerce Discount Plugin Disco
- Log in to your WordPress admin panel.
- Go to Plugins >> Add New and search for Disco.

- First, click Install and then Activate to enable the plugin.
Step 2: Create a New Discount Campaign
Navigate to the Disco dashboard and –
- Click the Create a Discount button.

- Give your campaign a name.

Step 3: Configure Discount Rules
To setup 10% Off on All Products over the Weekend, follow these steps –
- Select the Product option from the Discount Intent section.

- Under Discount, select All Products.

- Select the start and end date and time from the Valid Between fields.
- From the Discount Type dropdown, select the Percentage Discount option.

- Enter your value in the Discount Value box.
Step 4: Save and Test
- Click the Save button to enable the WooCommerce discount rule.
- Disco will immediately start displaying the discount amounts on the front.

In addition to the discounted price, Disco also displays a Sale badge and showcases original prices in strikethrough.
This is how to add a discount on WooCommerce products using the WooCommerce discount plugin free Disco.
Advanced Discount Strategies: Beyond Basic Coupons & Discounts
Basic discounts get sales, but advanced strategies turn casual shoppers into loyal fans. Let’s explore some WooCommerce dynamic pricing and discount rules that boost revenue, clear inventory, and keep customers coming back.
1. Tiered Pricing: “Buy More, Save More”
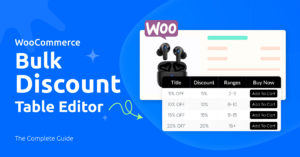
WooCommerce bulk discounts or Tiered pricing rewards customers for buying in bulk. The more they add to their cart, the bigger the discount they unlock—think of it as a volume-based “thank you.”
Why use it:
- Upsells without pressure: Customers willingly add items to hit the next discount tier.
- Clears inventory fast: Perfect for seasonal products or overstocked items.
- Boosts perceived value: Shoppers feel like they’re “winning” a deal.
Example:
- Buy 2-5 items, get 10% off.
- Buy 6-10 items, get 15% off.
- Buy 11+ items, get 25% off.
How to Add a Discount on WooCommerce Products for Bulk Purchases?
Here are the steps to create the above WooCommerce tiered pricing example –
- Create a new rule and name it.
- Select the Bulk discount intent and choose your products.

- Input 2 in the Minimum Quantity and 5 in the Maximum Quantity box. Select the Percentage option and enter the value.

- Click the Add More button twice to add two more rows.

- Set values according to your strategy. Keep the last Maximum field empty to keep offering 25% off on products over 11.

- Save the rule. Test from the cart page. Here’s the result for 2-5 items –

- Here’s what the cart page returns for 6-10 items.

- And finally for 11 or more products, it will apply a 25% discount.

2. Cart Threshold Discounts: “Spend X, Save Y”
Offer a WooCommerce cart discount when shoppers hit a specific cart total. It’s like dangling a carrot to push them over the finish line.
Why use it:
- Reduces abandoned carts: Customers add one more item to hit the threshold.
- Increases AOV: Small discounts drive bigger purchases.
- Flexible for promotions: Works for holidays, flash sales, or slow seasons.
Example:
- “Spend $75 or more and get 10% off.”
How to Add a Discount on WooCommerce Products Based on Cart Condition?
For this discount rule, you will need to add a condition. Disco conditions are filters that allow you to customize and personalize your discount rules further based on criteria such as customer behavior, product type, cart conditions, etc.

Disco offers several cart-based conditions. For the above example, follow these steps.
- After creating a new rule, select the Cart intent.

- Select your products and set the percentage value.

- Click the Add Condition button.
- Select the Cart Subtotal option.

- Choose the Greater Than Or Equal operator and set your minimum cart value.

- Save the rule and add $75 worth of products to the cart to test the rule.

3. Loyalty Rewards: “User Role Based Discounts”
Think of this as rolling out the red carpet for your best customers. VIP discounts reward repeat buyers, email subscribers, or loyalty program members with exclusive perks they can’t get elsewhere.
Disco also supports WooCommerce membership sites. You can create subscription-tiered-based discounts to encourage shoppers to upgrade to a higher tier.
As a result, you can reward customers for upgrading their membership or subscription tiers with escalating discounts. The higher their plan, the bigger the perks—think of it as a loyalty ladder.
Why use it:
- Turns casual shoppers into fans: Nothing says “we value you” like a personalized discount.
- Drives repeat sales: Customers return to unlock rewards, boosting lifetime value.
- Unlocks insights: Track who engages most—your VIPs—and tailor future offers.
Example:
- “Platinum Members Get 30% off for a Month.”
How to Add a Discount on WooCommerce Products Based on User Role?
Here’s how to create these WooCommerce advanced discounts.
- Create a new rule and select the Product intent.
- Specify your products and set the time and date.

- Set the percentage value.
- Add the condition User Role.
- Type in or scroll and select your target user role.

Now, Platinum members can enjoy 30% off their purchases for a month. Also, any user who upgrades to a Platinum membership can also take advantage of the discount.
4. Free Shipping Thresholds: “Spend More, Save on Shipping”
Offer free shipping when customers hit a specific cart total. It’s a win-win: they save on fees, and you boost order values.
Why use it:
- Reduces cart abandonment: Shoppers hate shipping costs—waive them to seal the deal.
- Encourages upsells: Customers add extra items to hit the threshold.
- Builds goodwill: Free shipping feels like a gift, not a discount.
Example:
- “Enjoy Free Shipping on Spending $60 or more”
How to Add a Free Shipping Discount on WooCommerce?
Here are the steps –
- Select the Shipping intent on the new rule window.
- Specify products and discount validity time.
- Add the condition Cart Subtotal.

- Select the Greater Than Or Equal operator and set the value.
- Save and test from the front.

5. Category Discounts: “Targeted Deals for Niche Shoppers”
Ever wish you could wave a magic wand over entire sections of your store?
Category discounts let you do just that—slashing prices across a whole product group (like “Yoga Gear” or “Organic Skincare”) to attract specific shoppers or clear out seasonal stock.
Why use it:
- Declutters your inventory: Perfect for dusty summer flip-flops in winter or last year’s tech gadgets.
- Lures niche buyers: Yoga enthusiasts? Coffee snobs? Target their passion points directly.
- Saves time: No tagging 50 products individually—apply discounts in one click.
Example:
- “Get $15 off on ‘Summer Collection’ items when you buy 2 or more!”
How to Add a Discount on WooCommerce Products Based on Category?
To create the above example, we will need to add multiple conditions. Here’s how –
- After naming your new discount rule, select the Cart intent.

- Select All Products to offer the discount on the entire category.
- From the Discount Type, select Fixed Discount and input your value.
- Add the condition Categories.

- Search and select your target category, ‘Summer Collection.’
- Click the Add Another Condition button.

- Select the AND logic and then select the Cart Items Quantity filter.

- Set the quantity value with the Greater Than Or Equal operator.

- Save and test the rule by adding products from the target category.

WooCommerce Built-In Coupons vs. Plugins (Disco)
WooCommerce’s built-in coupons work for simple discounts, but scaling promotions? That’s where plugins like Disco shine. Both tools are free, but one’s a pocketknife—the other’s a Swiss Army knife.
Let’s break down key differences to help you pick the right tool for your goals:
| Feature | Built-In Coupons | Disco Plugin |
| Automatic Discounts | ❌ No | ✅ Yes |
| Tiered Pricing | ❌ No | ✅ Yes |
| Cart-Level Rules | ❌ Limited | ✅ Advanced |
| Bulk Discounts | ❌ Manual setup | ✅ 1-click apply |
| Free Shipping Rules | ❌ Manual coupon setup | ✅ Auto-apply |
| User Role Discounts | ❌ Basic restrictions | ✅ Target VIPs, members, guests |
| Dynamic Pricing | ❌ Fixed discounts only | ✅ Adjust based on cart behavior |
| Scheduling | ❌ Only expiry dates | ✅ Start/end dates + times |
| Price | Free | Free (WordPress.org) |
Wrap up
Learning how to add a discount on WooCommerce products starts with understanding your store’s needs.
Built-in coupons handle simple promotions, but if you’re running frequent sales, tiered pricing, or targeted deals, plugins like Disco offer the flexibility to automate and scale discounts effortlessly.
Both methods are free, so choose the tool that aligns with your goals—whether it’s quick codes or advanced, hands-off strategies. Start experimenting today and turn more visitors into paying customers!