Quick Summary:
To change WooCommerce sale badge text, color, and size, you can use two methods: the Disco Plugin or custom PHP/CSS code. The recommended method is using the Disco Plugin because it requires no coding skills.
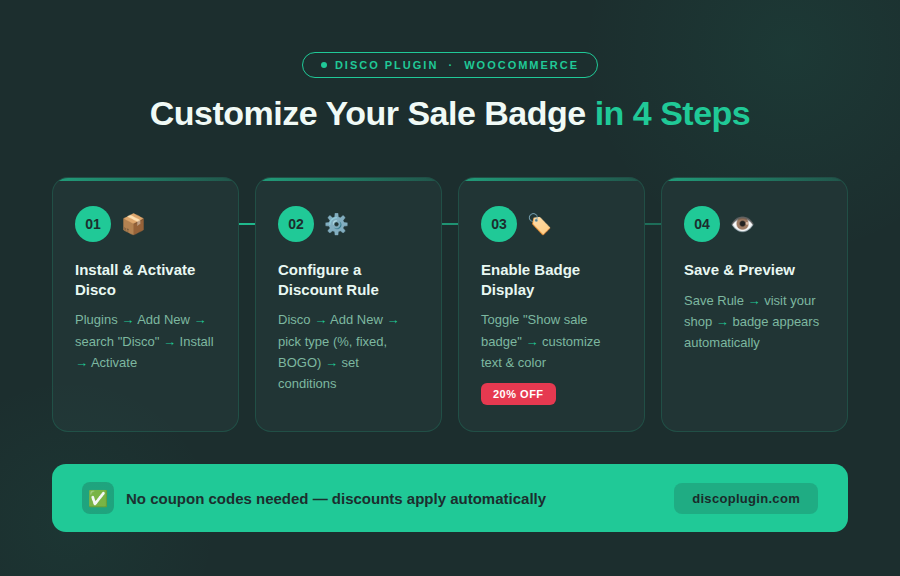
Steps: Install Disco → Create a Campaign → Enable Badge Display → Customize badge text, color, and size → Save and Preview.
A generic “Sale Badge” is the participation trophy of e-commerce. Every store has it, but nobody notices it.
Your competitors have already moved beyond the default WooCommerce sale badge. A badge that says “30% off,” “Best Seller,” “Hot Deal” communicates value instantly. In fact, leading companies like Amazon and ASOS heavily depend on dollar-off badges to drive purchasing decisions.
According to studies by Baymard Institute, nearly 70% of shoppers abandon their carts before checkout, due to weak promotional signals. Monetate reports that well-designed product badges can improve conversions by up to 55%.
The good news? You can change your WooCommerce sale badge text, color, and size in less than 5 minutes. This requires no coding, no developer, and there’s absolutely no risk of breaking your store layout.
Whether you want to replace the default “Sale!” label with a dynamic discount percentage, customize the badge color to match your brand, or adjust the badge size for better visibility — this guide walks you through every step. You’ll also learn the CSS method for developers and how to fix the common “WooCommerce sale badge not showing” issue.
Let’s walk through how to customize your WooCommerce sale badge step by step.
Method 1: How to Customize Your WooCommerce Sale Badge (No-Code)
Most badge tutorials will advise you to start your journey by “opening your functions.php file.” We don’t do that here. No CSS file, no child theme, no 2 a.m panic over a white screen.
With the Disco plugin, everything can be managed through your WordPress dashboard, and the free version is available on WordPress.org. This no-code method is the simplest way to change sale badge WooCommerce text, colors, and styling — and it works as a complete discount badge WordPress solution right out of the box.
Step 1: Install and Activate Disco
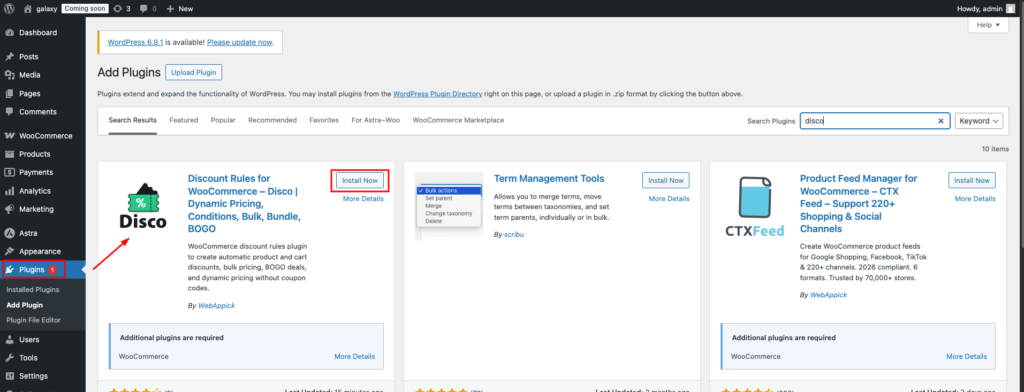
Open your WordPress dashboard, head to Plugins → Add New. Search for “Disco”, click Install, and activate the plugin. After activation, the Disco menu will be automatically added to your admin sidebar.
Step 2: Configure Your Campaign
Click on “Create a discount”, then proceed through the steps outlined below to complete the configuration process:
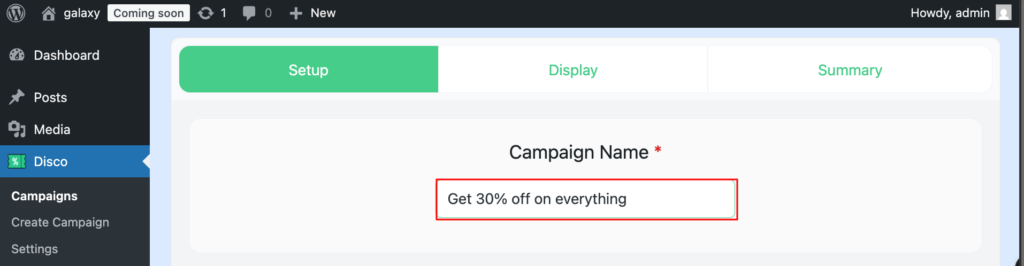
Add a campaign name: Enter a clear, descriptive name, like “50% discount on all products.” This internal label is only for your own reference. A well-crafted campaign name should communicate two key details instantly — the discount being provided and where it applies.
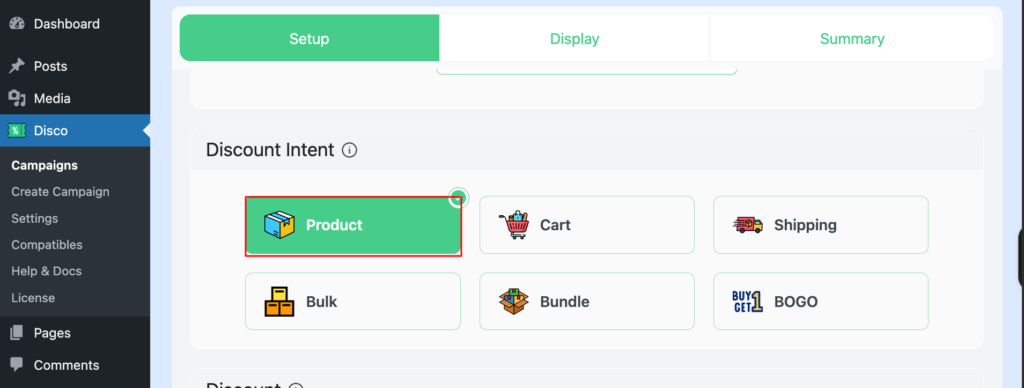
Select discount intent: Disco provides 6 types of promotional campaigns: product, cart, shipping, bulk, bundle, BOGO. Pick the one that best fits your needs. For this example, select product-based intent. Each discount type lets you create different WooCommerce product badge styles tailored to specific promotion strategies.
Set target products: With Disco, you can target discounts, narrowing to one product, a selected group of products, a specific WooCommerce category, or all products in your catalog. For product-specific discounts, use the filter section to search and select the products you want. In this case, we’re choosing all products as a target.

Set validity dates: Campaigns can be scheduled by setting a start and end time. Such as, Valid between 19/05/2026–24/05/2026. Leave the date fields empty if you want your campaign to run continuously.
Pro tip:
The Pro version of Disco allows you to set the user limit feature that prevents excessive use of discount offers.

Set discount type: Select your preferred discount type — fixed discounts or percentage discount. Select the percentage discount and enter the value 30 for this example.

Set conditions (optional): You can set any conditions based on ID, title, purchase history, etc. Conditional targeting helps you display your sales badge only to the right audience segments, improving both relevance and conversion rates.
 9")
Step 3: Enable Badge Display
After you’ve configured your campaign, click Continue. Then select the product badge display. Click Edit now.
This is where you control exactly how your WooCommerce product badge looks on the storefront — including the text, style, and positioning of the on-sale badge.
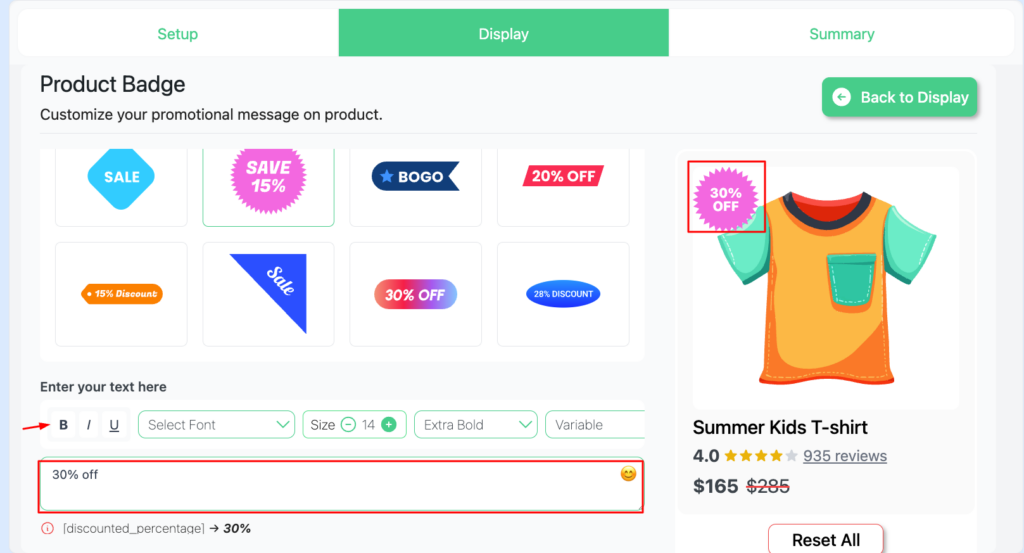
Change the WooCommerce Sale Badge Text
“Sale” is not only one of the least compelling messages, but also too generic to provide any value to customers. Replace it with something that gives a stronger message and a clear reason to buy for the shoppers.
Available options:
- Custom text: Align your campaign with engaging labels like “Hot Deal”, “Limited Offer,” or “Members Only.” Custom sale badge text helps your WooCommerce store stand out from every other shop running a generic promotion.
- Dynamic percentage: Select [discounted_percentage]. Then Disco will automatically calculate and display badges like “30% off” or “20% off.” This dynamic percentage feature is especially powerful because shoppers respond better to specific numbers than vague labels.
Studies from the CXL Institute reveal that “% OFF” labels consistently outperform the generic “Sale” badges. That is because they communicate clear, measurable value. On top of that, during peak season, Shopify’s BFCM data reports that urgency-based text can boost conversions by up to 14%.
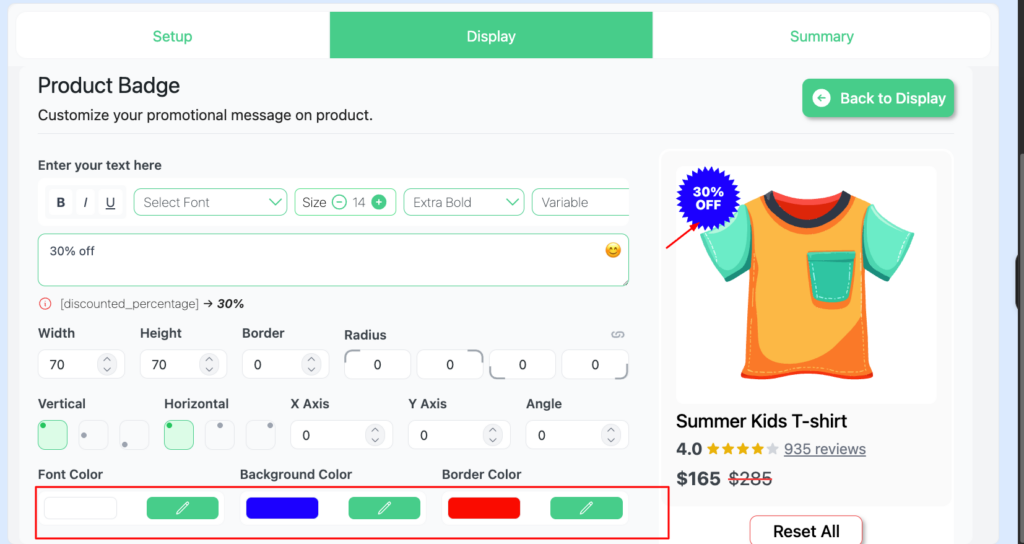
Change the WooCommerce Sale Badge Color
Within the Disco dashboard, scroll down to access the color controls. Here you can adjust three settings:
- Background color — controls the primary badge fill.
- Font/Text color — improves contrast and readability.
- Border color — adds definition and aligns with your store palette.
Research from CCICOLOR on color and purchasing found that shoppers make purchase decisions within 90 seconds, and up to 90% of that initial decision is influenced by color alone. Your badge color isn’t just decorative; it’s a conversion tool.
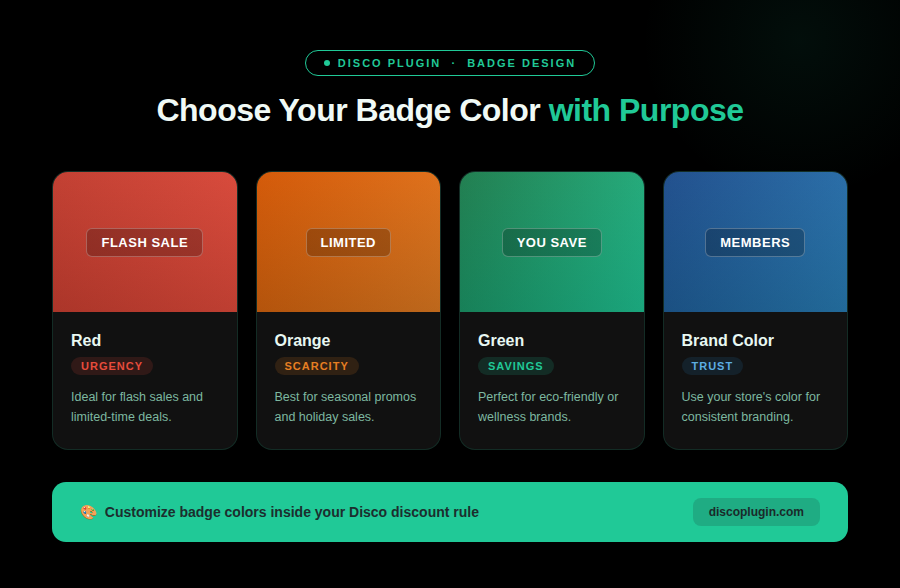
Quick badge color guide for WooCommerce stores:
- Red — Urgency. Ideal for flash sales and limited-time deals.
- Orange — Scarcity. Best for seasonal promos and holiday sales.
- Green — Savings. Perfect for eco-friendly or wellness brands.
- Brand Color — Trust. Use your store’s color for consistent branding.
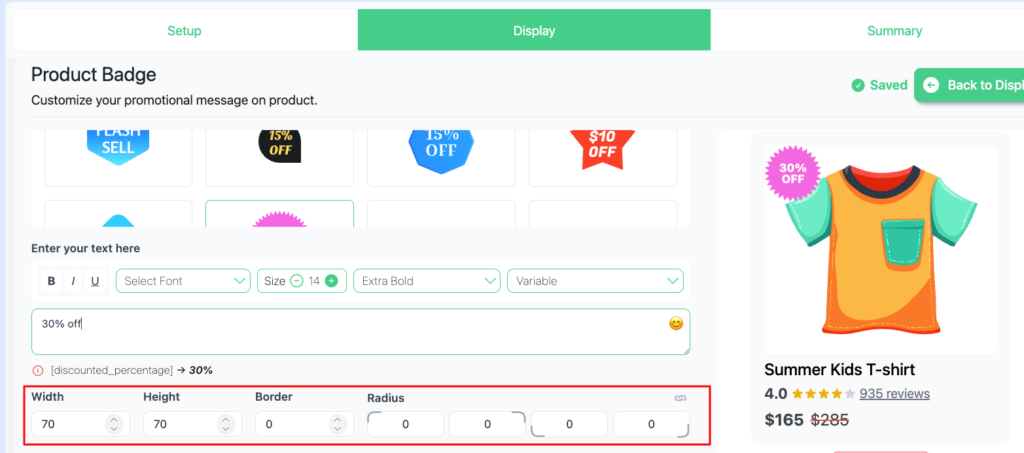
Change the WooCommerce Sale Badge Size
Scroll to the size controls in the dashboard to refine your badge appearances.
- Width and Height: Set exact badge dimensions.
- Border Radius: Adjust corner styling, from soft rounded edges to sharp corners.
Follow this guideline for sizing:
- Large badges can feel overly promotional and distracting from the product.
- Small badges often get overlooked, especially on mobile devices.
- Balanced sizing ensures that the badge is noticeable at a glance without overpowering the product layout.
For a cohesive look, try matching the badge style to your brand. Rounded badges pair well with lifestyle brands, while sharp badges are more suited for technical or industrial stores. Getting the sale badge size right is a small design detail that makes a big difference in how customers interact with your product grid.
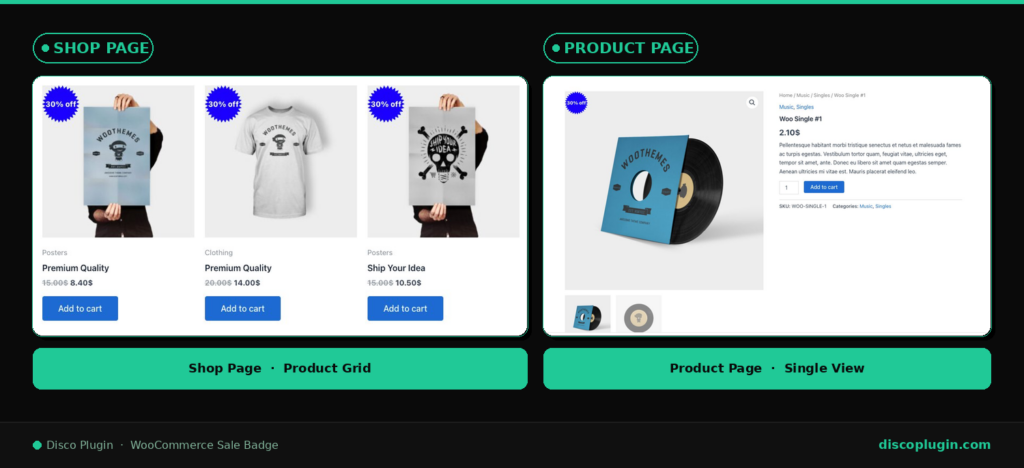
Step 4: Save and Preview
Visit your store and preview both the shop page and an individual product page to verify that the badge is working correctly on all eligible products. Make sure to check across desktop, tablet, and mobile — your WooCommerce sale badge should display correctly at every screen size.
You’ve now aced the race more than the majority of WooCommerce stores. Same-store traffic, same products, while drawing more attention to every detail.
Install Disco Free — Change Your Badge in Minutes. Free to install. No code. No credit card.
Why Custom Sale Badges Improve WooCommerce Conversions
Before diving into the code-based method, it’s worth understanding why replacing the default “Sale!” badge is such a high-impact change for your store. A well-designed WooCommerce product badge does more than signal a discount — it shapes how customers perceive value across your entire storefront.
Here’s what a custom discount badge helps you achieve:
- Grab attention instantly — A brightly colored badge with specific text like “Save 25%” creates a focal point in a crowded product grid, increasing click-through rates by 10–30% according to industry data.
- Reduce cart abandonment — When shoppers clearly see what they’re saving, they’re less likely to leave without purchasing. Clear sales badges reinforce the value at every touchpoint.
- Build urgency — Labels like “Ends Tonight” or “Limited Stock” create a sense of scarcity that encourages faster buying decisions.
- Strengthen brand identity — Badges styled with your brand colors and consistent messaging make your WordPress store feel more professional and trustworthy.
Whether you’re running a seasonal promotion or a permanent storewide discount, having a customized sale badge is one of the simplest ways to improve your WooCommerce store’s performance.
Method 2: WooCommerce Sale Badge CSS (For Developers Only)
Notice :
This method is optional — for developers only.
Not comfortable with code? Method 1 takes 2 minutes and has zero risk. Skip this section entirely.
If you only need small design tweaks to the default badge, you can apply a CSS-only approach by adding the code below to the child theme’s style.css file. Keep it out of the parent theme.
Change Sale Badge Background Color and Text with CSS
/* Change WooCommerce sale badge background color and text */

.woocommerce span.onsale {

    background-color: #e74c3c; /* change to your brand color */

    color: #ffffff;

}
Change WooCommerce Sale Badge Size with CSS
/* Change badge size */

.woocommerce span.onsale {

    min-width: 60px;

    min-height: 60px;

    line-height: 60px;

}
Change Sale Badge Position with CSS
/* Move badge to top right */

.woocommerce ul.products li.product .onsale {

    left: auto;

    right: 0;

    margin: 0.5em 0.5em 0 0;

}| Warning: Even one small syntax error can disrupt your storefront. Backup everything first, as theme updates may overwrite these changes; you may require manual replication. Always use a child theme when adding custom CSS to ensure your badge styling survives WordPress and WooCommerce updates. |
Why did my WooCommerce sale badge disappear?
If your sale badge isn’t displaying or working properly, it’s most likely due to one of these common factors:
| Problem | What Causes It | How to Fix It |
| The cached page version is showing an outdated version | The badge does not appear | Open the product settings, add a sale price, and save changes |
| Incorrect badge color or design | Theme CSS is overriding badge settings | Switch to the plugin method to remove CSS dependency |
| Badge changes are not visible | Clear the site/browser cache and reload the page | Clear site/browser cache and reload the page |
| Badge missing on variable products | Not all product variations have a sale price set | Set sale prices on all variations, or use a discount badge WordPress plugin that handles variable products automatically |
| Badge hidden by a plugin conflict | Another plugin (caching, optimization, or discount tool) is interfering with the sale flash | Temporarily deactivate other plugins to identify the conflict |
The most common issue is simple: no sale price is configured for the product. Verify your product settings before trying anything else. If you’re using a dynamic pricing plugin like Disco, the sale badge should appear automatically once the discount rule is active and the badge display is enabled.
Pro tip:
Use your browser’s Inspect Element tool (right-click → Inspect) and search for the .onsale class. If the HTML element is present but invisible, it’s likely being hidden by CSS — either from your theme or a conflicting plugin
Your Badge Is Now Built to Convert
You’re playing in a different league now. The vague and generic label is gone. You’ve replaced it with a badge that instantly communicates value and creates urgency.
Stronger badges attract more clicks, leading to more conversions. All without writing a single line of code (if you’re using the plugin-based approach).
Whether you changed the WooCommerce sale badge text to show a dynamic discount percentage, customized the badge color to match your branding, or fine-tuned the size for better visibility on mobile — every adjustment works together to improve your store’s conversion rate. A well-optimized sale badge is one of the simplest, highest-impact changes you can make to any WooCommerce store.
Install Disco Free — Change Your Badge in Minutes. Free to install. No code. No credit card.
Want to Go Further?
See how to show the exact percentage discount on your badge automatically → 👉 How to Show Percentage Discount on WooCommerce Sale Badge
Frequently Asked Questions
How do I change the sale badge text in WooCommerce?
WooCommerce’s default sale badge is automatically applied to discounted products, with no built-in customization options for the badge text. With Disco, you can easily swap it by following these steps: Go to Disco → open your campaign → Display Tab → Product Badge. Enter your preferred custom text or select the dynamic percentage variable to automatically display the discount value. For more detailed guidelines, please refer to the step-by-step walkthrough above.
How do I show the percentage discount on the sale badge?
Disco allows you to replace the flat “Sale” label with the exact discount value. Such as “30% OFF” displayed directly on the product image. The badge updates automatically sync with your discount rule and adjust whenever you modify the percentage. This eliminates the need to manually update each WooCommerce product badge when your promotions change.
Can I customize the sale badge color and size?
Yes. Disco has built-in options to customize background color, text color, and border color. You can also set exact width, height, and border radius values to control the badge dimensions. This allows you to style your badges aligned with your store branding — no CSS or child theme required.
What plugins help change the WooCommerce sale badge?
Disco is the most beginner-friendly, hassle-free solution for customizing your WooCommerce sale badge. It allows you to change badge text, colors, and styling without touching a single line of code. Instead of relying on CSS edits or child themes, Disco manages everything visually from your WordPress dashboard. Other popular discount badge WordPress plugins include YITH WooCommerce Badge Management and Product Labels for WooCommerce, though Disco stands out for combining discount rules and badge customization in one tool.
Does the sale badge show automatically without a coupon code?
Yes. This is one of the core advantages of Disco. Once you set up a discount rule and enable the badge, it will apply across all qualifying products. No coupon codes needed — the discount and the sale badge display are both handled automatically.
Can I remove or hide the sale badge on specific products?
Yes. Disco’s badges are configured separately for each discount rule. Just turn off the badge toggle for that specific rule. Disco ensures you stay in full control of badge visibility across your entire product catalog.
How do I change the WooCommerce sale badge using CSS?
You can customize the default sale badge appearance using the .woocommerce span. onsale CSS selector in your child theme’s style.css file. This lets you change the background color, text color, font size, dimensions, position, and border radius. However, CSS only modifies the visual styling of the badge — it cannot change the badge text itself. To change the actual sale badge text in WooCommerce, you’ll need either a PHP snippet using the woocommerce_sale_flash filter hook or a plugin like Disco.
Why is my WooCommerce sale badge not showing?
The most common reasons include: no sale price set on the product, theme CSS hiding the .onsale element, a caching plugin serving an outdated page version, or a plugin conflict. Start by verifying the sale price is configured, then clear your cache. If the issue persists, try switching to a default theme like Storefront to check for theme-level conflicts. For variable products, make sure all variations have a sale price set.