Let’s be real: a store without special offers is like a plate of plain fries—no salt, no ketchup, just… sad.
But add a sizzling discount? Suddenly, you’re serving loaded nachos. Customers crave that dopamine hit. (And no, ‘Free Shipping’ doesn’t count as ‘spicy’.)”
No wonder over 90% of online shoppers hunt for discounts like coupon ninjas.
Now, the question is, how to create special offer in WooCommerce?
To create special offers in WooCommerce, use coupons (set percentage/fixed discounts, expiry dates) or plugins like Disco for BOGO deals, tiered pricing, or flash sales. Configure rules in WooCommerce settings, automate urgency with countdown timers, and promote offers via email or site banners.
Ready to turn your store into a flavor bomb? In this guide, you’ll learn to cook up discounts so tasty, even the coupon skeptics will lick the plate. (No Michelin-star chef skills required.)
Let’s roll.
Table of Contents
Understanding WooCommerce Special Offers
So, what exactly makes a “special offer” special?
Think of it as your store’s secret weapon—a limited-time deal, discount, or incentive designed to nudge customers from “maybe” to “heck yes.” It’s not just slapping a “Sale” sticker on a product.
It’s strategic. Like bribing your kids with ice cream to eat their veggies, but classier.
Why Bother?
- Drive Sales: Discounts turn window-shoppers into buyers.
- Clear Inventory: Stuck with 500 neon fanny packs? Flash sales fix that.
- Attract Newbies: First-time buyers love a good deal (free shipping = instant crush).
- Reward Loyalty: Repeat customers? Hook them with exclusive perks.
Types of Offers That Actually Work
- Discounts: Classic. Think coupons, site-wide sales, or “20% off neon fanny packs”.
- BOGO: Buy One, Get One Free—or half off. Perfect for clearing stock and doubling order values.
- Free Shipping: The holy grail. Works like a charm when paired with a minimum spend.
- Bundles: Sell a camera + tripod + lens cloth combo. Customers feel smart; you boost margins.
- Flash Sales: Limited-time urgency. “48-hour deals” make FOMO your best friend.
- Loyalty Rewards: Points, VIP tiers, or birthday discounts—because loyal buyers deserve extra sprinkles.
The Fine Print
Not all offers are created equal. A “10% off” coupon might flop if your audience prefers free shipping.
Test. Tweak. Repeat. And always—always—set expiry dates. No one wants stale fries.
Methods to Create a Special Offer in WooCommerce?
There are 3 ways you can set a special offer discount WooCommerce –
- Using the “Sale” Feature in Product Pages
- Using the Coupon Tool
- Using an Automated Discount Plugin
How to Create Special Offer in WooCommerce Using the Sale Feature?
You can set a special pricing offer WooCommerce for individual product pages. Here are the steps to do it.
1. Navigate to Your Product:
- In your WordPress dashboard, head to Products >> All Products.

- Open the product you want to put on sale.
2. Set the Sale Price:
- From the Edit window, scroll to the Product Data section.

- Under the General tab, enter the “Sale” price. For example,
- Regular Price: $30 (original price).
- Sale Price: $20 (Special offer price).
3. Schedule the Sale (Optional):
- Click Schedule next to the sale price.

- Set start and end dates (e.g., run the sale for Labor Day weekend).
4. Save & Watch the Magic:
- Click Update to update the product page.
- The sale price will now show on your store with a strikethrough on the original price.

How to Create Special Offer in WooCommerce Using the Coupon Tool?
There’s nothing more satisfying than seeing those carts roll in—and setting up a special offer with WooCommerce’s built-in coupon tool is one of the fastest ways to light a little fire under your sales.
Here’s how you can craft a coupon-based “special offer” in just a few clicks—no extra plugins required.
Note: If your coupon feature is not already activated in WooCommerce, you can activate this promotional offer settings WooCommerce by going to WooCommerce >> Settings >> General >> Enable Coupons.

1. Open the Coupon Screen
- In your WordPress dashboard, go to Marketing >> Coupons.

- Click Add New Coupon at the top.
2. Pick a Memorable Coupon Code
In the Coupon code box, type something customers can remember (and maybe even brag about). For example,
- FIRST15 for 15% off first orders
- 10OFFALL for a $10 discount on all products
- FREESHIP for free shipping
Underneath, there’s an optional Description field. I like to use that to remind myself: “$10 off on all products storewide discount.”

3. Set Your Discount (General Tab)
Scroll down to the Coupon data panel, and you’ll see three tabs. Under General, you can choose:
- Discount type:
- Percentage discount
- Fixed cart discount
- Fixed product discount
- Coupon amount: Enter your number (10 for $10 off).

- Allow free shipping: Tick this only if your offer includes free shipping.
- Coupon expiry date: Click the calendar icon and pick a date.
As soon as you set these, your coupon has a home—but it still needs a little guardrail.
4. Add Usage Restrictions
Click the Usage restriction tab. Here’s where you decide who and what qualifies:

- Minimum/Maximum spend: Require a cart total—handy for “$10 off orders of $50 or more.”
- Individual use only: Prevents customers from stacking coupons.
- Exclude sale items: Ensures your coupon isn’t used on ‑discounted shirts.
- Products / Categories: Narrow your discount to specific items. If you only want this to work on hoodies, start typing “hoodies” under Products and select it.
Set these carefully—too many rules can confuse shoppers; too few and you risk giving away margin.
5. Limit the Fun (Usage Limits)
Last tab: Usage limits. Decide how many times this code can be used, and by whom:

- Usage limit per coupon: How many total redemptions? (e.g., 100 for the first hundred buyers)
- Limit usage to X items: Only valid on up to X products in a single order.
- Usage limit per user: Usually 1, so each customer gets one go.
With that in place, you’ve created a clean, controlled special offer.
6. Activate and Promote
- Hit the Publish button to activate your special offer coupon WooCommerce.

- Drop that code into your homepage banner, email blast, or social post.
- Consider a small pop-up to remind people: “Use code 10OFFALL at checkout!”

7. Test It Yourself
Open an incognito window, add a product to your cart, and enter the coupon code.
It should apply a $10 off discount when you hit the Apply Coupon button.
Limitations of Built-in Methods
Let’s face it—WooCommerce’s default sale and coupon tools are like trying to host a dinner party with just a microwave and a spork. They work, but you’ll leave guests (and customers) wanting more.
Sale Feature Limitations
- 🛒 Bulk Editing? Nope: Got 200 products to put on sale? Enjoy clicking “Edit” 200 times! RIP productivity.
- 🎯 Zero Targeting: Can’t exclude sale items from other discounts. Your “50% Off Everything” sale just turned into a profit-killing mess.
- 🔄 No Dynamic Discounts: “Buy 2, Get 1 Free”? Nada. You’re stuck with boring old price slashes.
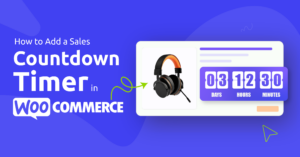
- ⏰ No Urgency Tools: Missing countdown timers or “Low Stock” alerts? Your “flash sale” is just… flat.
Coupon Tool Pitfalls
- 🔑 Manual Code Sharing: Customers must hunt for codes like it’s a scavenger hunt. Spoiler: Many won’t bother.
- 🚫 No Auto-Apply: Forget “secret discounts” for loyal buyers. If they don’t copy-paste, they’re outta luck.
- 🧩 Limited Rules: Want “20% off for Instagram followers AND repeat buyers”? Not happening.
The Real Problem: These tools treat every customer the same. Big spenders get the same deal as window shoppers. Gold members? First-time buyers? They all see the same stale offers.
Solution: A dynamic discount plugin that can create automated, advanced, and personalized discount strategies within a few clicks. That’s what we will find out in the next section.
How to Create Special Offer in WooCommerce? (Using a Plugin)
If you want to truly avail the power of discounts and boost your traffic, AOV (Average order value), sales, and revenue, then a WooCommerce special offer plugin is your best friend. And we will show you how to create special offer in WooCommerce using an advanced plugin without breaking the bank.
Our weapon of choice is called Disco. This free plugin is a giant killer, beating all the paid competitors by offering premium features for absolutely free.
Disco allows you to create all sorts of discount strategies, be it basic percentage/flat discounts, bulk tiered discounts, flash sales, or shipping-based discounts. Moreover, the plugin packs a plethora of condition filters for you to further personalize your campaigns.
Through these filters, you can customize your special offer based on product types, customer behavior, cart conditions, and more. In addition to that, you can also apply multiple conditions to a single rule with AND/OR logics.
Let’s get into action and walk you through how to add special offer in WooCommerce using Disco.
- Example Scenario: “Offer 15% Off on All Products “
Here are the steps.
Step 1: Install the Dynamic Discount Plugin Disco
The plugin is available for free in the WordPress repository.
- Go to Plugins >> Add Plugin.
- Search for Disco.
- Install and activate.

Step 2: Create a New Discount Offer Campaign
- Navigate to the Disco dashboard from the WordPress admin panel.
- Click the Create A Discount button.

- Give your campaign a name.
- Select the Product discount intent.

Step 3: Configure the Discount Offer Settings
- Select All Products from the Discount section.
- From Product Rules >> Discount Type dropdown, select the Percentage Discount option.

- Set the value in the Discount Value box.
Step 4: Save and Test the Special Offer
The Save button is your create special offer button WooCommerce. It will immediately activate the discount offer at your storefront.

Disco automatically displays the discount amount along with a Sale badge on the front site. This how you set up special sale campaign WooCommerce using Disco.

Advanced Discount Campaigns with Disco
Disco isn’t just for simple markdowns. Its real strength lies in layering multiple conditions—products, cart totals, user roles, dates, and more—into a single rule.
With AND/OR logic, you can craft laser-targeted campaigns that trigger only when your precise criteria are met, turning your store into a savvy, automated sales machine.
1. Tiered Bulk Discounts
Encourage customers to buy more by rewarding larger purchases with progressively deeper discounts. Disco’s bulk discount intent lets you define multiple quantity breaks in one rule—no extra plugins or fiddly code required.
Example:
- 2–9 units: 5% off
- 10–19 units: 15% off
- 20+ units: 25% off
Why use this:
- Drives larger cart sizes and higher AOV by incentivizing volume
- Simplifies wholesale pricing without separate “wholesale plugin”
- Reduces inventory by encouraging bulk buys during slow periods
How to Create Special Offer in WooCommerce Based on Bulk Purchases?
Here’s how you can create bulk discounts in WooCommerce using the plugin.
- After creating a new rule, select the Bulk intent and select All Products.

- Enter 2 in the Minimum and 9 in the Maximum Quantity box.
- Select the Percentage Discount option and set the value.

- To set the rest of the values, click the Add More button twice to add two more rows.

- Keep the last Maximum field empty to continue offering a 25% discount on any quantity over 20.

- Save and add some products to the cart to test.

- For 10-19 products, here’s the result.

- For 20 or more products, it will apply the 25% discount.

2. Flash Sale Campaigns
Create urgency with a short-term, flash sale discount event. Disco can schedule any discount rule to start and end at precise times, then automatically revert prices when the timer runs out.
Example:
- 24-Hour “Midnight Madness” Sale: 30% Off All Products
Why use this:
- Leverages FOMO to spark impulse buys
- Clears out slow-moving stock quickly
- Automates on/off scheduling—no manual toggling required
How to Create a Flash Sale Special Offer WooCommerce?
Here’s how you can set up limited time offer WooCommerce using Disco.
- Create a new rule and select the Product intent.
- Select All Products and set the time from the Valid Between fields.

- Select and set the starting hour and date.
- Next, select and set the ending time and date.

- Set the percentage value from the Product Rules section.

- Save the rule. Disco will automatically activate and deactivate the rule according to your set time.
3. Cart Value Threshold Discounts
Reward big spenders with automatic cart-based discounts. Disco lets you create rules that trigger when the cart total reaches a set amount—no coupons needed.
Example:
- 15% Off When Cart Subtotal ≥ $200
Why use this:
- Incentivizes higher spending to unlock the discount
- Eliminates coupon‑entry friction—customers simply see the discount applied
- Can be layered with product-level or shipping rules for complex promos
How to Create Special Offer in WooCommerce Based on Cart Conditions?
For this rule, we will need to add a condition. Here’s the process to create a cart conditional discount.
- Select the Cart intent in a new rule.
- Select the products and activation time.

- Set the percentage value.
- Click the Add Condition.

- Pick the Cart Subtotal condition.

- Select the Greater Than Or Equal operator and set the value.

- Save and test it by adding $200 or more worth of items to the cart.

4. BOGO (Buy One, Get One) Promotions
Craft BOGO deals—buy one item and receive another free or at a discount—with a single Disco rule. You can even offer “Buy 2, get 1 cheapest free” or “Buy 1, get 50% off second.”
Example:
- Buy Any T‑Shirt from the “Summer Collection” Category, Get One for Free
Why use this:
- Moves pairs of products—great for upsells and cross‑sells
- Flexible BOGO variants without multiple coupon codes
- Encourages customers to try new SKUs alongside best‑sellers
How to Create BOGO Special Offers in WooCommerce?
BOGO is a pro feature of Disco, only available in the paid version.
- Select the BOGO discount intent.

- Specify your products.
- Select the Buy X Get X option from the BOGO Type dropdown.

- Under Customer Buy box, set the minimum quantity.
- Set the free quantity that customers will receive from the Customer Get section.

- From the Discount Type dropdown, select the Free Items option.
- Add the condition Categories.

- Search and select the target category and save the rule.
- Add any products from the ‘Summer Collection’ category to the cart, and it will add an additional item for free.

5. Shipping Threshold Offers
Free shipping is a powerful motivator. With Disco’s shipping discount intent, you can waive shipping fees once customers hit your target cart value or combine it with other rules.
Example:
- Free Shipping on Orders Over $50
Why use this:
- Mitigates cart abandonment caused by surprise shipping costs
- Increases AOV by encouraging shoppers to add items up to the threshold
- Can be restricted to specific regions or products
How to Create Special Offer in WooCommerce Based on Shipping Threshold?
Here’s the process.
- Select the Shipping intent and specify your products and dates.

- Add the condition Cart Subtotal.

- Set the value according to your strategy.
- Save and test from the front.

Best Practices for High-Converting Offers
Creating promotions that actually work isn’t about fancy jargon—it’s about clarity, relevance, and a little psychology. Here’s how to design offers that customers can’t ignore, without overcomplicating things.
1. Know Who You’re Talking To
Not every customer wants the same deal. Use what you know about them to tailor your offers.
- Example: First-time shoppers love a welcome discount (“15% off your first order”), while loyal buyers prefer early access to new products.
- Why it works: Personalized offers feel less like ads and more like thoughtful recommendations.
2. Keep It Crystal Clear
Don’t confuse customers—be upfront about what’s included.
- Example: Instead of “Up to 50% off,” say “40% off all summer dresses. Ends July 10.”
- Why it works: Clear terms build trust. No one likes surprise exclusions at checkout.
3. Add a Dash of Urgency
People act faster when they think they’ll miss out.
- Example: “Only 5 left in stock!” or “Sale ends in 24 hours” with a countdown timer.
- Why it works: FOMO (fear of missing out) is real. Use it wisely.
4. Make It Look Good
Design matters. Your offer should catch the eye without clashing with your brand.
- Example: A bright red “BOGO” badge on product images, or a mobile-friendly popup with a bold “Claim Offer” button.
- Why it works: Visual cues guide customers to act.
5. Remove All Friction
If redeeming the offer feels like solving a puzzle, they’ll walk away.
- Example: Auto-apply discounts at checkout instead of requiring codes.
- Why it works: The fewer steps, the higher the conversion rate.
6. Show Others Love It
Social proof turns skeptics into buyers.
- Example: “Join 2,000+ customers who grabbed this deal!” or display reviews like “Rated 4.9/5 for value.”
- Why it works: People trust peers more than ads.
7. Test and Tweak
What works today might flop tomorrow. Keep experimenting.
- Example: Try “Buy 1, Get 1 Free” vs. “50% off the second item” to see which drives more revenue.
- Why it works: Data doesn’t lie. Small tweaks can lead to big wins.
Final Tip:
The best offers feel like a win-win—customers get value, you boost sales. Start with one strategy, track results, and build from there.
No need to overhaul everything at once. (And yes, even a tiny 10% discount can work magic if it’s targeted right.)
Wrap Up
So, this was our guide on how to create special offer in WooCommerce. Special offers aren’t just sprinkles on a cupcake; they’re the whole dang bakery.
Whether you’re offering coupons, BOGO deals, or flash sales, remember that urgency, simplicity, and a dash of creativity turn window-shoppers into raving fans.
Now, stop reading and start discounting.