Quick Answer:
To add a custom Add to Cart notice in WooCommerce, install Disco Pro, create a Cart or Shipping discount campaign, then enable the Cart Notice block under the Display tab. Choose a banner design, write your message using placeholders like [remaining_amount], style it, and publish it live on your cart page.
That little message that pops up after a shopper clicks “ Add to Cart” confirms to them that the action succeeded. The reasoning comes from a well-established usability principle. Nielsen Norman describes it as “visibility of system status”, meaning users should always be informed of what’s happening at any given moment. Without that feedback, the shoppers may click the button two or three times because they aren’t sure they are registered. That’s why this guide covers changing the message, removing it, or replacing the message instead of deleting it blindly.
What Is a Cart Notice, Exactly?
A cart notice is a promotional banner shown on your WooCommerce cart page.
It displays a live, dynamic message tied to an active discount campaign. As the shopper adds or removes items, the message updates in real time.
Think of it as a smart progress bar for savings. It tells the customer exactly how close they are to unlocking a deal.
This is different from a generic WooCommerce notice, like “product added to cart.” A custom cart notice is tied to your actual discount rules, not just a system alert.
Why Does a Custom Cart Notice Actually Matter?
A cart notice isn’t just decoration. It’s a proven conversion lever.
Here’s what it does for your store:
- Increases average order value (AOV). Telling a shopper they need $20 more for a discount often pushes them to add one more item.
- Reduces cart abandonment. A clear incentive at checkout keeps shoppers engaged instead of leaving.
- Builds urgency. Real-time updates create a sense of momentum, not just a static ad.
- Improves transparency. Shoppers see exactly what they’re getting, with no guesswork.
Most WooCommerce stores never use this. That’s a missed opportunity, since it’s one of the easiest wins in conversion rate optimization.
First, Make Sure This Is the Right Notice
WooCommerce has similar-looking messages but serves different purposes:
- The one that this guide covers: the confirmation that appears right after clicking “ Add to Cart” ( something like “ Product X has been added to your cart)
- A different note: Promotional banners on the cart or checkout page itself, such as “Spend $20 more for free shipping.” See our cart page notices guide for that.
- Another different one: A site-wide banner that shows on every page, with no connection to the cart at all.
If you’re unsure about whether you’re looking at the right message, here’s a quick test: Does it show up the moment you click Add to cat? If so, you’re in the right place.
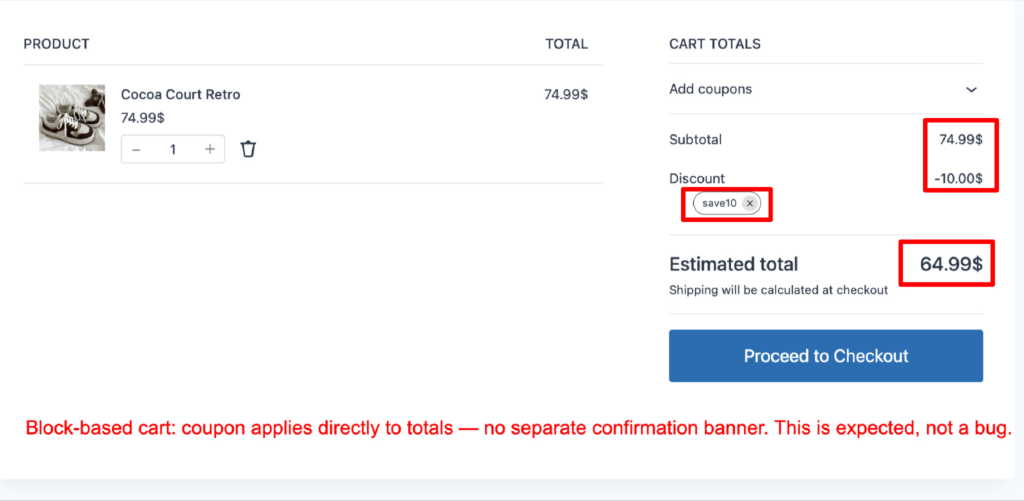
Here’s how to figure out which method below fits you :
| What do you want to do | Do you need to touch any code? | Good for |
| Change the wording | Yes: one short snippet | A simple, low-risk customization |
| Remove the notice | Yes: one shorter snippet | Don’t want it at all. |
| Hide it on specific pages only | Yes: a bit more code | Different behavior per page |
| Replace it with a plugin that handles cart notices instead. | No | You prefer a plugin experience |
A Quick Note on Why It sometimes Doesn't show:
Sometimes the “added to cart” notice behaves differently across your store. On shop and category pages, WooCommerce typically adds products via AJAX ( a method that lets a webpage fetch or send information without reloading page) .
A Quick Fix you should avoid :
Some of you’re inclined to use this ccode snippet : .woocommerce-notices-wrapper { display: none; }. Even developers who use CSS for quick fixes acknowledge this tradeoff. WooCommerce specialist Rodolfo Melogli has agreed that hiding elements with CSS is generally a bad practice.
Use the plugin method instead. It builds your discount logic and puts a matching notice on the cart page, without touching any code.
What You’ll Need Before Starting?
A few things need to be in place first.
- A WooCommerce store, live and active.
- The Disco plugin is installed on your site.
- Disco Pro, since Cart Notice is a Pro-only feature.
- An active Cart or Shipping discount campaign is already set up in Disco.
That last point matters. The Cart Notice pulls its data from a real campaign. Without one, there’s nothing for the banner to display.
Introducing Disco Plugin: WooCommerce Discount Rules with Discount Display
Disco is a WooCommerce discount plugin which was designed for automatic,no-code discount campaigns: bulk pricing, cart-based conditions, countdown timers, and self-updating badges. One of the features, Cart Notice, turns your promotion into a live progress reminder. It automatically displays messages like “Spend $40 more to get 10% off your entire order ” and nudges customers to add just a little more to their cart.
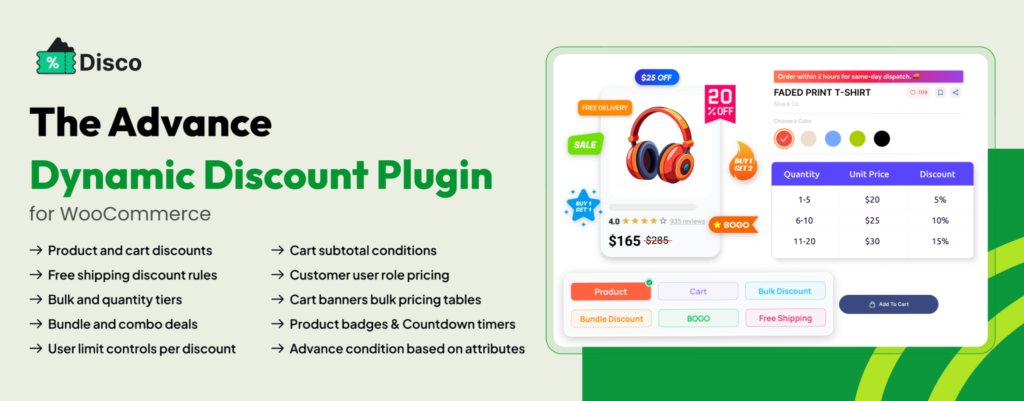
One of the features, Cart Notice, turns your promotion into a live progress reminder. It automatically displays messages like “Spend $40 more to get 10% off your entire order ” and nudges customers to add just a little more to their cart.
How to Add a Custom Cart Notice in WooCommerce? Step-by-Step:
Once your campaign exists, adding the notice takes just a few minutes.
Step 1: Open Your Campaign’s Display Tab
Go to your Cart or Shipping campaign inside Disco.
Click the Display tab at the top of the campaign editor.
This tab contains all the visual elements you can add to a discount campaign. Cart Notice is one of several design blocks here.
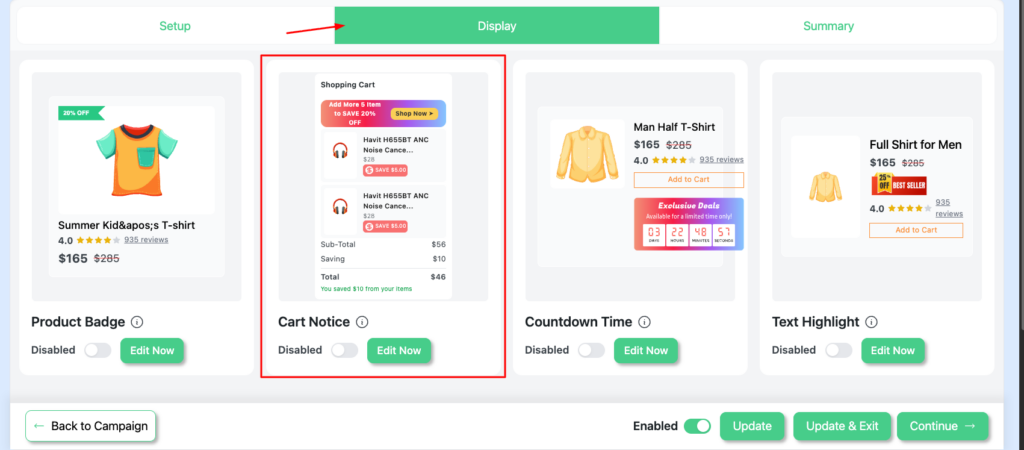
Step 2: Enable the Cart Notice Block
Find the Cart Notice block on the Display tab.
Toggle it to Enabled.
Click Edit Now to open the customizer. This is where the actual design work happens.
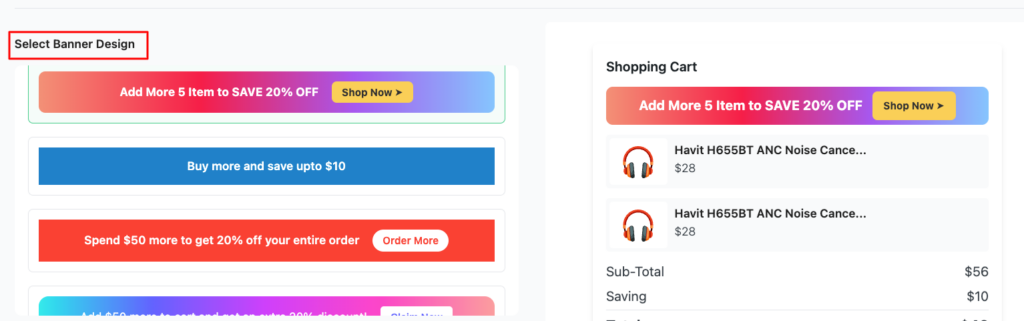
Step 3: Pick a Banner Design
Disco gives you four pre-built banner templates to start from:
- Dark green solid
- Purple gradient
- White with border
- Soft white
Pick whichever one is closest to your brand colors. You can adjust everything later.
Every template is fully customizable after selection, so don’t overthink this step.
Step 4: Write Your Banner Message Using Placeholders
This is the most important step. It’s also the most fun.
Instead of writing a static message, Disco lets you use dynamic placeholders. These update automatically based on each shopper’s actual cart.
Here are the placeholders available:
- [discounted_percentage], shows the campaign discount as a percent, like 20%.
- [discounted_amount], shows the discount as a currency value, like $50.00.
- [remaining_amount], shows how much more a shopper needs to spend to qualify.
- [remaining_quantity], shows how many more items are needed for a quantity-based offer.
- [remaining_cart_items], shows how many more product types are needed for a count-based condition.
Here’s an example message:
“Spend [remaining_amount] more and get [discounted_percentage] off your order!”
For a shopper who needs $20 more, that renders as:
“Spend $20.00 more and get 20% off your order!”
Disco shows a live preview underneath the text field. You’ll see exactly what each placeholder resolves to, based on your campaign’s rules.
![Disco's Cart Notice Banner Text editor, showing dynamic placeholders like [remaining_quantity] and [discounted_percentage] used to build the message](https://discoplugin.com/wp-content/uploads/image-199-1024x387.png)
Step 5: Add a Banner Button (Optional)
A button gives shoppers a direct next step, rather than just a message.
Toggle Banner Button to Enabled.
Add your button text; something like “Shop Now” works well.
Enter a destination URL, like /shop or a category page.
Then adjust the font, color, border, and radius under the Button Style section.
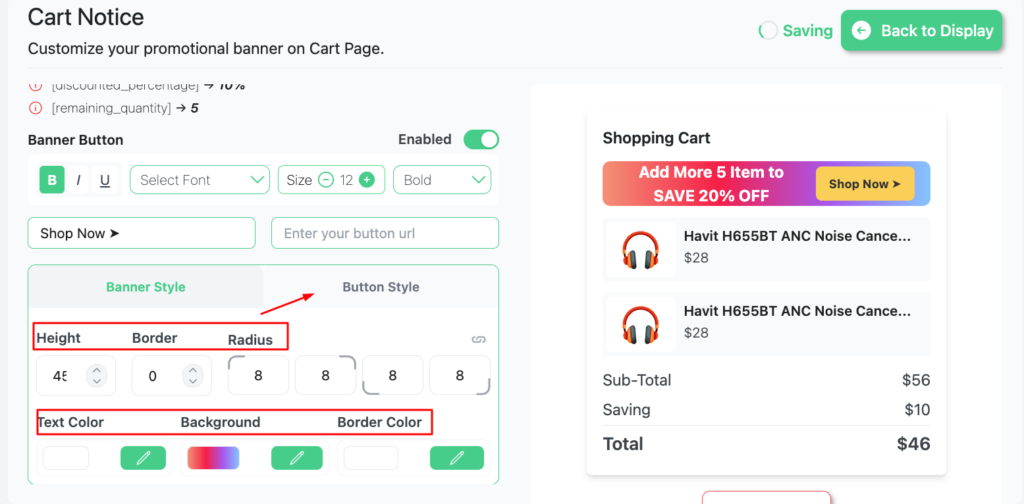
Step 6: Style the Banner to Match Your Store
Now it’s time to make the banner feel native to your site.
Under Banner Style, you can adjust:
- Height, with a default minimum of 45px.
- Border and radius control width, color, and corner roundness.
- Text color for the message itself.
- Background, either a solid color or a gradient.
Small tweaks here go a long way. A banner that clashes with your theme tends to get ignored.
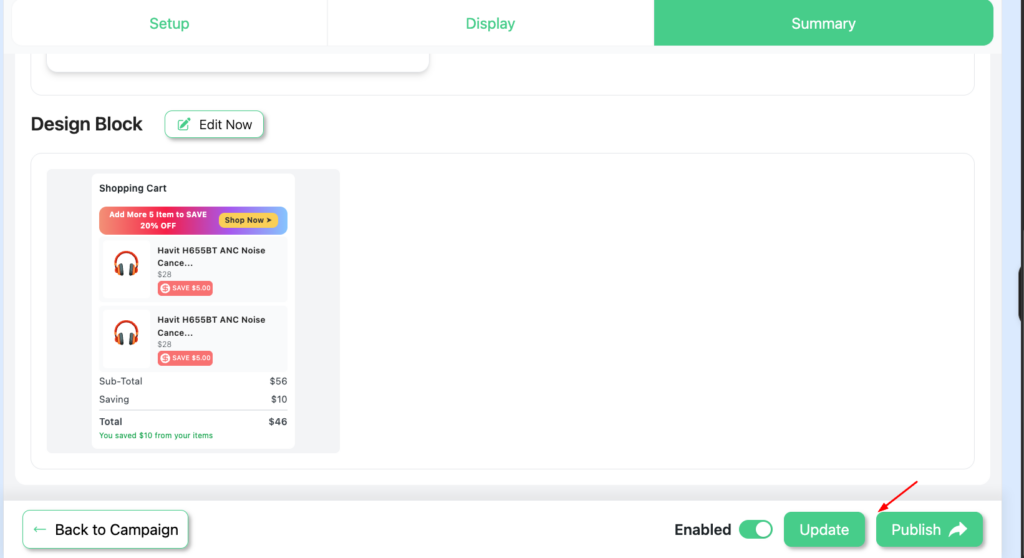
Step 7: Save and Publish the Campaign
Click Update to save your changes.
Double-check that the campaign’s main Enabled toggle is switched on.
Then click Publish to push it live.
Step 8: Check the Result on Your Cart Page
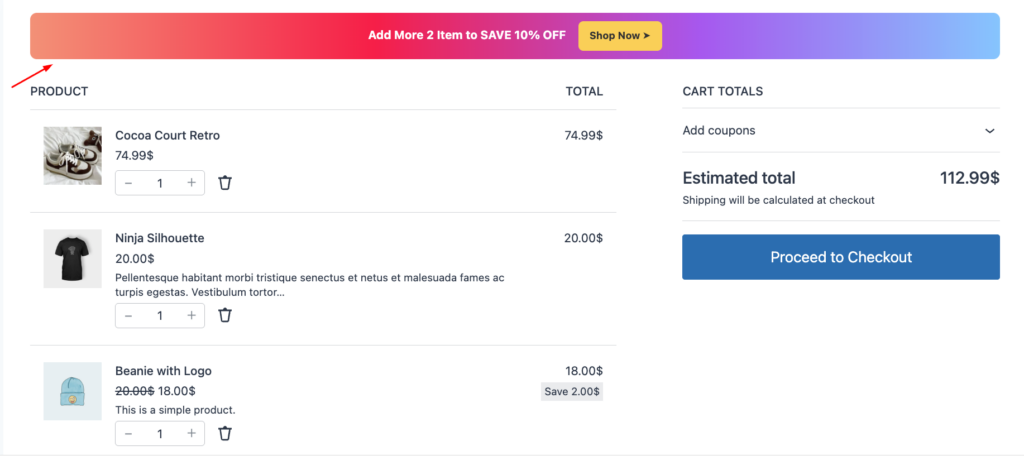
Open your WooCommerce cart page.
You should see the Cart Notice banner sitting right at the top, above the cart items.
It will update live as the customer adds or removes products. Here’s what a finished example looks like:
“Spend $320.00 more and get 20% off your order! Shop Now →”
That’s it. Your custom add to cart notice is now live.
Real Examples of Cart Notice Messaging
Not sure what to write? Here are a few proven message formats.
Spend-to-save messaging:
“You’re just [remaining_amount] away from [discounted_percentage] off!”
Quantity-based messaging:
“Add [remaining_quantity] more items to unlock [discounted_amount] off your cart.”
Category bundle messaging:
“Grab [remaining_cart_items] more products from this collection for a special bundle price.”
All of these use the same placeholder system. You just swap the wording to match your brand’s tone.
If you’re already running a promotion — like a Buy 2 Get 1 Free deal or a category discount — this is a good place to remind shoppers about it, since they’re already paying attention.
Best Practices for a Cart Notice That Actually Converts
A cart notice only works if shoppers notice it and understand it. A few habits help here.
- Keep the message short. One clear sentence beats a paragraph every time.
- Lead with the benefit. Say what the shopper gains, not just what they need to do.
- Use a contrasting color. The banner should stand out from your cart page background.
- Add a button when it makes sense. A direct “Shop Now” link removes friction.
- Mobile test. Most cart page visits happen on a phone, so check the banner there too.
- Match your campaign to real margins. A generous discount message is only good if it still protects your profit.
Common Issues and How to Fix Them
The banner doesn’t show up on the cart page.
Check that both the Cart Notice toggle and the overall campaign Enabled toggle are switched on. Both need to be active.
The discount applies, but no banner or badge appears.
This is a known edge case, and Disco has a dedicated troubleshooting guide for it. Usually, it comes down to a display block that wasn’t saved or published correctly.
Placeholders show blank or incorrect values.
Double-check your campaign rules. Placeholders like [remaining_amount] only calculate correctly if a minimum spend condition is actually set.
The banner looks broken or unstyled.
Revisit the Banner Style section. A missing background or text color setting can make the banner blend into the page or disappear entirely.
Frequently Asked Questions
Is the Cart Notice feature free in Disco?
No. Cart Notice is a Pro feature. You’ll need Disco Pro to enable and customize it.
Do I need a discount campaign already set up?
Yes. The Cart Notice pulls its message and values from an existing Cart or Shipping campaign. It can’t run on its own.
Can I show a different message for different discount conditions?
Yes. Since each campaign has its own Cart Notice settings, you can write a unique message per campaign, matched to that specific offer.
Will the notice update automatically as customers shop?
Yes. The banner uses dynamic placeholders, so it recalculates in real time based on each shopper’s current cart.
Can I add a call-to-action button to the notice?
Yes. The Banner Button option lets you add custom text and a destination link, styled to match your theme.
Will removing this message break anything else on my site?
No. The “added to cart” is just a confirmation message. Removing or hiding it doesn’t affect how your cart, checkout, or order process works.
How do I remove the “has been added to your cart” message?
Add the following code to your child theme’s functions.php file or use the Code Snippets plugin if you prefer: add_filter( 'wc_add_to_cart_message_html', '__return_false' );
This disables the default “Added to cart “ across your entire store.
Can I hide the message on just one page without hiding other important messages too?
Yes. Use the Method 3 code above with a conditional like is_checkout(), not a CSS rule.
How do I just change the wording instead of removing it?
Use the Method 1 code above and edit the text inside the quotes on the $message line.
Why isn’t my message showing up at all, even though I haven’t changed anything?
A few things commonly cause this: a caching plugin serving a stale page, or your theme’s “instant add to cart” being switched off. Check your theme’s WooCommerce settings first, since some themes disable it by default.
Want to customize the store’s messaging? Read our WooCommerce sale badges guide next.
Pairing Cart Notice With Other Disco Display Blocks
A cart notice doesn’t have to work alone.
Disco includes other display blocks under the same Campaign Display category. You can combine them for a stronger effect.
- Countdown timers add urgency alongside your spend-to-save message.
- Product badges highlight the discount directly on product pages, before shoppers even reach the cart.
- Discount tables show bulk or bundle pricing tiers, useful if your campaign rewards larger orders.
Used together, these blocks create a consistent discount story. A shopper sees the badge on the product page, then the cart notice reinforces the same offer at checkout. That consistency builds trust, and trust tends to convert better than a one-off pop-up ever does.
Wrapping Up
A custom add-to-cart notice is a small addition with a real impact.
It turns your cart page from a plain checkout step into an active selling tool. With Disco’s Cart Notice feature, the entire setup takes minutes, not hours.
Set up your campaign, write a clear message with placeholders, style the banner, and publish. From there, WooCommerce and Disco handle the rest automatically.
If you want the full technical reference, check the official documentation from Disco: