Quick Answer:
WooCommerce sale badge CSS lets you customize the badge by adding CSS that targets the.onsale class under Appearance → Customize → Additional CSS. Use background-color and color to change its colors, font-size and padding to resize it, border-radius to reshape it, and position to move it.
Your WooCommerce Sale Badge is technically alive, but at what cost? If it’s not looking its best, it’s not doing your products any favors. Whether the default color clashes with your brand, hides behind your product image, or the text is barely readable, you fix it up with a few lines of CSS.
Everything in this guide acts as a quick reference. There’s no need for an extra plugin, no theme file edits, and no risk to your store. Find the customization you need and drop into Appearance → Customize → Additional CSS. Save and then hit Publish to see the change.
Note:
WooCommerce only displays a sale badge when a product is actually on sale. If your product isn’t discounted yet, then create a discount first before customizing the badge. Need help? Check out our setup guide for a storewide discount.
Prefer not to touch any code? No problem. With Disco, you can customize your sale badge from the dashboard, including its color, size, shape, position, and even display dynamic text like “20% OFF,” all without writing a single line of code. See our complete WooCommerce sale badge for the no-code method. If your sale badge isn’t appearing at all, see WooCommerce Sale Badge Not Showing: 10 Fixes
Where to add this CSS (classic vs. block themes)
WooCommerce outputs the sale badge differently based on your theme. Find your setup below:
| Theme type | Sale Badge Selector | Where to Add CSS |
| Classic Theme | woocommerce span.onsale | Appearance → Customize → Additional CSS |
| Block Theme (FSE) | .wc-block-components-product-sale-badge(or legacy .wc-block-grid__product-onsale) | Appearance → Editor → Styles → Additional CSS |
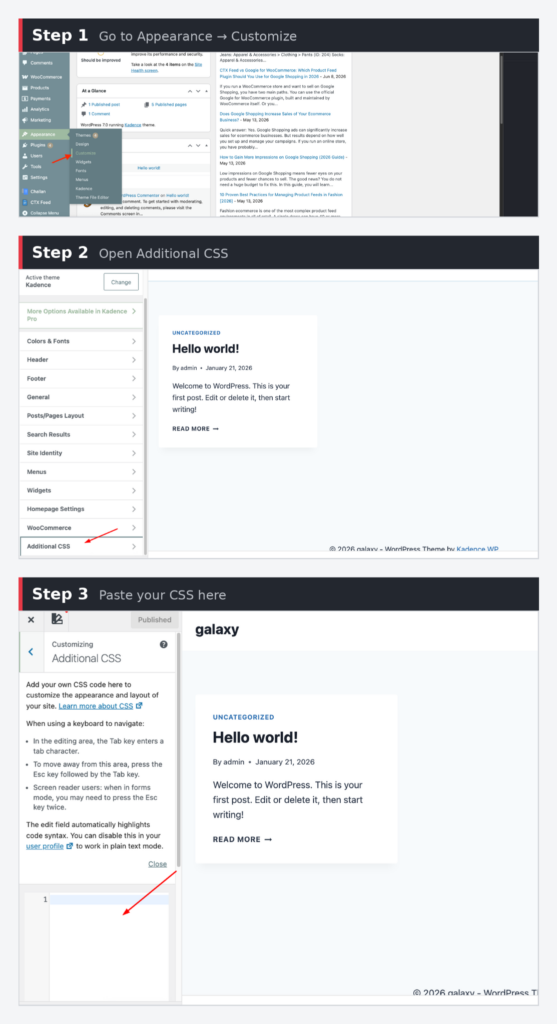
To add custom CSS for your WooCommerce sale badge:
- 1. Open Appearance → Customize → Additional CSS (Classic themes) or Appearance → Editor → Styles → Additional CSS (Block themes).
- 2. Navigate to Additional CSS
- 3. Paste the snippet and click Publish.
A quick note on block themes: WooCommerce changes block names from time to time, so there’s no single selector to count on, as there is with classic themes. If a snippet isn’t working, right-click the badge → Inspect, identify the class assigned to the badge, then drop it into the selector.
To keep every snippet below, work on either theme type you’re using; just target all three classes at once :
.woocommerce span.onsale,.wc-block-components-product-sale-badge,.wc-block-grid__product-onsale { /* your styles go here */}All examples below use the classic .onsale selector. If you’re on a block theme, use the combined selector from above instead.
Change the WooCommerce sale badge color
| To change the WooCommerce sale badge color, add the following CSS to Appearance → Customize → Additional CSS, then swap the background-color and color properties to use your desired look. |
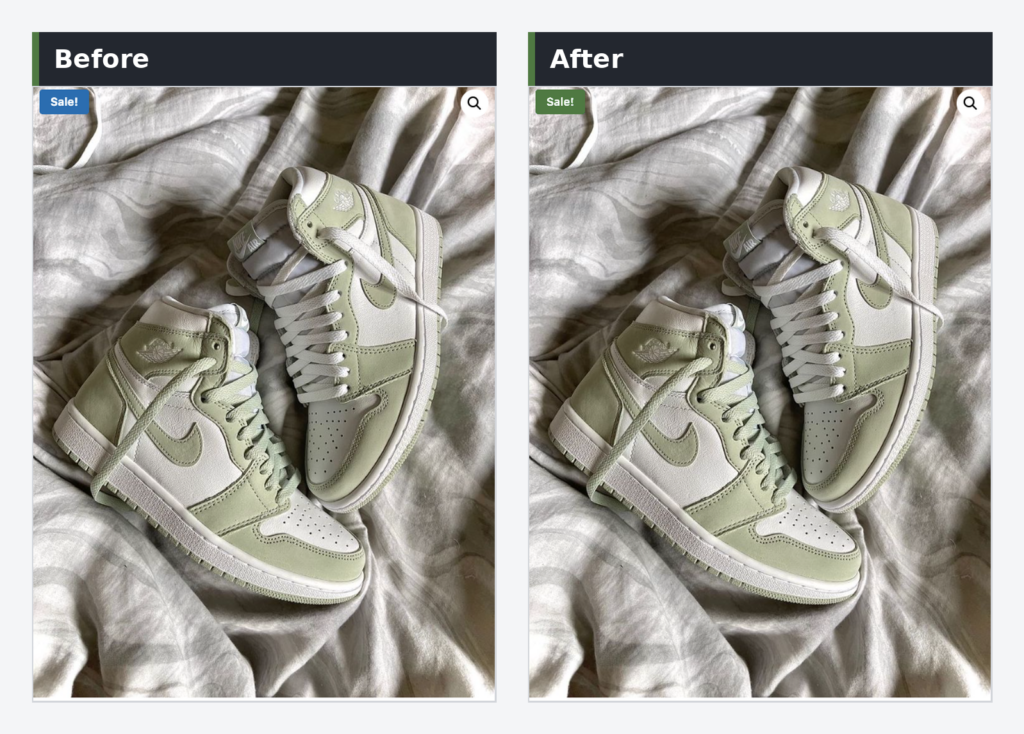
The default WooCommerce badge color clashes with your store’s design. Set the background text and color to match your brand identity.
.woocommerce span.onsale { background-color: #e63946; /* your brand color */ color: #ffffff; /* badge text color */}Swap in your own hex values. One accessibility note: Keep the text-to-background contrast ratio at 4.5:1 for readability, and don’t rely on color alone to signal the discount; the wording covers that too.
Resize the WooCommerce sale badge
If shoppers keep overlooking your sale badge, try increasing the size. Adjust the font-size and padding instead of setting a fixed width, it scales naturally with the text.
.woocommerce span.onsale { font-size: 15px; /* bump up to make it pop */ padding: 10px 14px; /* breathing room around the text */ line-height: 1.2;}Experiment with values until the badge sits right with your store’s look. For consistent scaling, adjust both font-size and padding together rather than changing one on its own.
Reshape the sale badge: rounded, pill, circle, or ribbon
A small shape change can make your sale badge stand out from generic ones and give it a more polished look.
Rounded corners– a subtle upgrade:
.woocommerce span.onsale { border-radius: 4px;}Pill shape – fully rounded edges for a sleek, modern look.
.woocommerce span.onsale { border-radius: 999px;}Circle-ideal for concise labels like “ Sale” or discount percentage.
.woocommerce span.onsale { border-radius: 50%; width: 54px; height: 54px; display: flex; align-items: center; justify-content: center; text-align: center;}Corner Ribbon- a diagonal banner that stretches across the top-left corner of the product image. It requires the badge’s parent element to be positioned (see the next section)
.woocommerce span.onsale { position: absolute; top: 18px; left: -34px; transform: rotate(-45deg); width: 120px; text-align: center; z-index: 9;}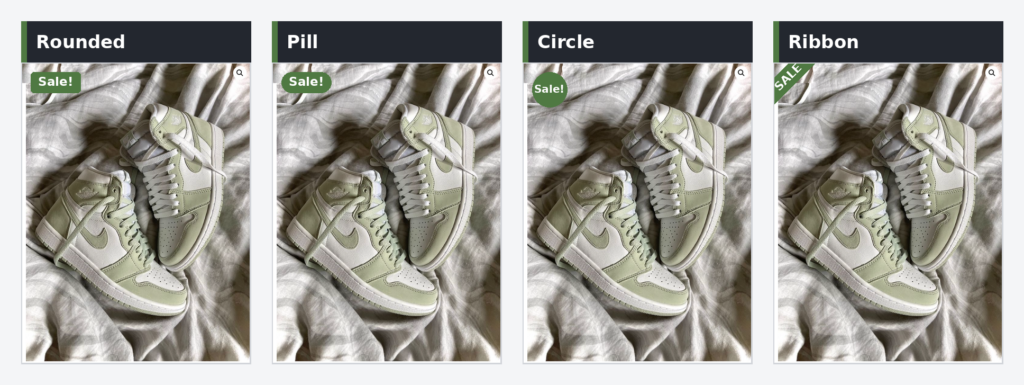
Reposition the WooCommerce sale badge
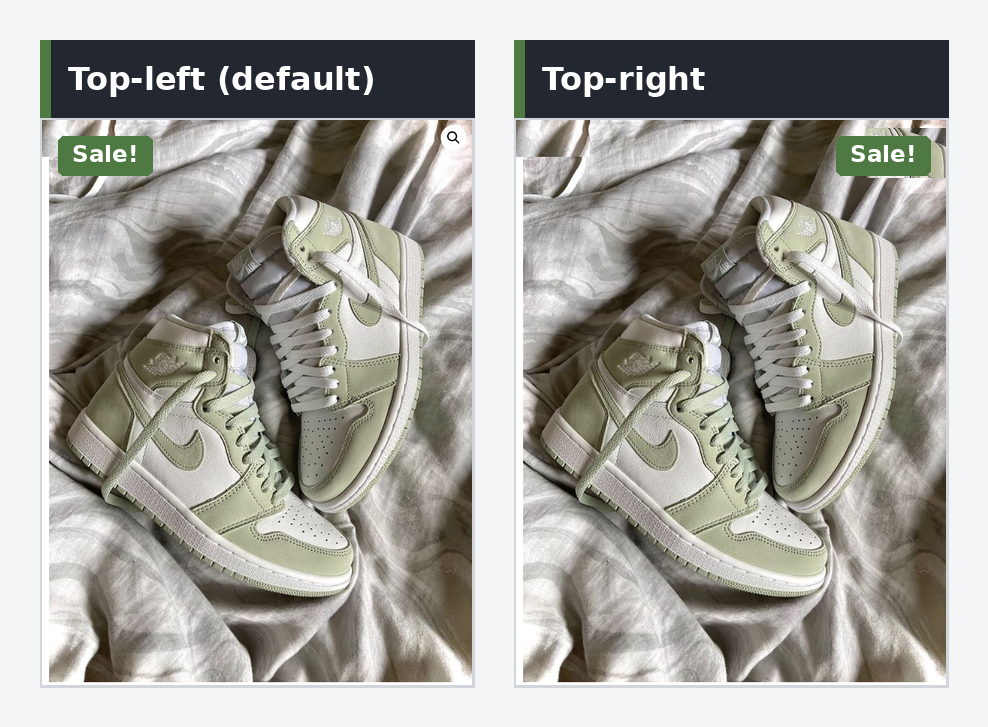
To move the badge around the product image, anchor it to the image’s container: Give that container position: relative, then place the badge with position: absolute.
/* 1. Anchor the badge to the product image */.woocommerce ul.products li.product,.woocommerce div.product { position: relative;}/* 2. Place the badge (top-right shown) */.woocommerce span.onsale { position: absolute; top: 12px; right: 12px; left: auto; /* clears any default left value */}For the top-left, switch to left: 12px; right: auto; Adjust the top, right, and left values to exactly where you want. Skipping step one is the single most common reason the badge won’t move. With no position parent, absolute has nothing to anchor to.
Bonus: hover effect and mobile sizing
A gentle lift on the hover animation adds just enough movement to make the badge feel interactive without becoming distracting:
.woocommerce span.onsale { transition: transform 0.2s ease;}.woocommerce li.product:hover span.onsale { transform: scale(1.08);}Shrink the badge on smaller screens to keep it readable without overwhelming the product image:
@media (max-width: 600px) { .woocommerce span.onsale { font-size: 12px; padding: 6px 9px; }}Rather skip the code entirely? Let Disco take care of it
Hand coding is great for one-off tweaks. Until your twentieth snippet leaves you wondering why your sale badge is suddenly purple. Here, Disco rests a comforting hand on your shoulder and says, “ We’ve got this — you can manage everything right from your WooCommerce dashboard.”
Disco is a free WooCommerce discount plugin that lets you customize and generate your own sale badge without writing a single line of code. Enable it from the Display tab→ Customize the appearence→choose text, color, and position →Publish it.
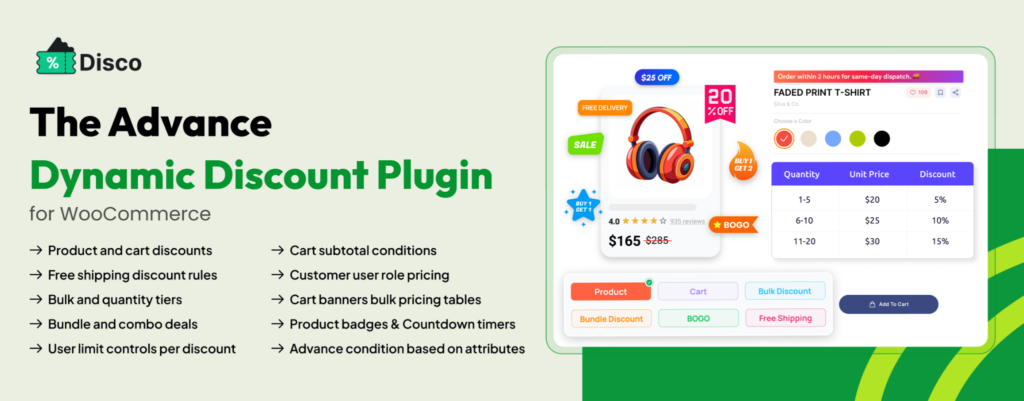
What you can do with Disco:
- Display a custom sale badge independent of your theme
- Flexible controls for badge, text, colors, and placements from a single dashboard
- Bulk, quantity-based, and storewide discount campaigns
- Built-in countdown timers, cart notices, and pricing tables
- Campaign scheduling with no manual intervention
For the full no-code walkthrough, see the complete WooCommerce sale badge guide — or jump straight in:
Want to change what the badge says, not just how it looks? Read How to Change Sale Badge Text in WooCommerce.
Frequently asked questions
How do I change the WooCommerce sale badge color without a plugin?
Add the following snippet into Appearence → Customize → Additional CSS (Classic themes) or Appearance → Editor → Styles → Additional CSS (Block themes):.woocommerce span.onsale { background-color: #e63946; /* your brand color */ color: #ffffff; /* text color */}
How do I move the WooCommerce sale badge to the top right?
Because the sale badge uses absolute positioning, the product container needs position: relative first.
.woocommerce ul.products li.product,
.woocommerce div.product { position: relative; }
.woocommerce span.onsale {
position: absolute;
top: 12px;
right: 12px;
left: auto; /* clears the theme's default left value */
}
If your badge isn’t moving where you expected, it is usually because the parent container is missing position: relative.
Why aren’t my sale badge CSS changes showing up?
If the CSS isn’t taking effect, check three things: clear your cache, CSS specificity, or a wrong selector. This is usually common with block themes, where the badge class may not be .onsale. If your badge is missing entirely, check out WooCommerce Sale Badge Not Showing. 10 Fix
Why aren’t my sale badge CSS changes showing up?
If the CSS isn’t taking effect, check three things: clear your cache, verify CSS specificity, or check for a wrong selector. This is usually common with block themes, where the badge class may not be .onsale. If your badge is missing entirely, check out WooCommerce Sale Badge Not Showing:10 Fixes.
Will my CSS changes disappear after a theme update?
No. CSS you’ve added through Additional CSS works independently from your active theme. Only changes made directly to a theme’s style.css file are lost when the theme is updated.
Can I change the sale badge text with CSS?
No, CSS only controls the badge’s appearance, not its content. To replace “ Sale” with custom wording, you’ll need a PHP filter or plugin. See How to Change Sale Badge Text in WooCommerce for the complete tutorial.